Host Attestation is a measure that verifies whether host machines are trustworthy before users can interact with them. An Attestation Service checks the host’s integrity against known good values or a predefined policy.
The post How to Fix “Host TPM Attestation Alarm” in VMware? appeared first on Appuals.
]]>Table of Contents
What is Host Attestation?
In simple terms, Host Attestation verifies the integrity of your computer (the host) on which various Virtual Machines are running through vSphere. This ensures that the system has not been tampered with and offers a safe environment for the VMs on it. Consider how you (the VM) would want your house (the host) to be secure.
A report containing vital data regarding your system is created and used to identify against known or expected values to see if the host is trustworthy. This becomes indispensable in server environments where data worth billions of dollars is being fed into remote machines, and you’d want to make sure these machines are trusted.
Typically, TPM is not required in vSphere. Each VM in a vSphere environment uses a vTPM (Virtual TPM), to ensure security at the grassroots level. You don’t need a physical TPM to use vTPM. A vTPM allows the use of services like BitLocker per each VM separately.
The “Host TPM Attestation Alarm” issue occurs because of the physical TPM. This could be due to many reasons; adding a new TPM chip, insufficient TPM hardware, incorrect UEFI settings, or vSphere/vCenter version.

READ MORE: PTT vs TPM: Microsoft’s Security Effort for Windows 11 ➜
How to Fix “Host TPM Attestation Alarm”?
Luckily for us, fixing the Host TPM Attestation Alarm is not that difficult. First, we need to find the root cause of the problem. To do so, we can either view the respective error message or go through the logs.
- Connect to the vCenter Server.
- Select a data center and go to the “Monitor” tab.
- Under “Performance“, click on “Security“.
- Locate the machine that is facing this issue and check the error message in the “Message” column. (Credits: VMware)

- If the message says, “Host secure boot was disabled“, then follow Step 1 below to enable Secure Boot from your UEFI settings. If the “Attestation” column simply states “Failed“, then you’ll have to check the vCenter Server log files. For more information regarding log files, follow this guide.
- Once you’ve found the vpxd.log file, check to see if it contains the log, “No cached identity key, loading from DB“. If so, then follow Step 2.
1) Does Your Host Meet the Requirements?
If your VM is configured to use host attestation, then you must meet a few requirements, which are:
- A physical TPM 2.0 chip
- Secure Boot must be enabled
- TPM must use SHA-256 based encryption
- vCenter Server and ESXi versions must be updated to 6.7 or higher
In almost all cases, either the user has accidentally disabled TPM or Secure Boot. To re-enable these settings, follow these steps:
- Restart your PC and press the “Delete“, “F1“, “F2” or the “F10” keys.
- Navigate to the “Boot” tab and find a setting that says “Secure Boot“. Set this to “Enabled“.

- Next up, we need to enable TPM. Go to the “Settings” tab. In our case, TPM was present under the “Trusted Computing” section. This could be different for your system, so it is best to consult your motherboard’s manual.

- If your applications are not up to date, you should upgrade them to at least version 6.7, according to the requirements. As vSphere and vCenter are sophisticated applications, it is recommended you follow the proper guides (vSphere, vCenter) to ensure no unforeseen problems occur.
READ MORE: How to Enable TPM 2.0 in BIOS on Asus Devices ➜
2) Installing a TPM Chip in an Existing Host
If your log files contain the text “No cached identity key, loading from DB“, this essentially means that you installed a TPM 2.0 chip in a host that is already managed by vCenter. To fix this, simply put your host in maintenance mode, disconnect your ESXi host from the vCenter Server, and reconnect it.
- Log in to the vSphere Client.
- Right-click on the respective ESXi host.
- Select “Maintenance Mode” and click on “Enter Maintenance Mode“. (Credits: StarWind Software)

- Once in Maintenance Mode, again right-click on the server. Go to “Connection” and select “Disconnect” as shown. (Credits: VMware)

- After successfully disconnecting the server, right-click on the server once more, go to “Connection” and select “Connect“. Wait until the task status updates to complete.
- If the vpxd.log file doesn’t have the same message anymore, then Reset the alarm to Green manually. (Credits: Lenovo)

How Reliable is TPM?
Host Attestation relies on TPM (Trusted Platform Module) hardware on the host. A report is generated by the system which contains a hash of its current state, software, firmware, and whatnot. When combined, it is almost impossible to spoof or recreate a copy of this hash, thanks to a process called hash-chaining.

The physical TPM on your host cannot be passed on to the VMs installed on it. The VMs use what is called a vTPM (Virtual TPM) which offers the software-level functionality of a TPM 2.0 chip. The physical TPM assures that the host booted securely and has little to nothing to do with the VMs installed on it.
There can be a situation where if your server uses “Host Attestation” and the attestation fails due to the physical TPM, the host becomes unable to decrypt the VM configuration files because the vCenter Server doesn’t trust it.

Therefore, TPM can become extremely useful if you’re all in for that extra layer of protection and security. However, be mindful of its drawbacks since services like BitLocker can encrypt your entire drive and make it inaccessible without valid credentials.
READ MORE: Is It Safe to Clear TPM When Resetting Windows 10/11? ➜
Conclusion
The “Host TPM Attestation Alarm” is a very complex and detailed topic if you get into the nitty-gritty, however, fixing this problem involves just 2 simple checks. Do note that there can be a large number of issues if you’re setting up this feature, such as hashing algorithms, managing many hosts, and whatnot, but they can get extremely specific.
However, thanks to abstraction and a streamlined process, this error is mostly caused by incorrect UEFI settings or improper installation of the TPM chip. In any case, while TPM does have its benefits, it also poses the risk of completely locking you out of your system in rare scenarios. Therefore, we recommend users to assess the risks and benefits and proceed with caution.
FAQs
What is Host Attestation?
Does this issue impact Virtual Machines on the host?
It depends on the extent of the problem. Generally speaking, the “Host TPM Attestation Alarm” is related to the host or the physical TPM. In the worst-case scenario, you could be locked out of your Virtual Machines if the vCenter Server deems your host to be compromised.
Is a physical TPM necessary for VMware?
The Virtual Machines installed on hosts use what is called a Virtual TPM. Virtual TPMs do not depend on the physical TPM in any way.
The post How to Fix “Host TPM Attestation Alarm” in VMware? appeared first on Appuals.
]]>The post 2.4 vs 5 GHz – What’s Better & What Should You Use? appeared first on Appuals.
]]>In this article, we will break down the differences between 2.4 GHz and 5 GHz and which one is right for you. So, let’s jump right in!
Table of Contents
What Does GHz Mean?
GHz refers to “gigahertz” and is an electromagnetic radio frequency used to transmit information like sounds or images via radio, television, mobile phones, and wireless internet connections. Since Wi-fi frequency bands are higher than FM radio they are measured in Gigahertz which equals one billion hertz rather than Megahertz which equals one million hertz.
Now what do the numbers before GHz mean? Well, these numbers (2.4 and 5) represent the two different bands of radio frequencies used by your Wi-Fi router to connect to internet-enabled devices in your home or office. The reason why router manufacturers label the two individually is because each of them is useful for a different purpose.
2.4 GHz vs 5 GHz: What are the Differences?
The two primary factors are speed and range when discussing the differences between 2.4GHz and 5GHz. Let’s look closely at these two along with a few others.
| Pros | Cons | |
| 2.4 GHz | – Greater coverage area – Better penetration through walls and objects | – Slower data speeds – More prone to interference and congestion |
| 5 GHz | – Faster data speeds – Less interference and congestion | – Shorter coverage area – Less effective at penetrating through solid objects |
1. Speed
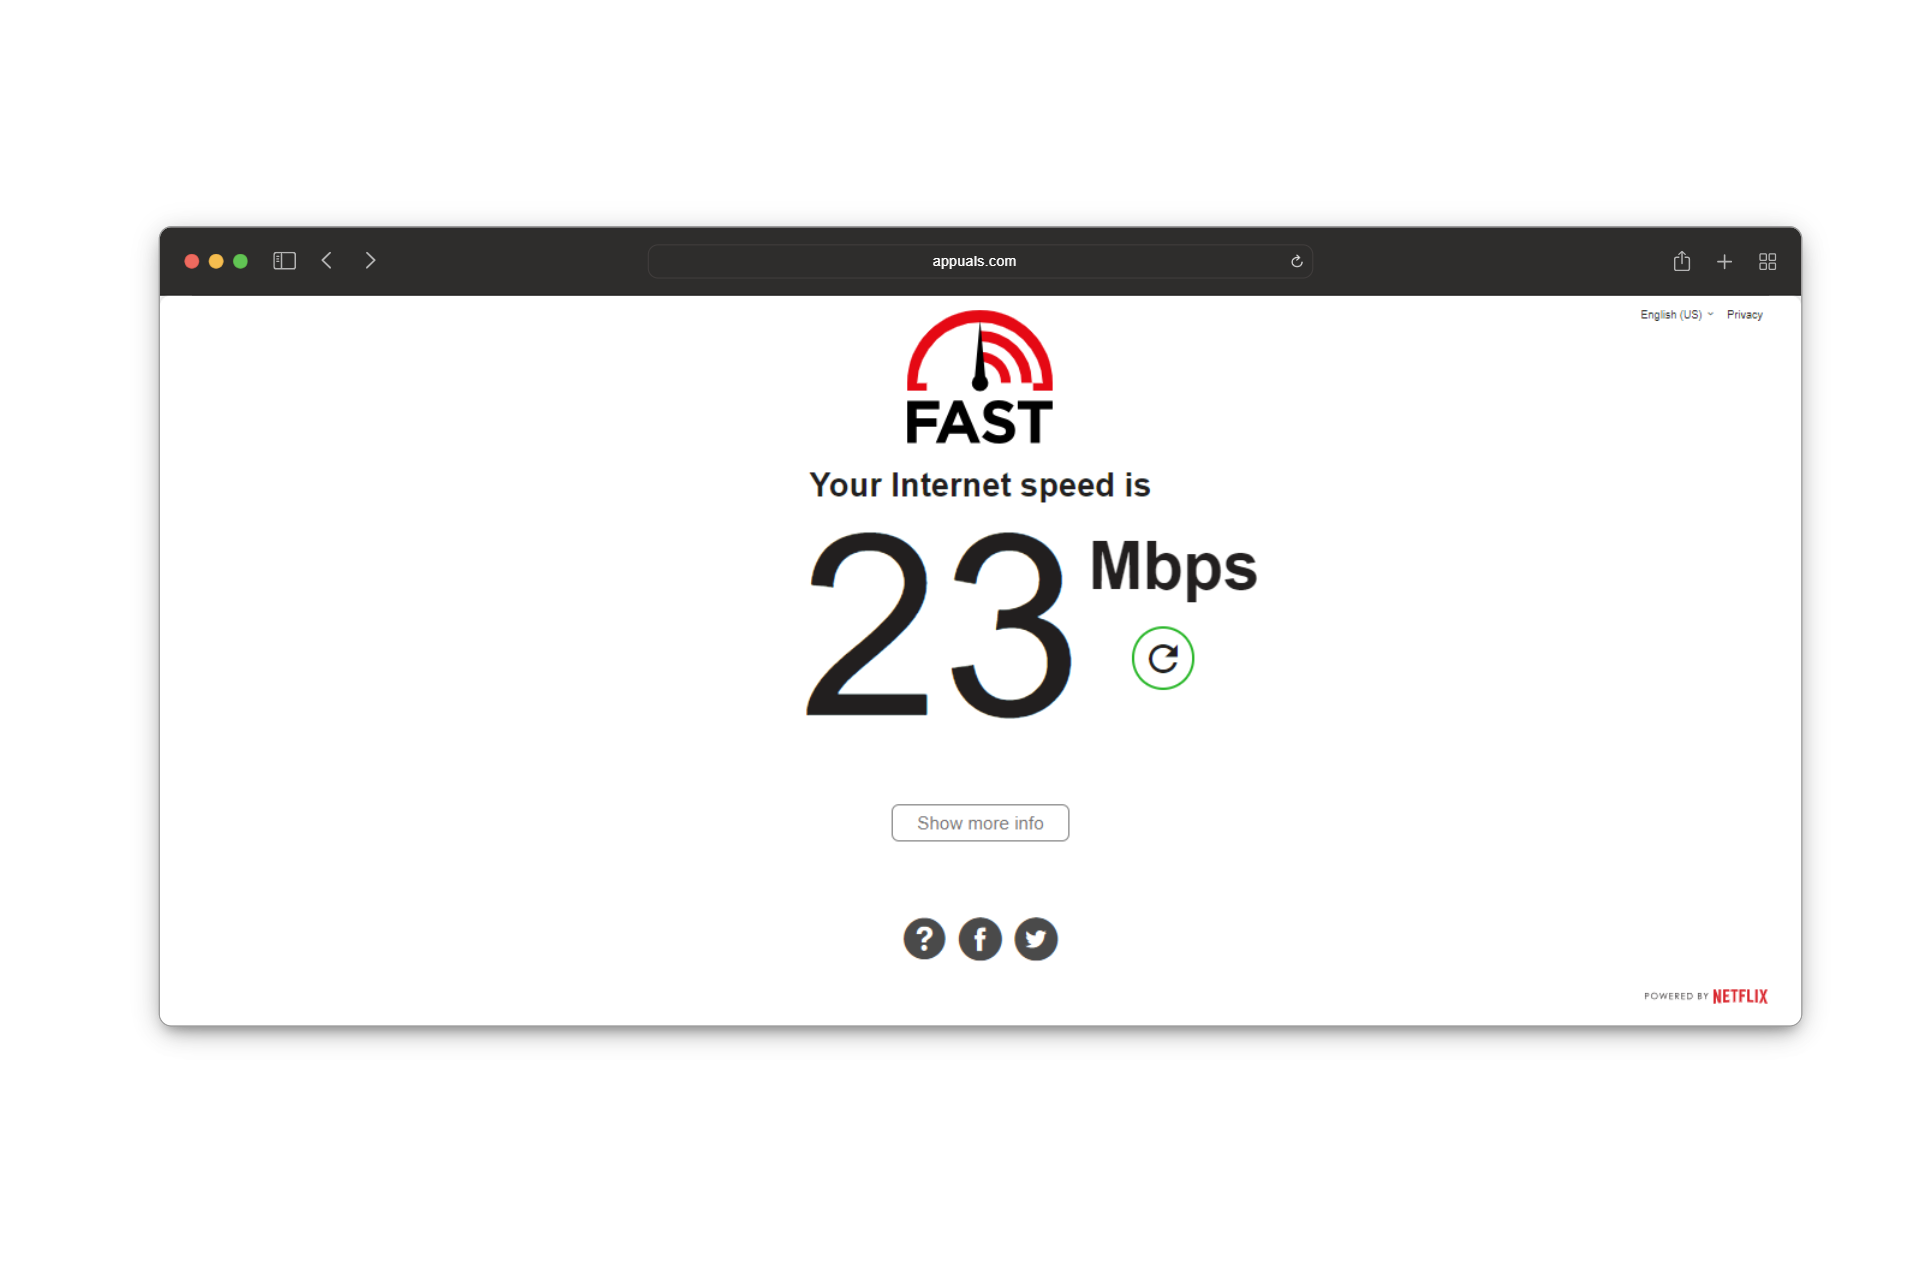
In terms of speed, the 5 GHz band has a significant advantage as it provides faster data rates compared to 2.4 GHz which offers a slower speed. Specifically, 2.4 GHz can deliver max speed of up to 100 megabits per second (Mbps), while 5 GHz can deliver up to 1 gigabit per second (Gbps).
So, whether you’re streaming HD video, gaming online, or downloading large files, the 5 GHz network offers the speed you need for smoother and faster performance.
2. Range and Coverage
While 5 GHz is great for faster speeds, it falls short when covering larger distances. Conversely, the biggest advantage of 2.4 GHz is that it can cover longer distances. Due to its lower wireless frequency, the 2.4 GHz frequency can penetrate through walls and other solid objects better than higher-frequency ones. For comparison, a 2.4 GHz signal drops by 70% through drywall, while a 5 GHz signal drops by 90%.
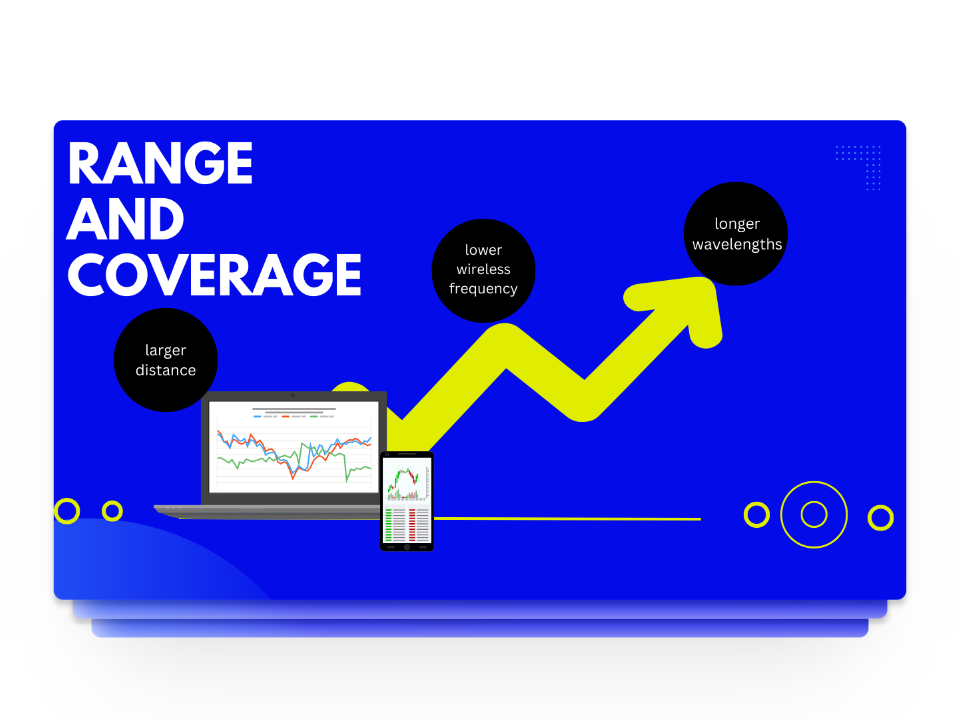
Another advantage of lower frequencies is longer wavelengths which allows them to bend around furniture and objects more easily. This makes it ideal for use in large spaces as you’ll have fewer Wi-Fi dead spots and better coverage around your home.
3. Channel Availability
A Wi-Fi frequency band is divided into channels which is the medium through which we send or receive data. The 2.4 GHz frequency band has 11 channels whereas the 5 GHz band has 45 different channels. However, out of the 11 only 3 (1, 6, and 11) can work without interfering with each other. The rest often overlap and interfere with the operation of sending and receiving data.

Channel interference can significantly affect your internet connection and the most common cause of this is Congestion. Network channels are like highways and if too many cars use the same one or two lanes it can cause a traffic jam. When there’s a lot of data traffic on a signal channel everything slows down and your Wi-Fi signal drops.
By comparison, the 5 GHz band has 21 non-overlapping channels which allows it to have less interference and offer faster speeds. Additionally, with 5 GHz being less crowded than 2 GHz, there’s less chance of congestion, making Wi-Fi connections more reliable.
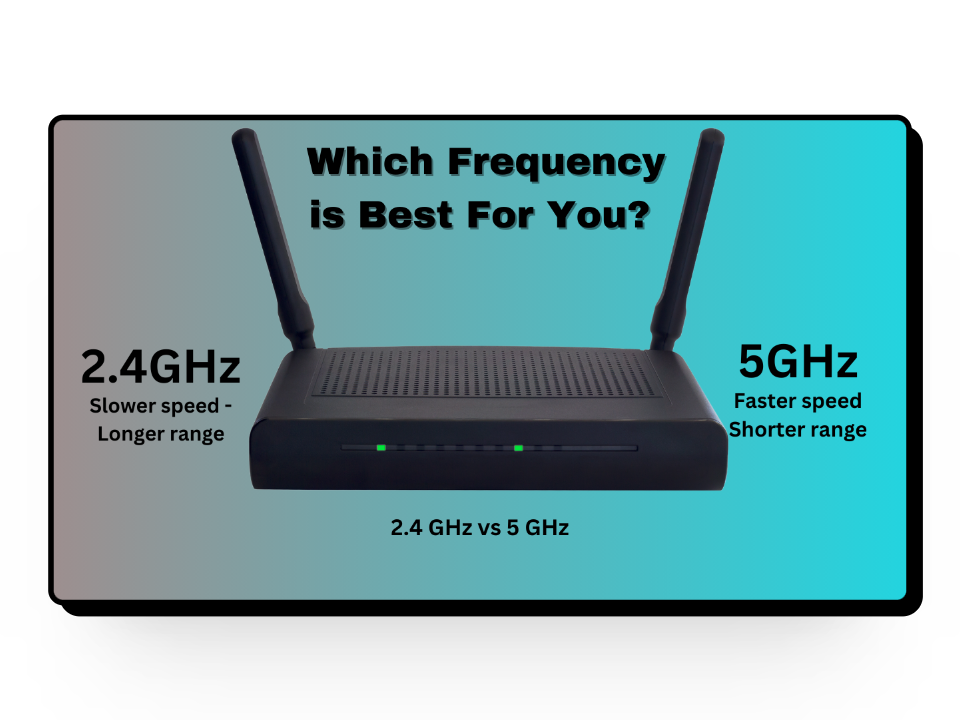
2.4 GHz vs 5 GHz: Which Frequency is Best for You?
Now that you know that a 2.4 GHz is slower but travels further than 5 GHz frequencies which provide faster data speeds but at the cost of a shorter range, it’s time to choose the best one for yourself. The choice of using 2.4 GHz or 5 GHz depends on how far you are and how you want to use your Wi-Fi.
Before we jump into that, one thing we recommend to you is the use of a wired ethernet connection. This means that if you have a device that supports an ethernet connection, make use of that as wired connections don’t have to deal with channel interference and offer faster connection and lower latency. They are a bit awkward to set up but in every way are better than wireless connections.
 Use 5 GHZ When Your Device is Close to the Router
If most of the devices you use are near your router, 5 GHz can be the best choice as you’ll have the advantage of higher speeds. Gaming, streaming, or other activities that require high bandwidth work much more smoothly when using 5 GHz. On top of that if you are in an apartment or somewhere with a lot of devices, using a 5 GHz frequency band can help you avoid interference and congestion.
Use 2.4 GHz When Your Device is Far from the Router
On the other hand, if you are using your smartphone from the other side of the room, your best bet is to use 2.4 GHz as it offers a greater coverage area. When using the 2.4 GHz band, it’s ideal to use devices that require low bandwidth like home security systems, garage openers, smartphones, etc.
Changing Frequency Settings with Dual and Tri-Band Routers
When it comes to changing your frequency settings from 2.4 GHz to 5GHz or vice versa, you’ll need to make sure your router can act as a Dual or Tri-band router. As it’s in the name, a dual-band router can broadcast both frequency bands but in two different ways.
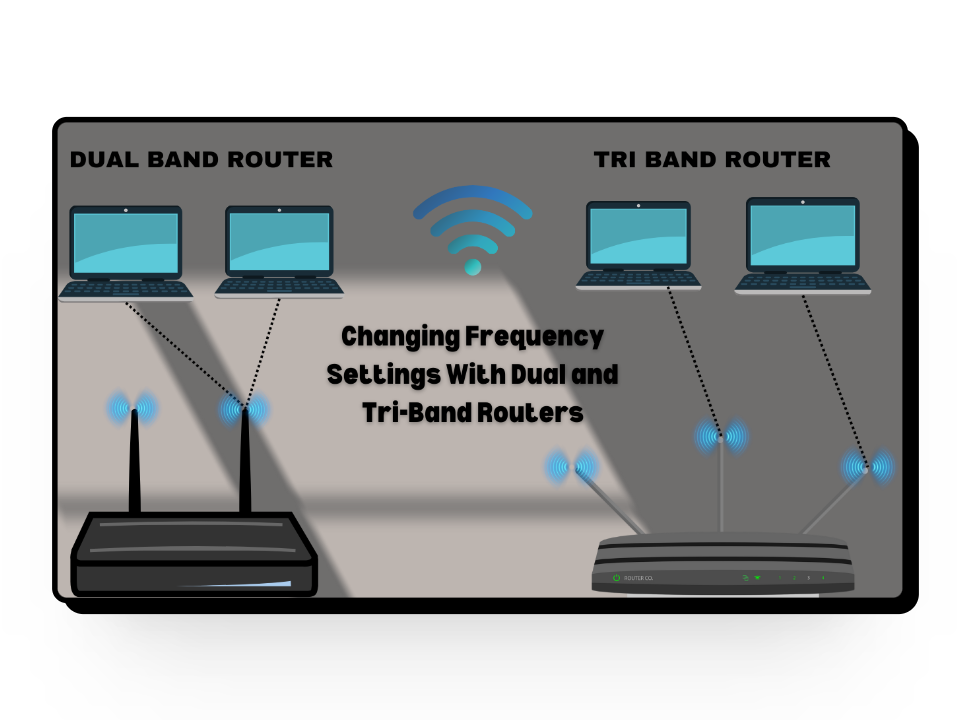
- Selectable Dual-Band Router: A selectable dual-band router can only use one of the two frequency bands at a time. This means that if you are on 2.4 GHz, you’ll have to manually switch to the 5 GHz frequency band for it to work.
- Simultaneous Dual-Band Router: A simultaneous dual-band router has better technology and is capable of broadcasting both 2.4 GHz and 5 GHz at the same time. With this one, you’ll have two separate networks appear in your network list with identical names except for a “5G” or “2.4G” at the end. This allows you to individually connect to each network at any time.
While simultaneous dual-band routers are a bit more expensive than selectable dual-band routers, their advantage outweighs the cost. Apart from these two, you also have tri-band routers which as you guessed can broadcast three networks simultaneously — two 5 GHz signals and one 2.4 GHz signal. So, if you have several devices operating on a 5 GHz network you can benefit from a tri-band router.
What About 6 GHz?
6 GHz is the newest addition to the Wi-Fi frequency band family and it is supposed to offer faster speeds and less congestion than 5 GHz. While the speed jump from 5 GHz to 6 GHz is not as significant as we saw in 2.4 GHz vs 5 GHz what matters is that with 6 GHz the total available space for data to travel will almost be quadrupled.
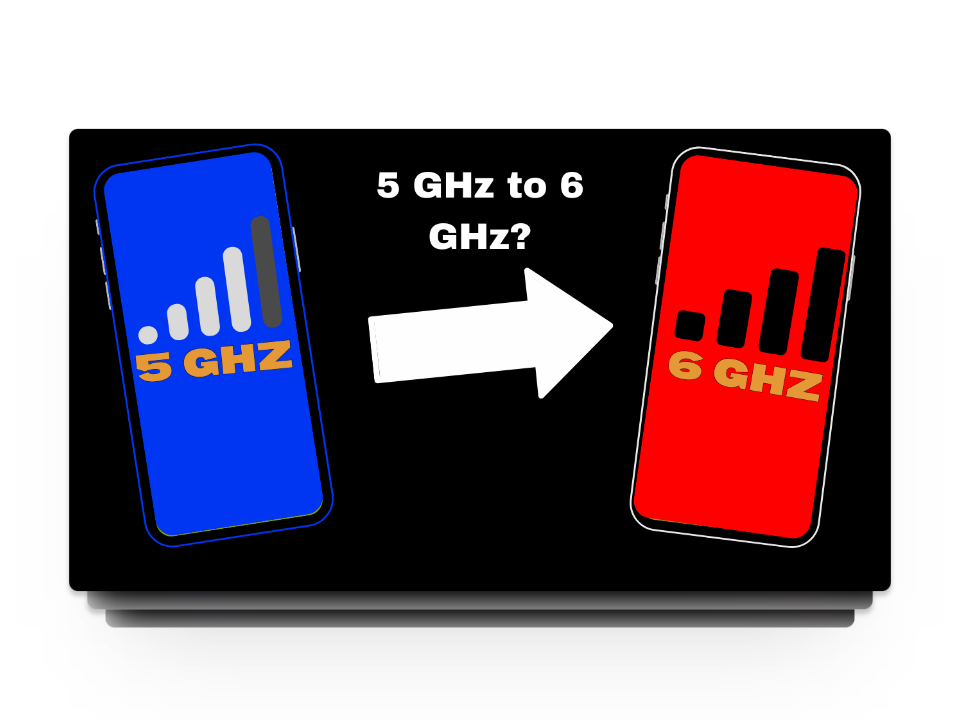
To find devices that support the latest frequency, you’ll have to look for the label “Wi-Fi 6E” which stands for “Wi-Fi 6 extended into the 6 GHz band.” However, it’s important to note that you won’t be able to utilize the benefits of 6 GHz even if your device supports it until you buy a Wi-Fi 6E router.
Wrapping Up
All in all, the difference between 2.4 GHz and 5 GHz boils down to speed and coverage area, and choosing between the two depends on your situation. Luckily, if you have a dual-band router, you can enjoy both frequency bands simultaneously. With newer technologies on the rise, it’s a matter of time before 5 GHz is widely replaced by 6 GHz.
FAQs
What is the history of wireless router technology?
Wi-Fi 4 (802.11n) introduced MIMO technology, offering improved range and reliability across both 2.4 GHz and 5 GHz bands. Wi-Fi 5 (802.11ac) further enhanced speeds and efficiency with wider channels and MU-MIMO, operating exclusively on the 5 GHz band. Wi-Fi 6 (802.11ax) builds upon these advancements, introducing OFDMA and operating on both 2.4 GHz and 5 GHz bands, with Wi-Fi 6E utilizing the 6 GHz band for even faster speeds and reduced interference.
What is meant by MU-MIMO technology?
MU-MIMO stands for “Multi-User, Multiple-Input, Multiple-Output.” It’s a technology used in routers to improve the efficiency of Wi-Fi networks by allowing multiple devices to transmit and receive data simultaneously. MU-MIMO enables concurrent communication with multiple devices, leading to faster and more efficient Wi-Fi connections.
What are some popular dual-band routers?
Popular dual-band routers like TP-Link Archer AXE75, which is a Wi-Fi 6 router with excellent performance, and the Asus RT-AX86U Pro, designed for gaming enthusiasts. Additionally, the Eero Pro 6E Tri-Band Mesh Wi-Fi System (3-Pack) extends coverage using Wi-Fi 6E technology, while the Linksys Dual-Band AX5400 Wi-Fi 6 Router is great for streaming
The post 2.4 vs 5 GHz – What’s Better & What Should You Use? appeared first on Appuals.
]]>The post How to Troubleshoot and Resolve Error 503 First Byte Timeout? appeared first on Appuals.
]]>
1. Basic Troubleshooting
Begin with some fundamental steps.
- Reload: On the client side, perform a forced reload of the website in your browser by pressing Ctrl + F5 multiple times.
- Restart: Power down your system and networking equipment. On the server side, restart the server if possible.
- Update: Ensure that all related systems and software are up to date with the latest patches applied.
- Server Service Status: Verify the status of the backend technology you’re using. For instance, ensure that Firebase services are operational.
2. Things to Try on the Client Side
Although Error 503 is typically a server-side issue, the client machine might display this error due to an improper request from the client side. Let’s try the following steps to ensure that’s not the case:
Try the Website in Another Browser
- Open a different browser and navigate to the problematic website. If issues arise in a Chromium-based browser, try using Firefox, or vice versa.
Use the Firefox Browser - Determine whether the website loads correctly without the first-byte error. If it does, clear the cache and cookies in the original browser.
Use Another Network or Try a VPN
- Disconnect from the current network, restart your system, and then connect to a different network such as a mobile phone’s hotspot.
- Open a web browser and check if the problematic website loads without errors.
- If the issue remains, consider installing and using a reputable VPN service.
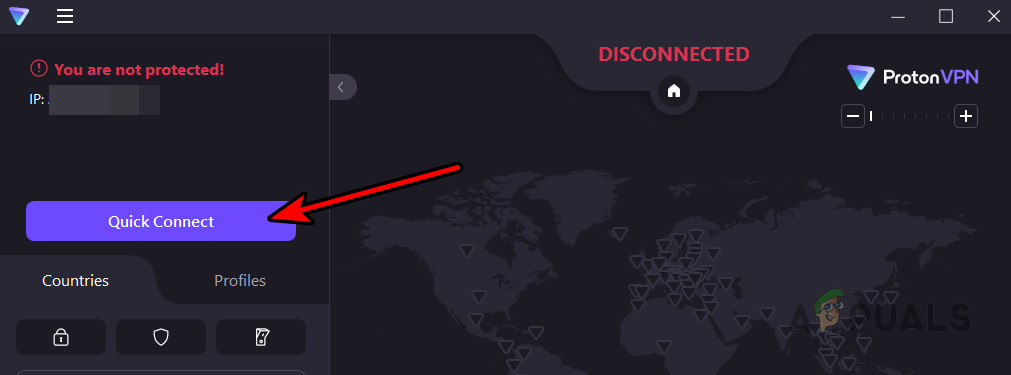
Connect the Proton VPN to a VPN Location - Connect to the VPN and test the website again in your browser.
Visit the Stable Version of the Website
Some websites have alpha or beta versions that are used for testing. These versions might be unstable, leading to the first-byte timeout error. To circumvent this, try accessing the stable version of the website.
The process will vary based on the website and browser settings.
- In Google Chrome, search for Reddit Settings.
- Access the Account Settings page on Reddit, scroll down to the Beta Tests section, and disable the Opt Into Beta Tests option, then restart Chrome.
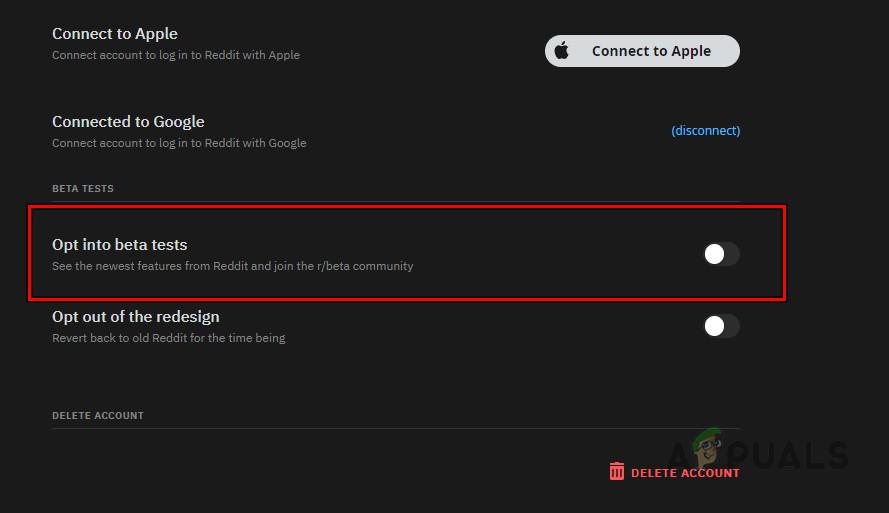
Disable Opt Into Beta Tests on Reddit - If this doesn’t solve the problem, navigate to Reddit’s URL to check if the issue is resolved:
https://www.reddit.com
- If the problem persists, attempt to load the website using the beta URL:
https://beta.reddit.com/
Check Your User Actions
You might receive the Error 503 if you attempt to perform an action that the server does not allow. For instance, if the website only permits uploading JPEG images, trying to upload a PNG file could trigger the first-byte timeout error. The solution here is straightforward: upload a JPEG image. Depending on your situation, you may need to investigate further to identify user actions that could be causing the error.
3. Server Side
If users encounter Error 503 first-byte timeout when trying to access your website, you can employ the following methods:
Check Limits
Firstly, review the timeout limits set for your website or server. You may need to adjust these values, and the procedure will depend on the technology or server architecture in use.
Varnish
- Edit the php.ini file to increase the following limits:
memory_limit max_execution_time
- Similarly, adjust the pub/.user.ini file to increase these limits as well.
- If necessary, modify the VCL Conf file, setting first_byte_timeout to 300s (from the default of 60s).
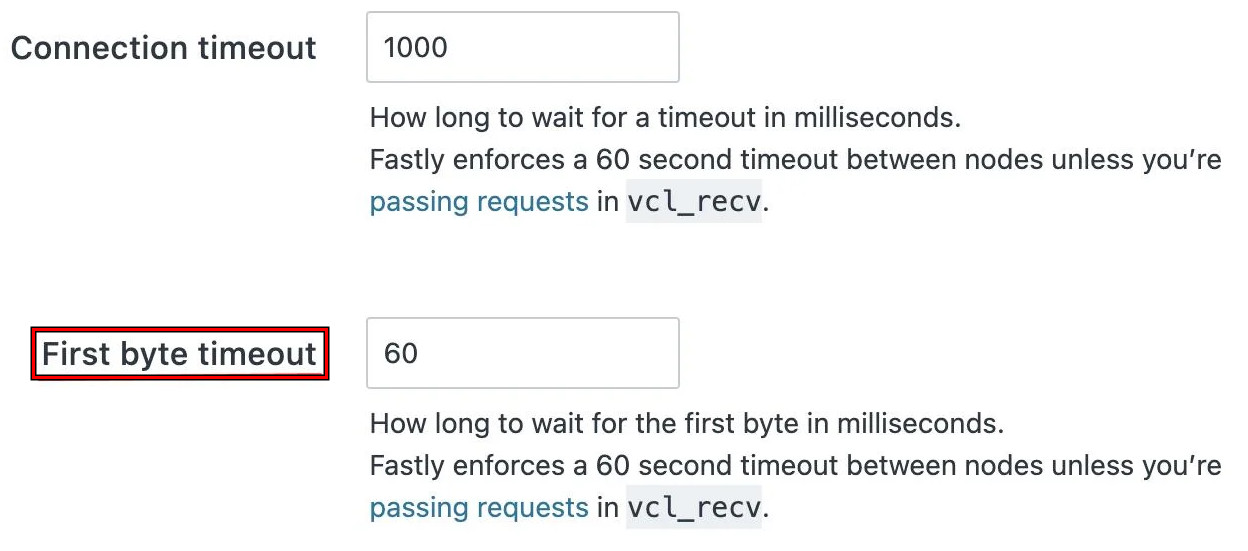
Set the First Byte Timeout Value to 60 - Save the changes and retest the website.
Fastly
- In the command-line interface, run:
update fastly/magento2
- Navigate to Admin > Stores > Configuration > Advanced > System > Full Page Cache.
- Set the Admin Path Timeout to 600 (the maximum limit Fastly supports) and select Upload VCL to Fastly.
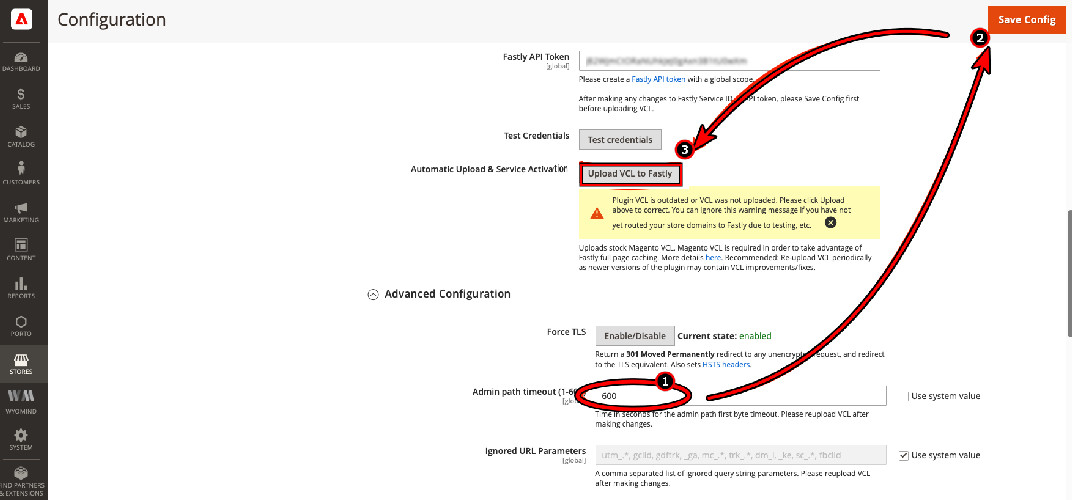
Upload VCL to Fastly
Magento
- Go to the app/bootstrap.php file and insert the following code at the beginning:
ini_set('memory_limit', -1); ini_set('max_execution_time', 18000); - Save your changes and check if the error has been resolved.
Check Server Extensions
The issue might stem from a server extension. Disabling or removing any questionable extensions may solve the problem. The PCNTL extension is known to cause Error 503. If such or similar extensions are present, disabling or removing them is advisable.
Be aware that disabling or removing an extension can temporarily affect certain website functionalities. To pinpoint the culprit, you may need to deactivate extensions one at a time.
Test Response Headers for Nginx
- On a client machine, open a command-line interface and run the following command. Remember to replace “ and “ with the appropriate information:
curl -I -H "Host: " http:///request/uri
- Inspect the returned response headers for any specific error messages related to Nginx and address those issues accordingly.
- If no response headers are obtained, consider adjusting your Nginx configuration as follows:
http { tcp_nopush off; tcp_nodelay on; # force socket to send buffer } - If a gateway timeout error is returned, modify the configuration to:
http { keepalive_timeout 300; proxy_connect_timeout 300; proxy_read_timeout 300; proxy_send_timeout 300; }
Check Your Subscription Plan
Should your server be unable to access essential services due to subscription limitations, this could result in a first-byte timeout error. As an illustration, under the Spark payment plan, servers are unable to make external HTTP requests to non-Google services.
An upgrade of your subscription plan might be necessary to resolve this issue, for example, switching from Spark to the Blaze plan in Firebase.
Check for a DDoS Attack
If the website server or any of its backend dependencies are under a DDoS attack, the server may not be able to obtain the required responses, leading to a first-byte timeout error for users.
Investigate potential DDoS attacks against your website, hosting, or any backend technology such as Webflow.
Should none of the suggested solutions work, reach out to the Support team of your hosting or backend services provider. Additionally, check the status page of the hosting’s website for any known issues.
The post How to Troubleshoot and Resolve Error 503 First Byte Timeout? appeared first on Appuals.
]]>The post How to Fix ‘Virtual Machine Disk Consolidation is Needed’ Error in VMware? appeared first on Appuals.
]]>
However, errors may arise during the attempt to merge the virtual machine disk files. These errors can often be resolved straightforwardly.
Consolidation of Virtual Machine Disks in VMware
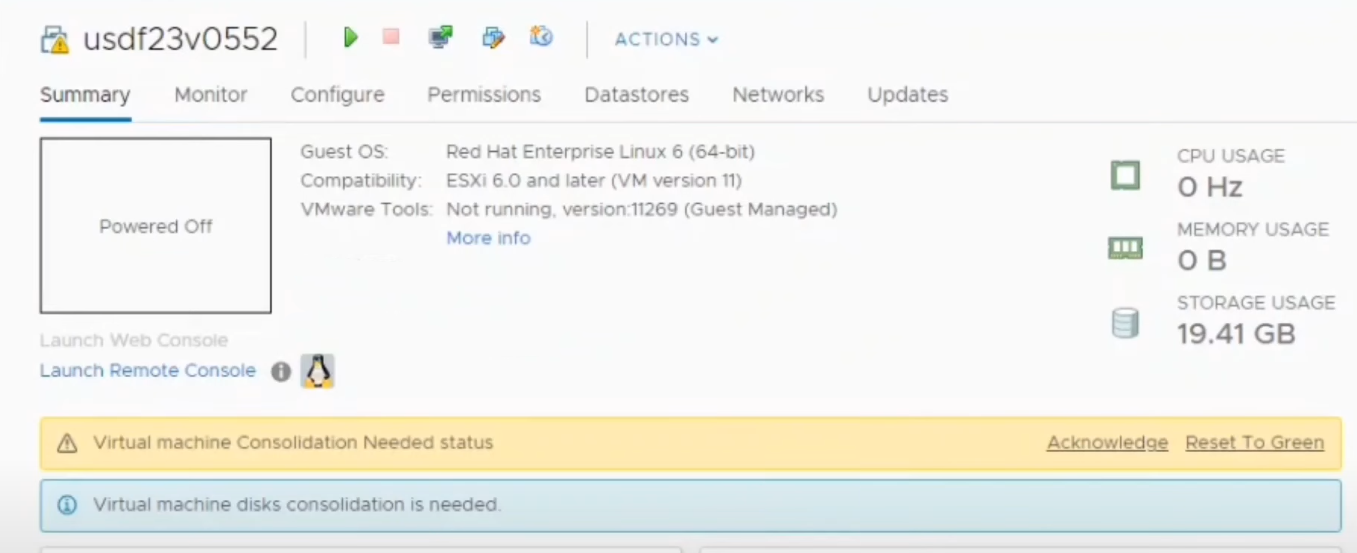
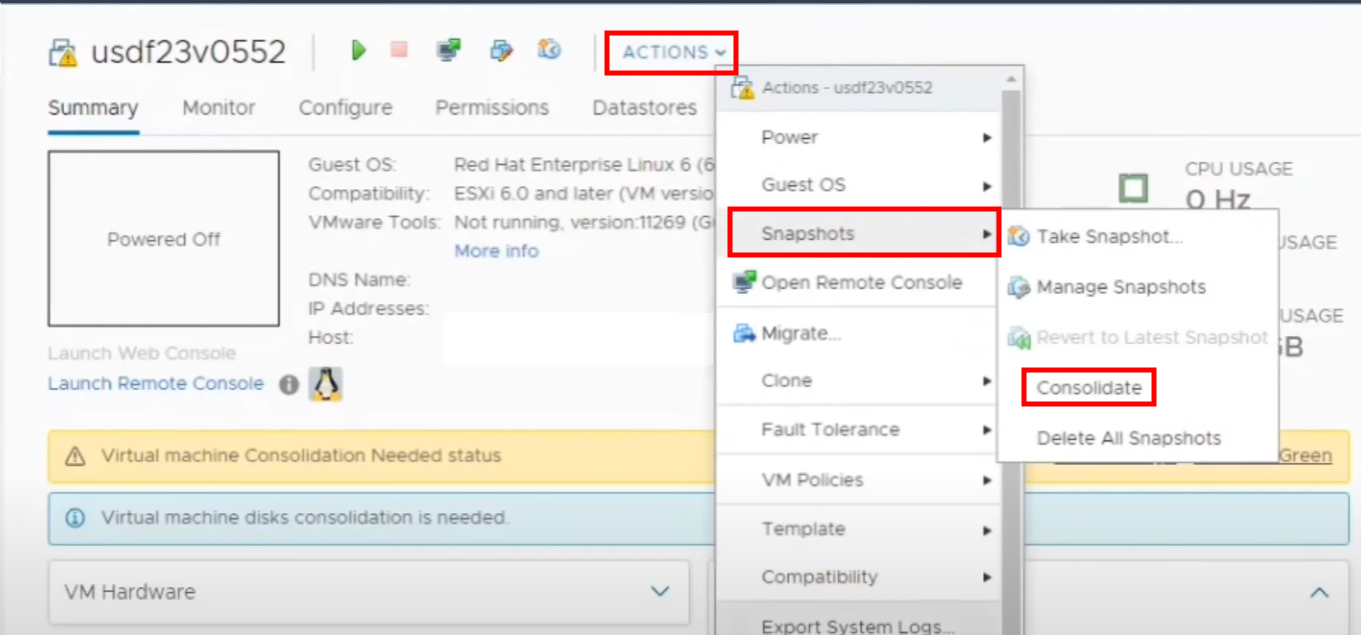
To clear the “Virtual machine disks consolidation is needed” status, you must consolidate the virtual machine disks.
- Select the Virtual Machine that requires Disk Consolidation.
- Click the Action button and hover over the Snapshots option.
- From there, select Consolidate. A confirmation prompt will appear; click Yes.
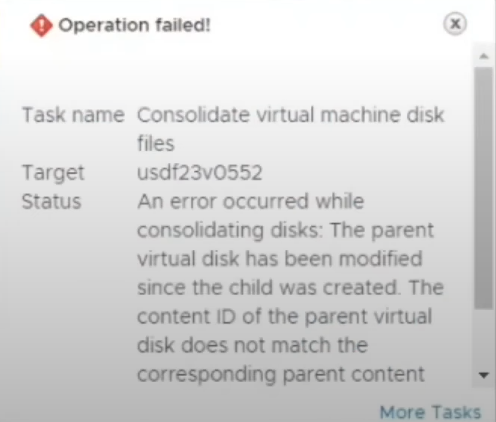
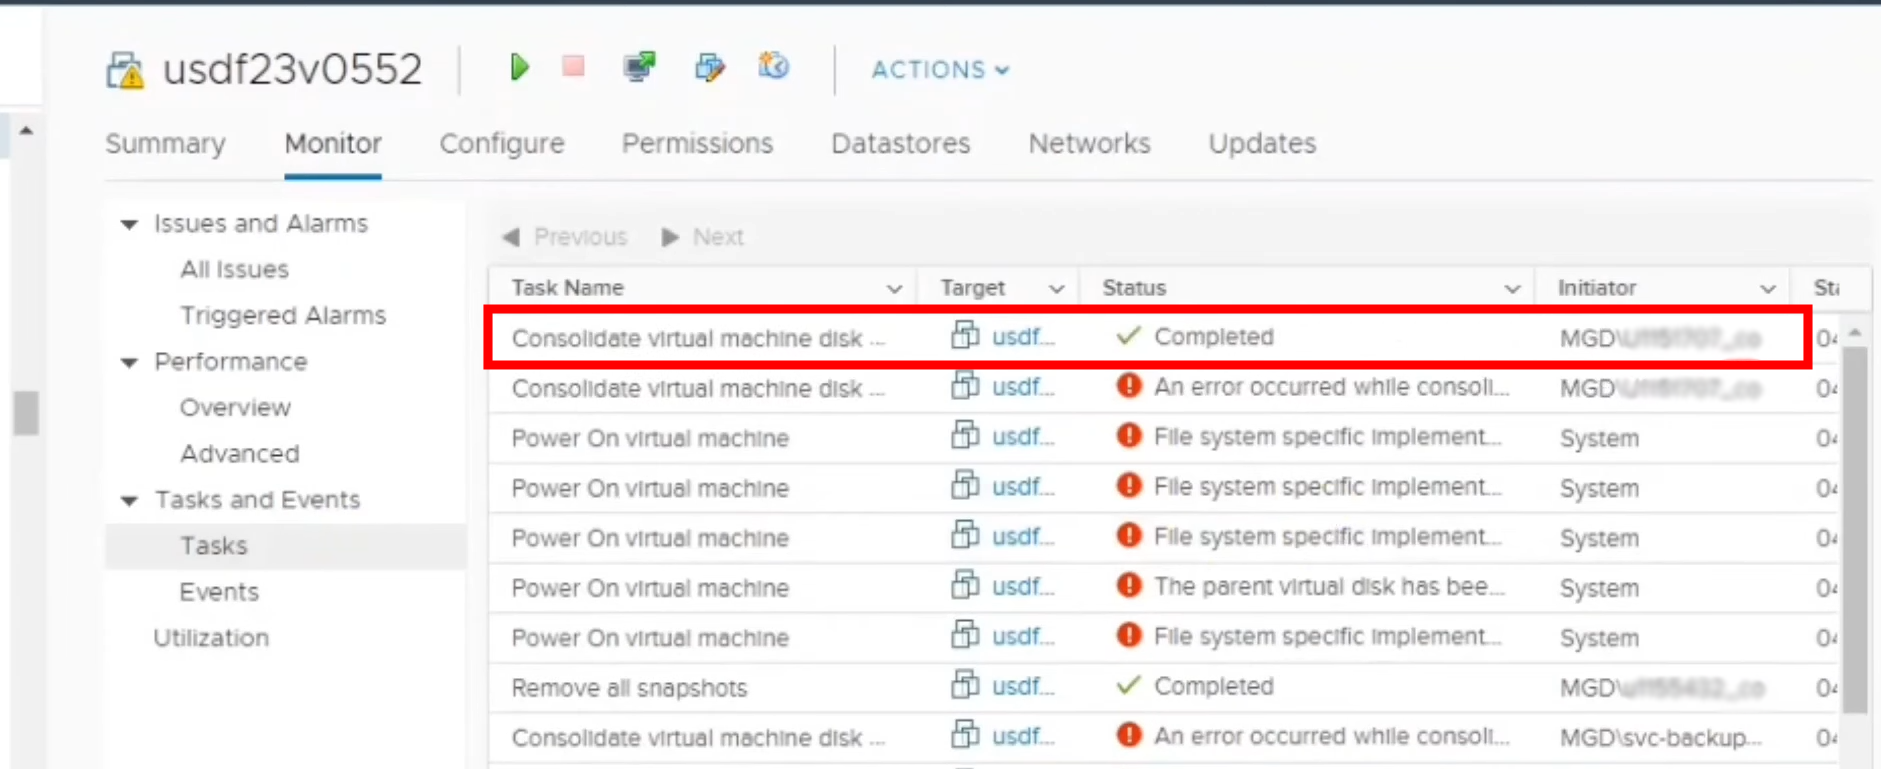
Errors You Might Encounter During Consolidation
During disk consolidation, you might encounter an error stating, “The content ID of the parent virtual disk does not match the corresponding parent content ID in the child”. This error occurs when the chain of virtual disks to be consolidated has differing Content-IDs and cannot be merged.
Another possible error is “Unable to access the file since it is locked”, which happens when the virtual machine is running, snapshot operations are being performed, or third-party services used by the virtual machine lock the file.
FIX: The Content ID of the Parent Virtual Disk Does Not Match the Corresponding Parent Content
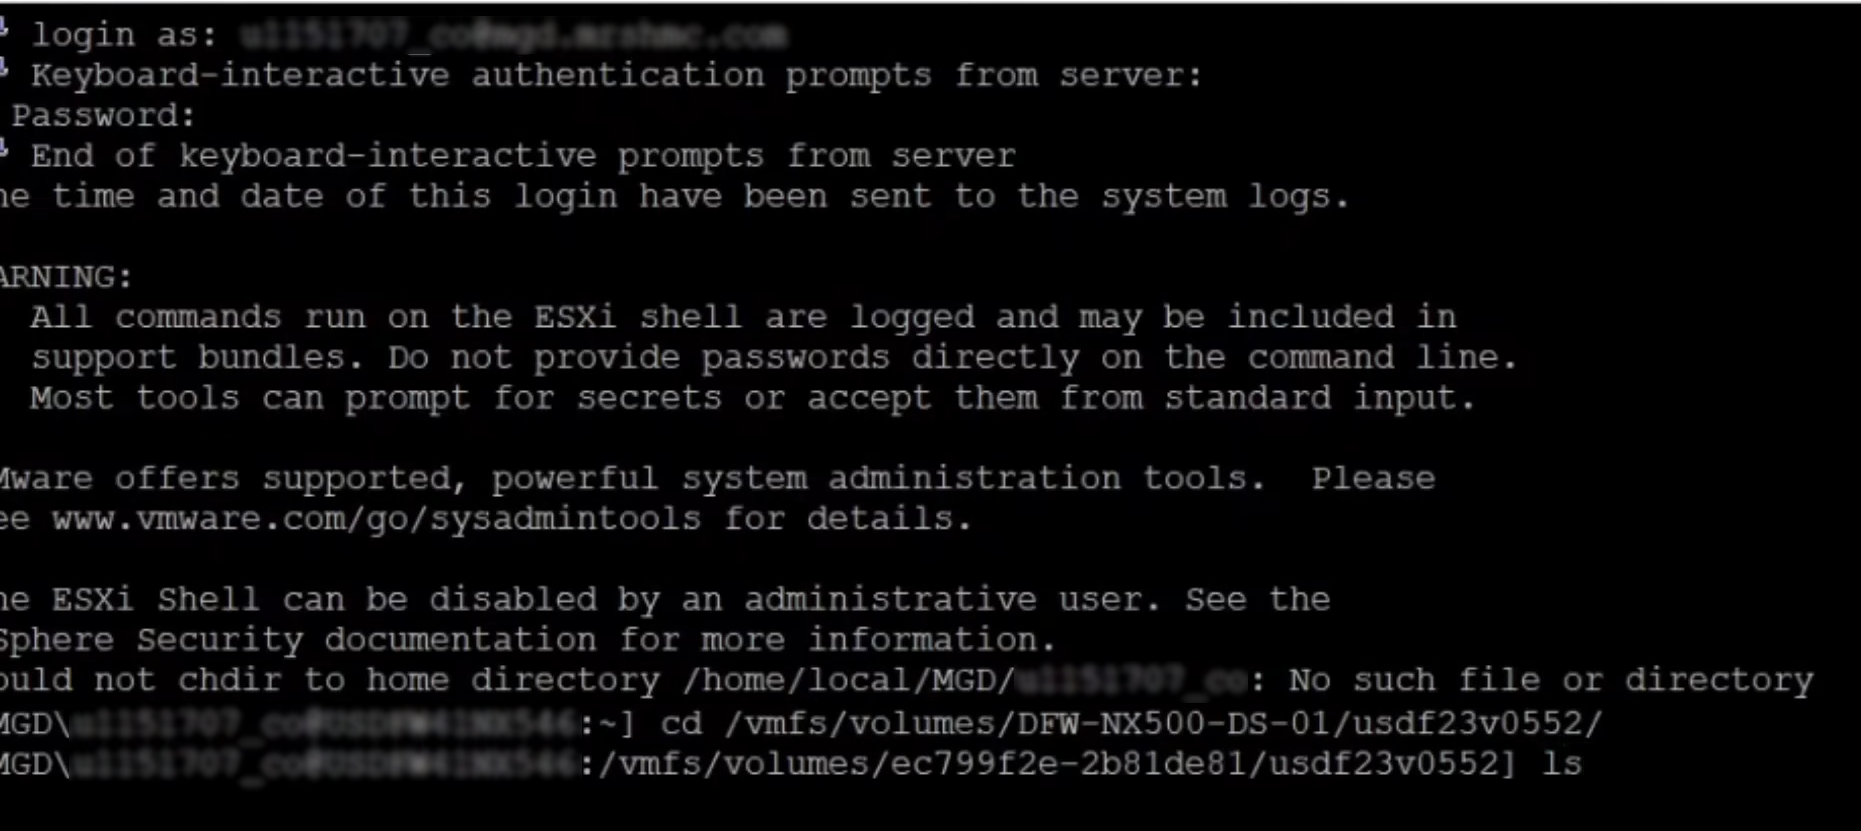
Firstly, copy the hostname of the affected virtual machine and input it into the PuTTY configuration window, a free SSH client available for download. This will open a terminal.
NOTE: Be aware that the procedure described below carries the risk of corrupting the virtual drive and should only be attempted if you understand partitioning schemes.
- Launch the PuTTY Configuration window and enter the Host Name of the virtual machine with the error.
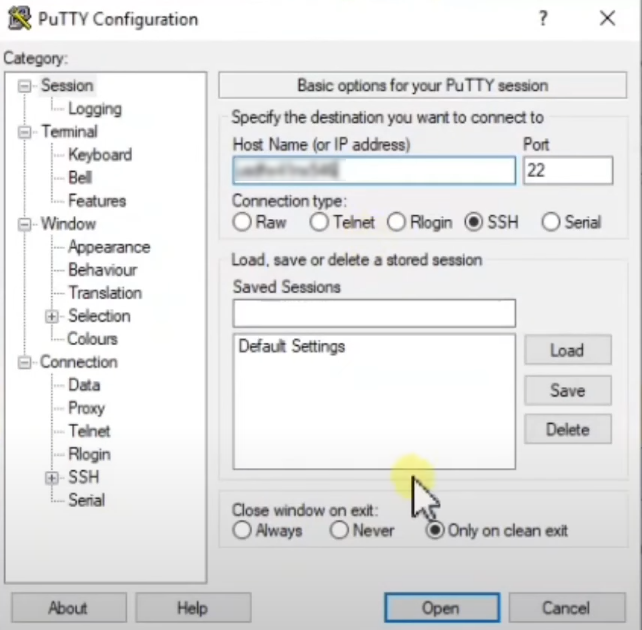
- A terminal will open, where you should log in using the credentials of your virtual machine.

- Change your directory to where the virtual machine’s disk files are stored using the command “cd /vmfs/volumes/DatastoreName/VmName”, replacing ‘DatastoreName’ and ‘VmName’ accordingly. Then type “ls” to display all the virtual disks.
- Next, you must identify the two conflicting virtual disks. To do this, type “cat vmware.log”.
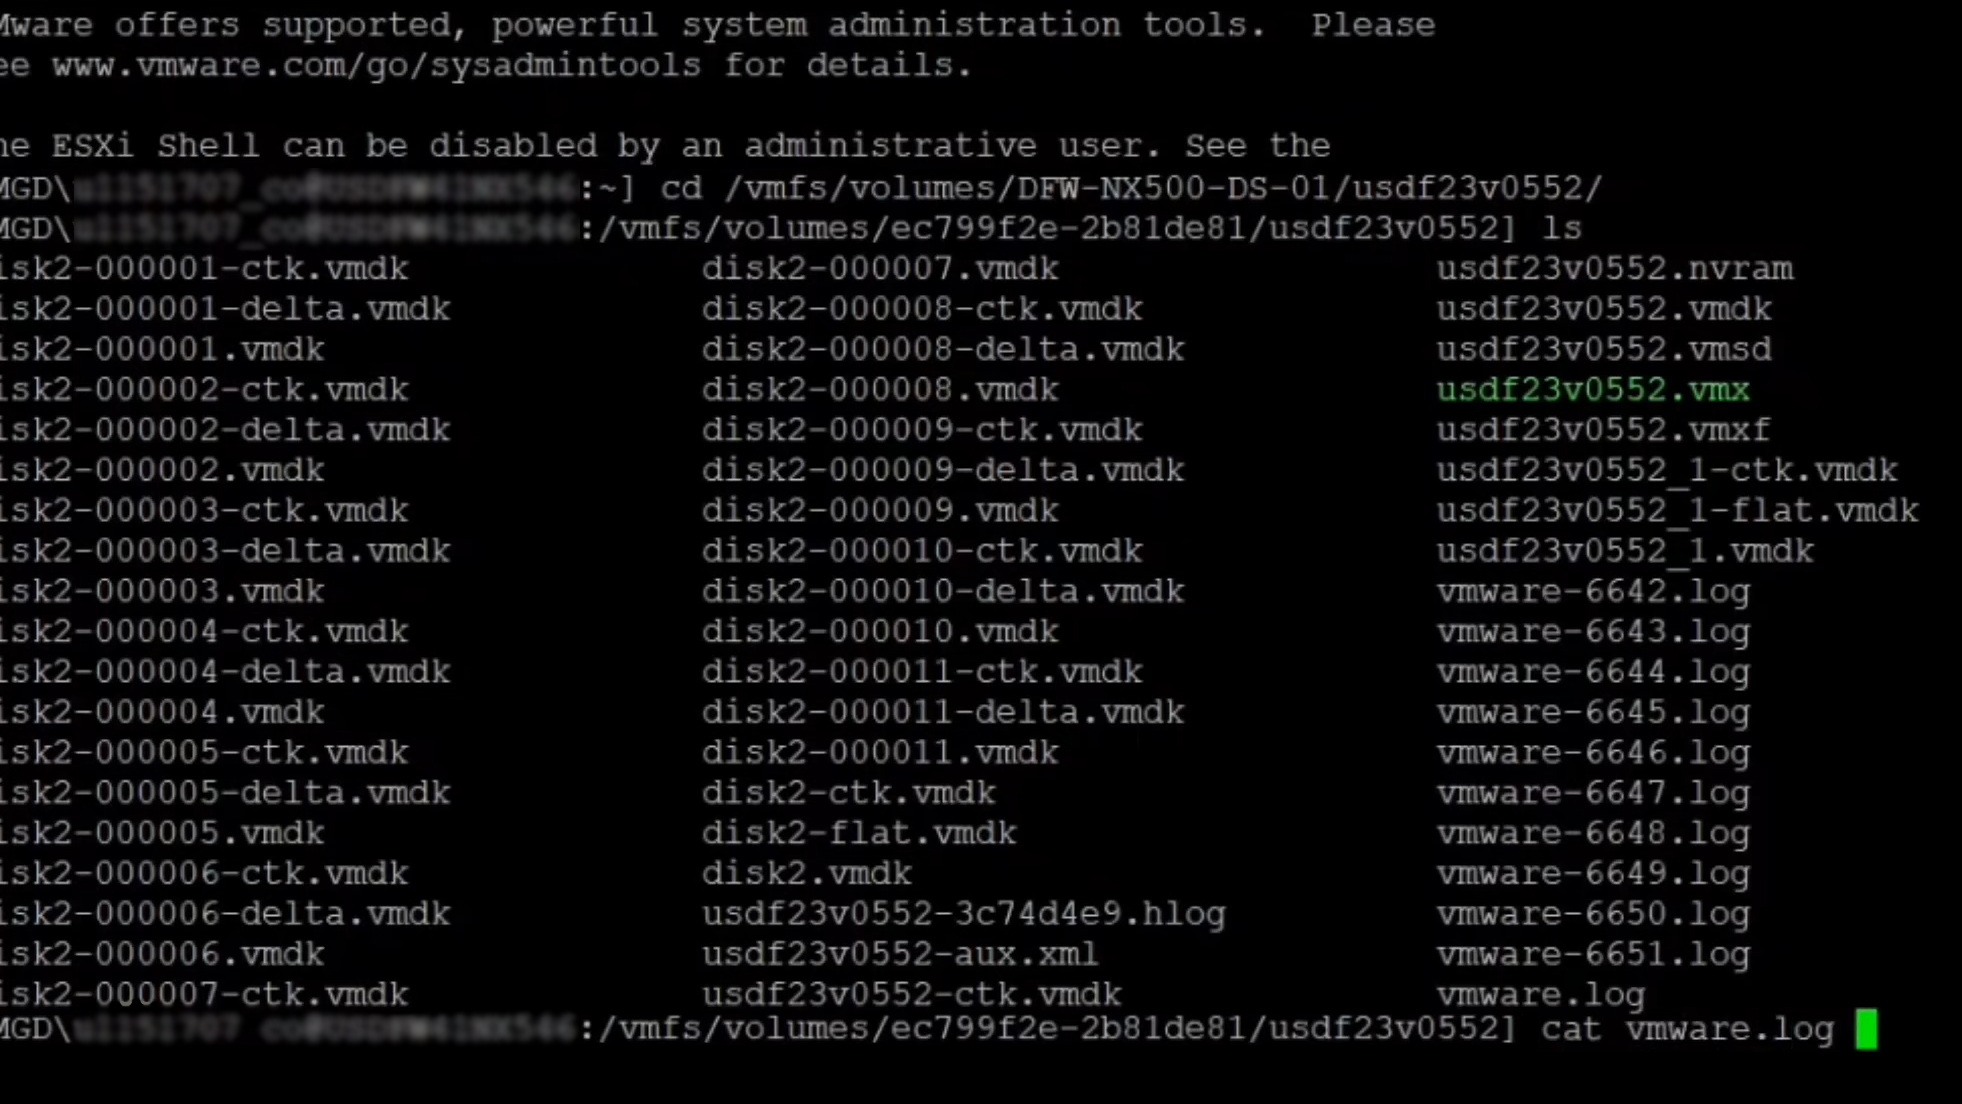
- Look for the “DISKLIB-LINK” text in the log file. Note the disk names indicated in this line as they represent the disks with mismatched Content IDs.

- View the Content IDs of the identified “.vmdk” files using the ‘cat’ command, such as “cat disk2-000001.vmdk” or “cat disk2.vmdk”.
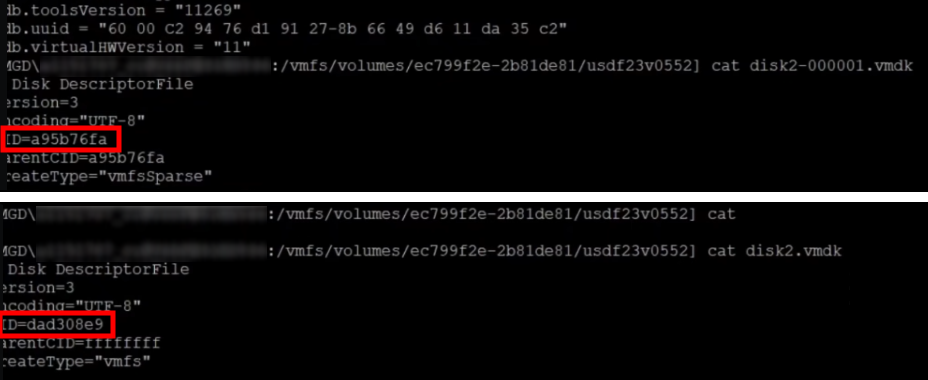
- To modify a disk’s ID, use the ‘vi’ command, like “vi disk2-000001.vmdk”. Copy the ID from “disk2.vmdk” and paste it into “disk2-00001.vmdk” as its new ParentCID.
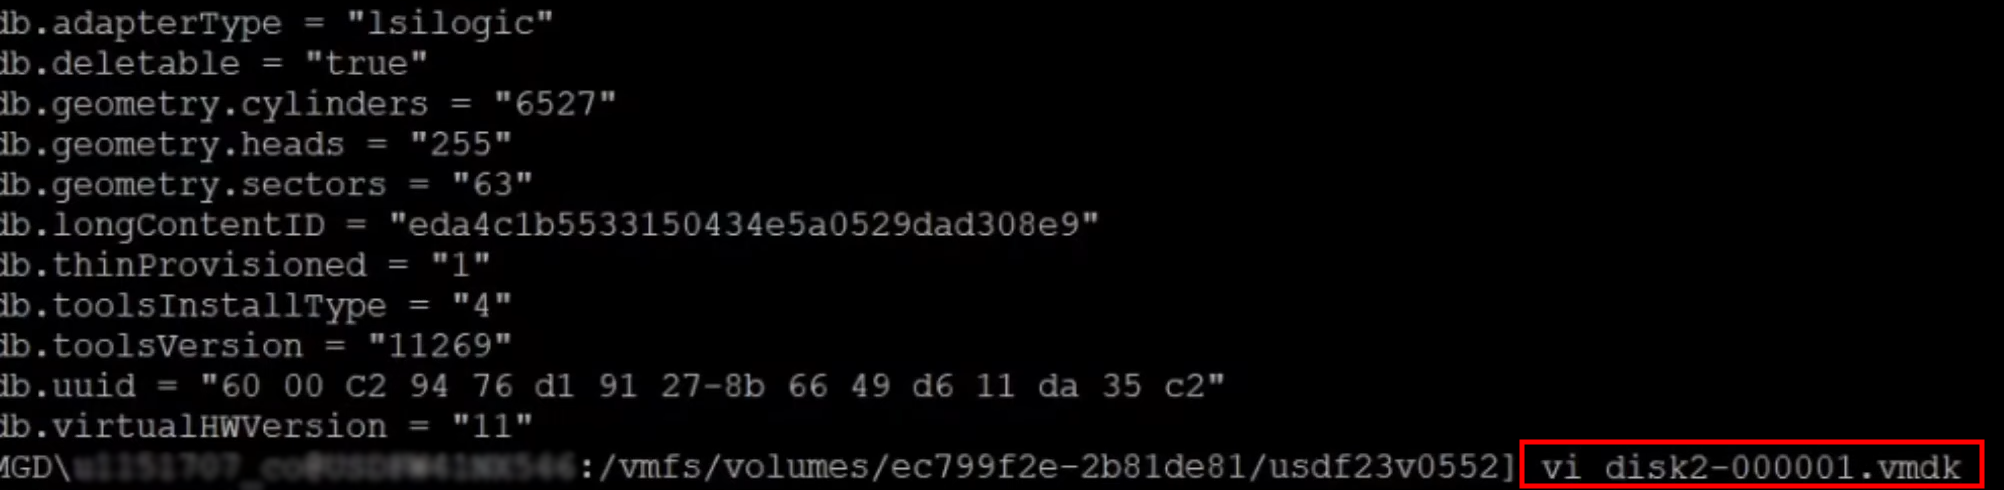
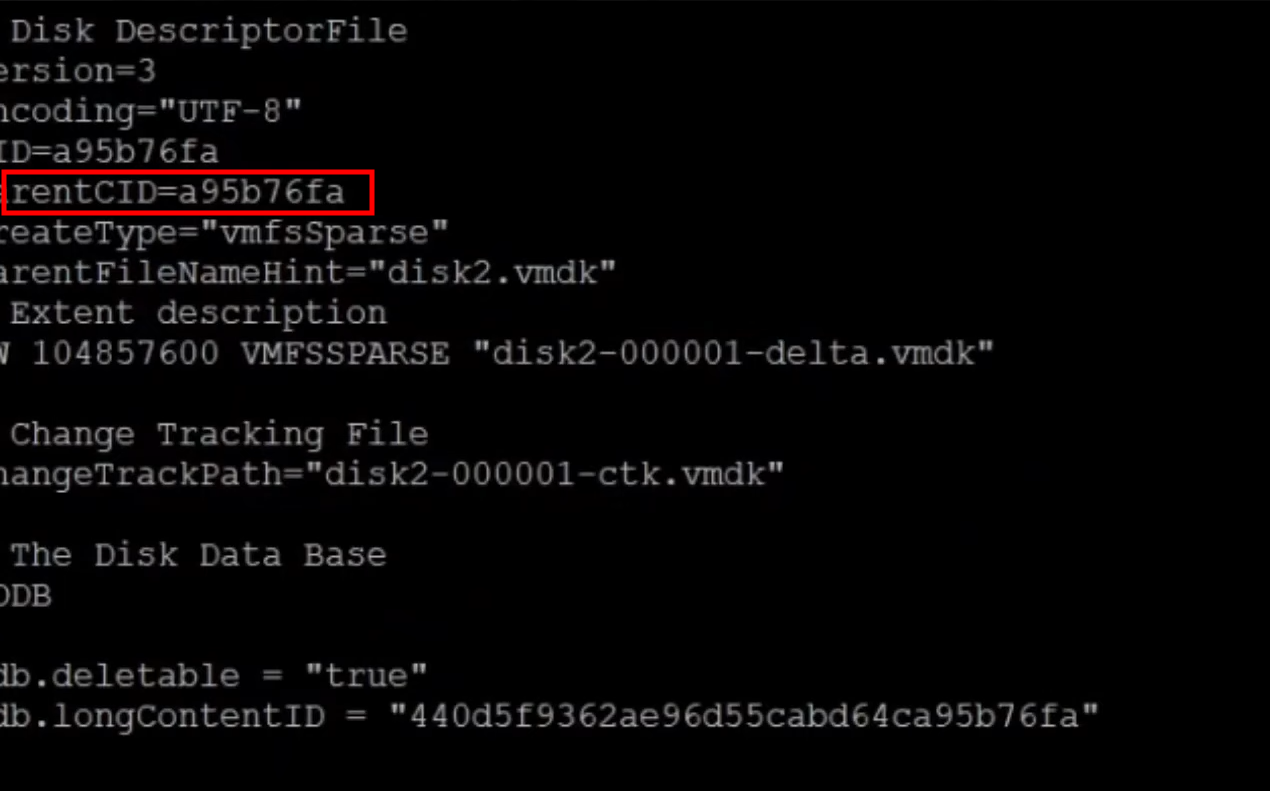
- Replace the ParentCID with the correct Content ID, then press the escape key and input “:wq!” to save and exit. You can now proceed with disk consolidation.
FIX: Unable to Access File Since It Is Locked
To remedy the “Unable to access file since it is locked” error, restart the services.sh script. This will refresh all services using the virtual machine’s disks, eliminating obstacles and allowing the consolidation process to complete.

Restarting the services will temporarily idle the virtual machines, permitting the consolidation to occur without interference.
- Open the PuTTY Configuration window and enter the Host Name of the virtual machine causing the error.
- In the opened terminal, log in as the ‘root’ user and execute “services.sh restart”.

Upon completing these steps, you should be able to successfully consolidate your virtual machine snapshots.
The post How to Fix ‘Virtual Machine Disk Consolidation is Needed’ Error in VMware? appeared first on Appuals.
]]>The post How to Fix Error 503 Backend Fetch Failed on Your Website? appeared first on Appuals.
]]>
This error indicates that the website’s server could not communicate effectively with the back-end services. It is commonly triggered by updates to plugins, server OS, or extensions. Because it’s a server-side problem, clients can only attempt to refresh the website in their browsers.
If you are experiencing this issue on a website, it is advisable to contact the web administrators to rectify the error on their end.
Basic Troubleshooting
- Reload the Browser Page: Temporarily resolve the error 503 by refreshing the page a few times.
- Server Status: Verify if the host server is down or undergoing maintenance.
- Backup: Ensure that you have a backup of the server, website, and database to prevent data loss while troubleshooting.
- Reload or Restart Services and Server: Try reloading or restarting services, such as Varnish, and if the error remains, consider restarting the server.
- Update: Check that all related services, applications, and server OS are up-to-date.
3. Check the Website Health and Resources
Insufficient storage or resources on a website can cause the backend fetch failed issue due to the inability to carry out necessary operations.
- Navigate to the WordPress dashboard and select Tools > Site Health > Info.

Check the Storage Size of Your Website on WordPress - Assess whether the storage is nearing its limit. If so, you may need to add more storage or purge unnecessary items. In some cases, it might be necessary to upgrade your plan.
- Make sure that other server resources are not being overwhelmed and that resolving this issue eliminates the error.
4. Check the Resource Availability
Attempting to access an absent resource on the backend server will result in an error message. Your reverse proxy might report this as a 503 backend fetch failed error.
- Check the URL or code and determine which resource it is trying to access.
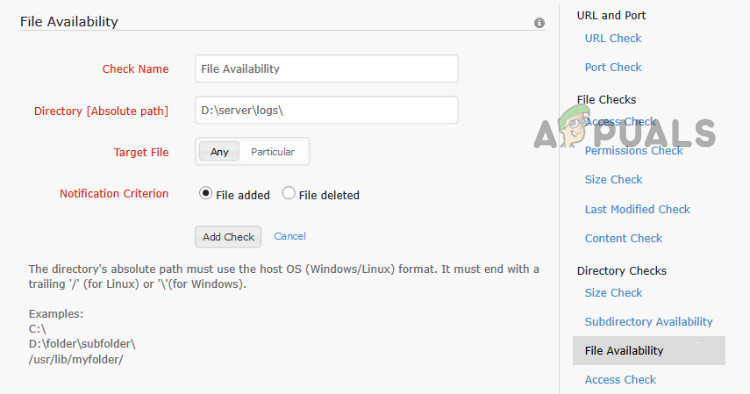
Check the Resource Availability on the Server - Verify the availability of the requested resource on the server. If absent, upload the resource to the appropriate location.
- If the problem continues, ensure the action being executed doesn’t attempt to load the entire website. For instance:
.request ="GET HTTP/1.1"
Revise the command as follows:
.request ="GET /sitehealth.html HTTP/1.1"
5. Change the Cloudflare Settings
Suboptimal Cloudflare settings can cause an error 503 by restricting access to backend server resources. Changing these settings can rectify the issue.
- Access the Cloudflare dashboard and go to Security > Make Changes on Elementor.
- Copy the IP displayed and go to WAF > Tools.
- Click Edit next to your website entry and add the IP to the allowed list.
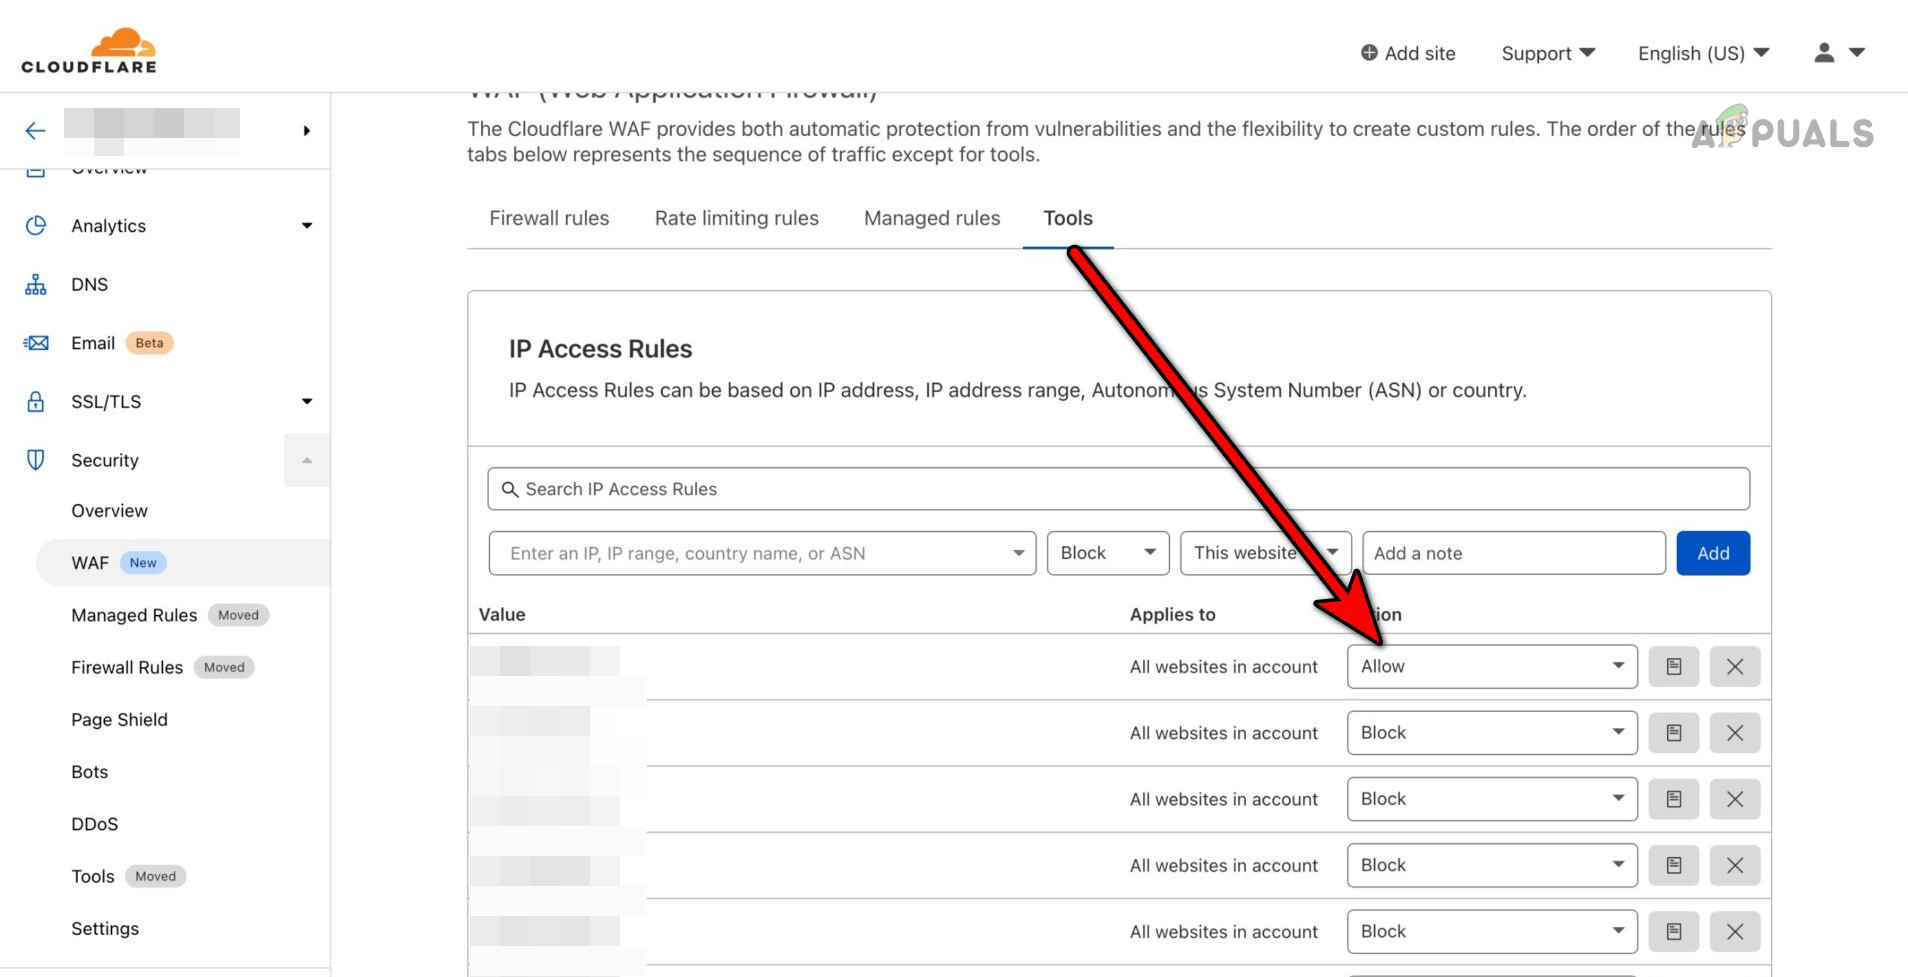
Add the IP as an Allowed One in the Cloudflare’s WAF Tools
6. Increase the Server Time-Out Limit
If the backend server’s response time is longer than what the reverse proxy is set to wait for (timeout), a backend fetch error will occur. Increasing the server’s time-out limit can address this problem. This may vary, but in Varnish, it can be done by:
- Navigating to the Varnish configuration. For example:
/etc/sysconfig/varnish
- Editing the VCL Conf file to increase the wait time to, say, 300s (the default is often 60s):
first_byte_timeout = 300s
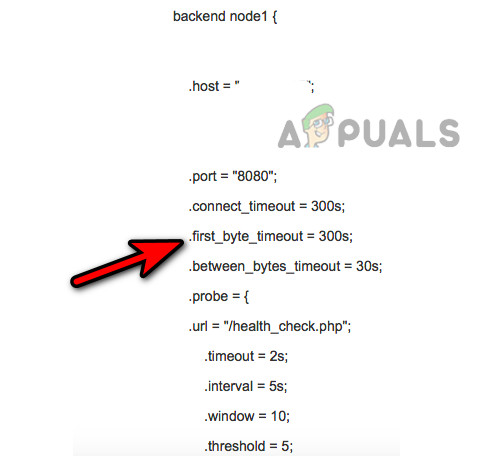
Change the Timeout Limit of Varnish - Save changes and verify if the error persists.
- If the error began following a Varnish config change, revert to an older, functional configuration if available.
7. Edit the Health Check Settings of the Website
The backend error may arise if the reverse proxy cache, like Varnish, is unable to access, or perceives the backend server health check information as faulty. The resolution is to repair the health check settings of the website:
- Remove the following line from your configuration if it exists:
.url="/health_check.php"
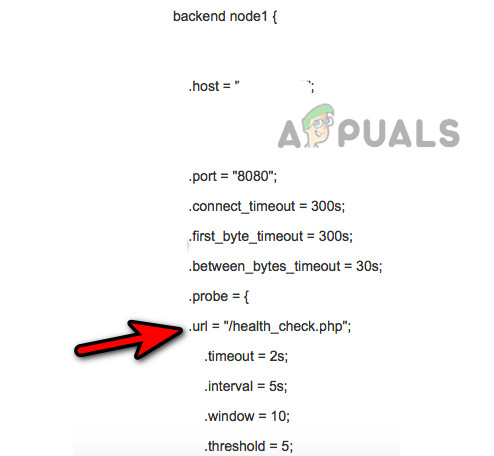
Remove the Health_Check from the Varnish Configuration - Verify if the problem has been resolved.
- If not, deploy varnishlog to identify what is being marked as unhealthy and address it accordingly.
sudo varnishlog -g request -q "VCL_call eq 'BACKEND_ERROR'"
8. Revert the PHP Version of the Server
If a recent PHP version upgrade is incompatible with your website’s backend, a 503 error may be triggered. Reverting to a prior PHP version can solve the issue. For example, on Bluehost with WordPress:
- Proceed to the Bluehost dashboard and select the Advanced tab.
- Within cPanel, navigate to MultiPHP Manager in the Software section and select the affected website.
- Change the PHP Version back to the earlier version and verify if the error has been resolved.
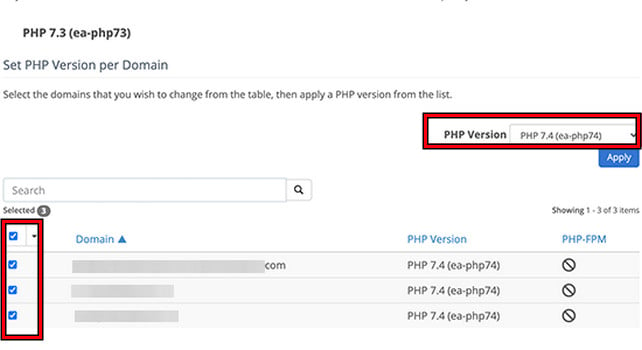
Revert the PHP Version of the Website
9. Disable Plugins, Utilities, Extensions, and Themes
When a plugin, utility, extension, or theme is incompatible with a server setup, a 503 error may result. Mitigate the error by disabling them and re-enabling one at a time to pinpoint the troublesome element.
For instance, to disable GZip on the Jira Service Desk, which has been known to cause a 503 error:
- Head to the Jira dashboard and select Admin > General Settings > Use GZip Compression.
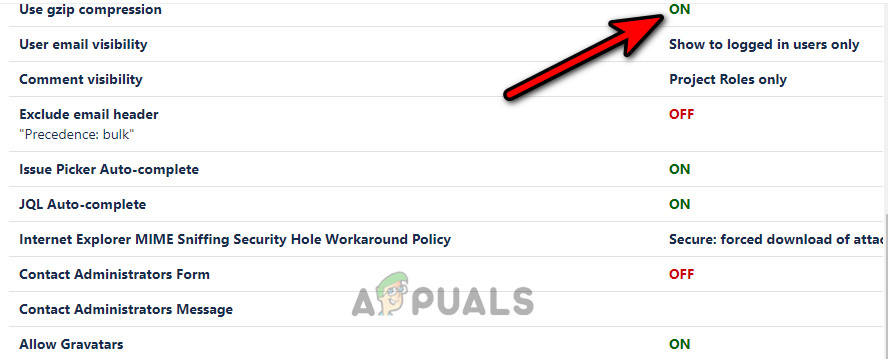
Disable GZip on Jira - Disable GZip compression and see if it resolves the error.
10. Disable the CSP Module on Magento
The Content Security Policies (CSP) module provides security for Magento applications. If the CSP module is incompatible with your current setup, it can trigger a 503 error.
Disabling the CSP Module on Magento could solve the issue:
- Launch Terminal and run the following commands successively:
php bin/magento module:disable Magento_Csp php bin/magento c:f

Disable Magento CSP Module - After execution, check if the error 503 has been corrected.
11. Change Host Header, Child Tag, and Port Configurations
Backend fetch errors can also stem from overly large host headers, improperly configured child tags, or incorrect port configurations. Editing these settings might rectify the error.
Add a .host_header Property
- Implement a .host_header property for the backend server to ensure probes are directed to the correct host.
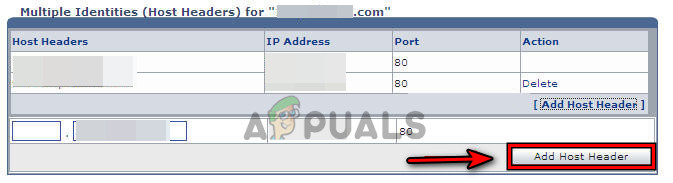
Add a Host Header Property to the Server - Embark on debugging to inspect the incoming host header details within the logs.
Remove Child Tags from Magento
- Access this file:
Magento\ConfigurableProduct\Plugin\Model\Product
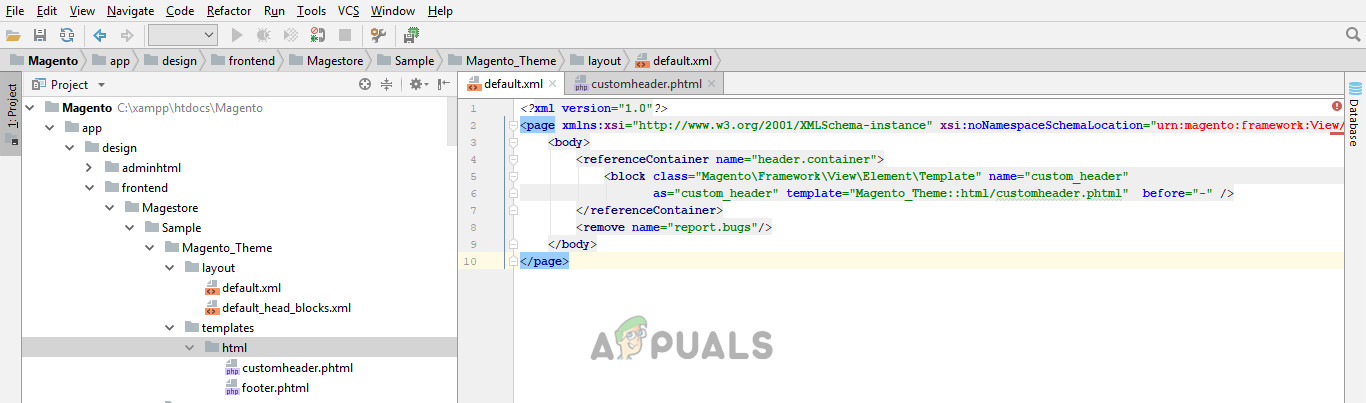
Remove Child Tags from the Magento Header - Expunge the child tag from the header and evaluate if the error is resolved.
Remove Ports from the Docker Compose
- Locate the Docker Compose and navigate to the Default.vcl file.
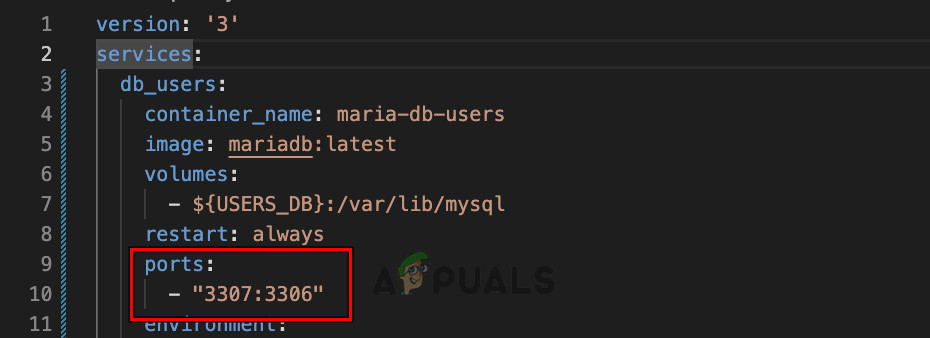
Remove Ports from the Docker Compose - Replace ports with the service name as depicted below:
client: image: ... ports: <-- remove - target: 80 published: 8080 mode: host
Adapt the Default.vcl accordingly:
backend default { .host = "client"; .port = "80"; } - Examine if this amendment resolves the issue.
12. Use a Systematic Approach
If all previous steps have failed, a systematic approach should be employed to isolate the cause of the error 503.
Check Logs
- Scrutinize the logs associated with reverse proxies, PHP, backend servers, or hosting configurations for any irregularities that might instigate the error 503.
Check PHP Logs - If an anomaly is detected, rectify the underlying issue to eliminate the error.
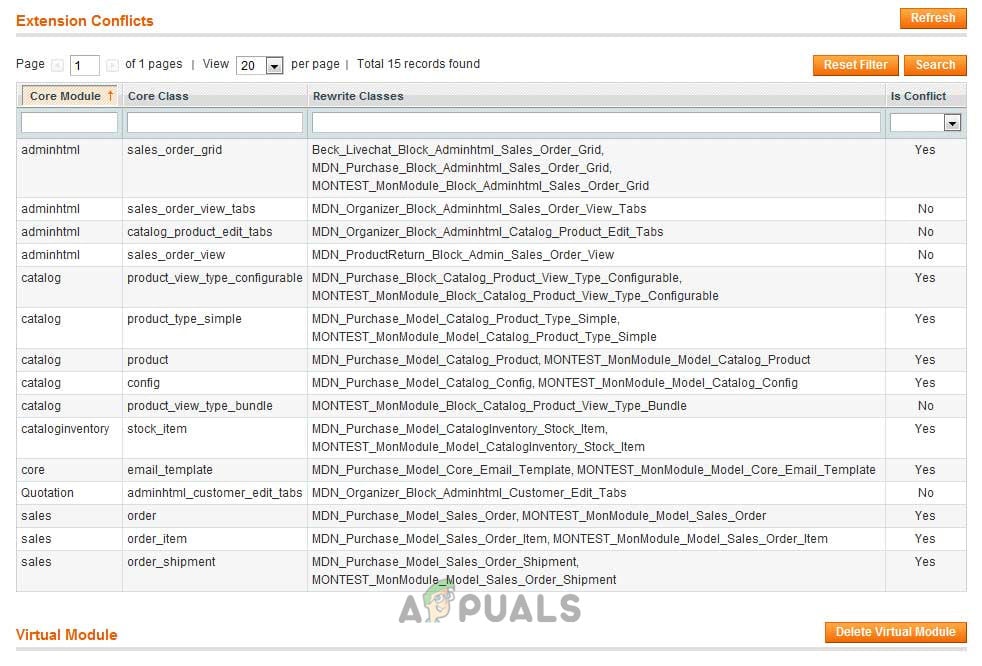
Do a Full Conflict Test
Perform a full conflict test if your setup permits, to discover any potential conflicts. If any conflicts arise, resolve them to clear the backend fetch error.
Directly Access the Backend Server
If you are utilizing a reverse proxy like Varnish, bypass it and try directly accessing the backend server. If this method works, the issue likely lies with the reverse proxy setup. Consider the following steps if direct access is successful:
- Assess the cache tags’ length used by Magento—especially relevant for stores with many products—as they might exceed the default limit set in Varnish (typically 8192 bytes). To rectify, modify the http_resp_hdr_len (e.g., to 70000 bytes) in Varnish’s configuration. Correspondingly, adjust Varnish’s http_resp_size.
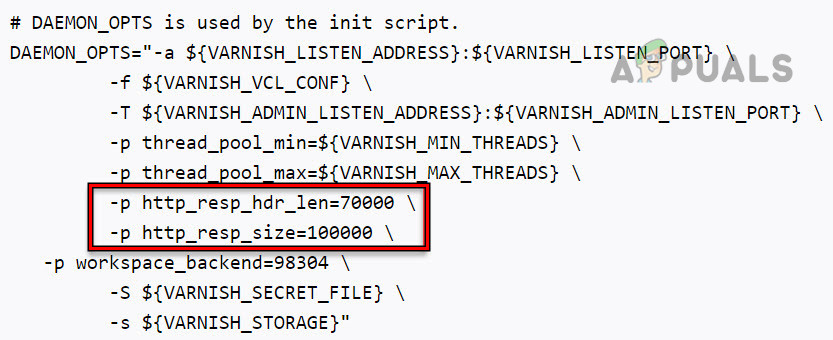
Increase Header Length of Varnish and Response Size - Ensure that the health_check.php file is in the right directory or modify the Varnish configuration to point to the accurate location. The default may be /pub/health_check.php, but for Nginx servers, it may need to be changed to /health_check.php.
- For Magento sites, if a maintenance.flag file exists, try deleting or renaming it and then refresh the website to see if the error is resolved.
- Investigate the Product Rules within Magento through a backtrace to identify any invalid outputs that may be causing the error.
If these methods are ineffective, strip down the website to its most fundamental elements, such as an index file with some placeholder content. Gradually reintroduce features to determine which one triggers the error 503. If the problem continues, reach out to the appropriate support channels for assistance, be it WordPress Support, Magento Support, or the hosting provider’s customer service team, such as Hostinger Support.
The post How to Fix Error 503 Backend Fetch Failed on Your Website? appeared first on Appuals.
]]>The post How to Fix a Spectrum Modem with Flashing Blue and White Lights appeared first on Appuals.
]]>
The issue may also occur when the modem is moved to a different location or when you replace an older modem with a new one. Sometimes, the issue is intermittent—the modem blinks blue and white, switches to solid blue, and then resumes the blinking cycle.
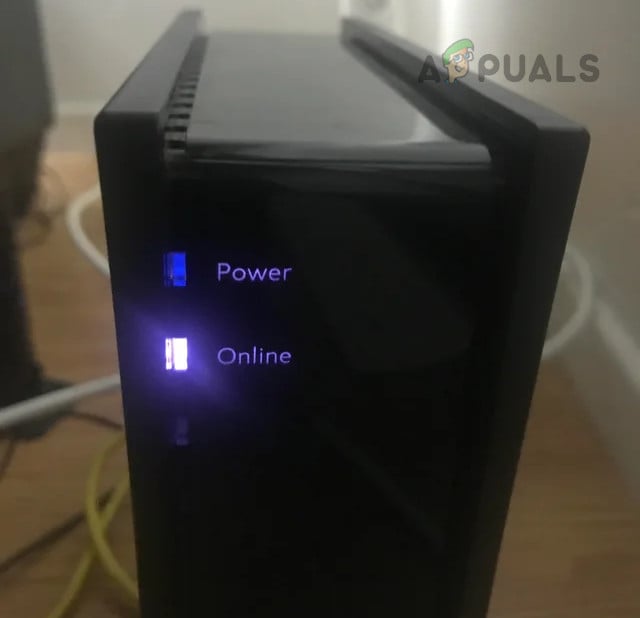
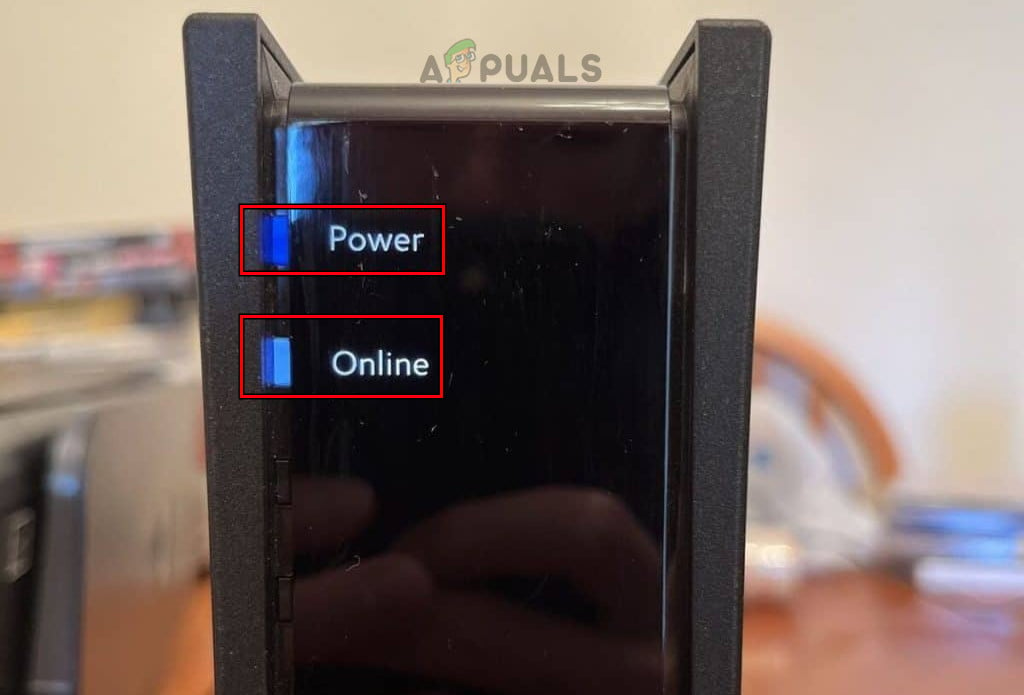
According to Spectrum’s light indicator patterns, blinking white and blue lights indicate that the modem is unable to find or lock onto a signal. Correspondingly, the router may display or blink a red light, signaling a lack of connection.
1. Check the Service Status of Spectrum
A flashing blue and white light on your Spectrum modem indicates that it isn’t receiving any signal from Spectrum, which could be due to a service outage or maintenance on the company’s end.
Note: Use an alternative internet source, such as a mobile hotspot or mobile data, for this step.
- Launch a web browser and visit the Spectrum Maintenance Update page.
- Verify whether there is any ongoing scheduled maintenance. If so, wait until the maintenance concludes. The My Spectrum app can also be used to check for scheduled service maintenance.
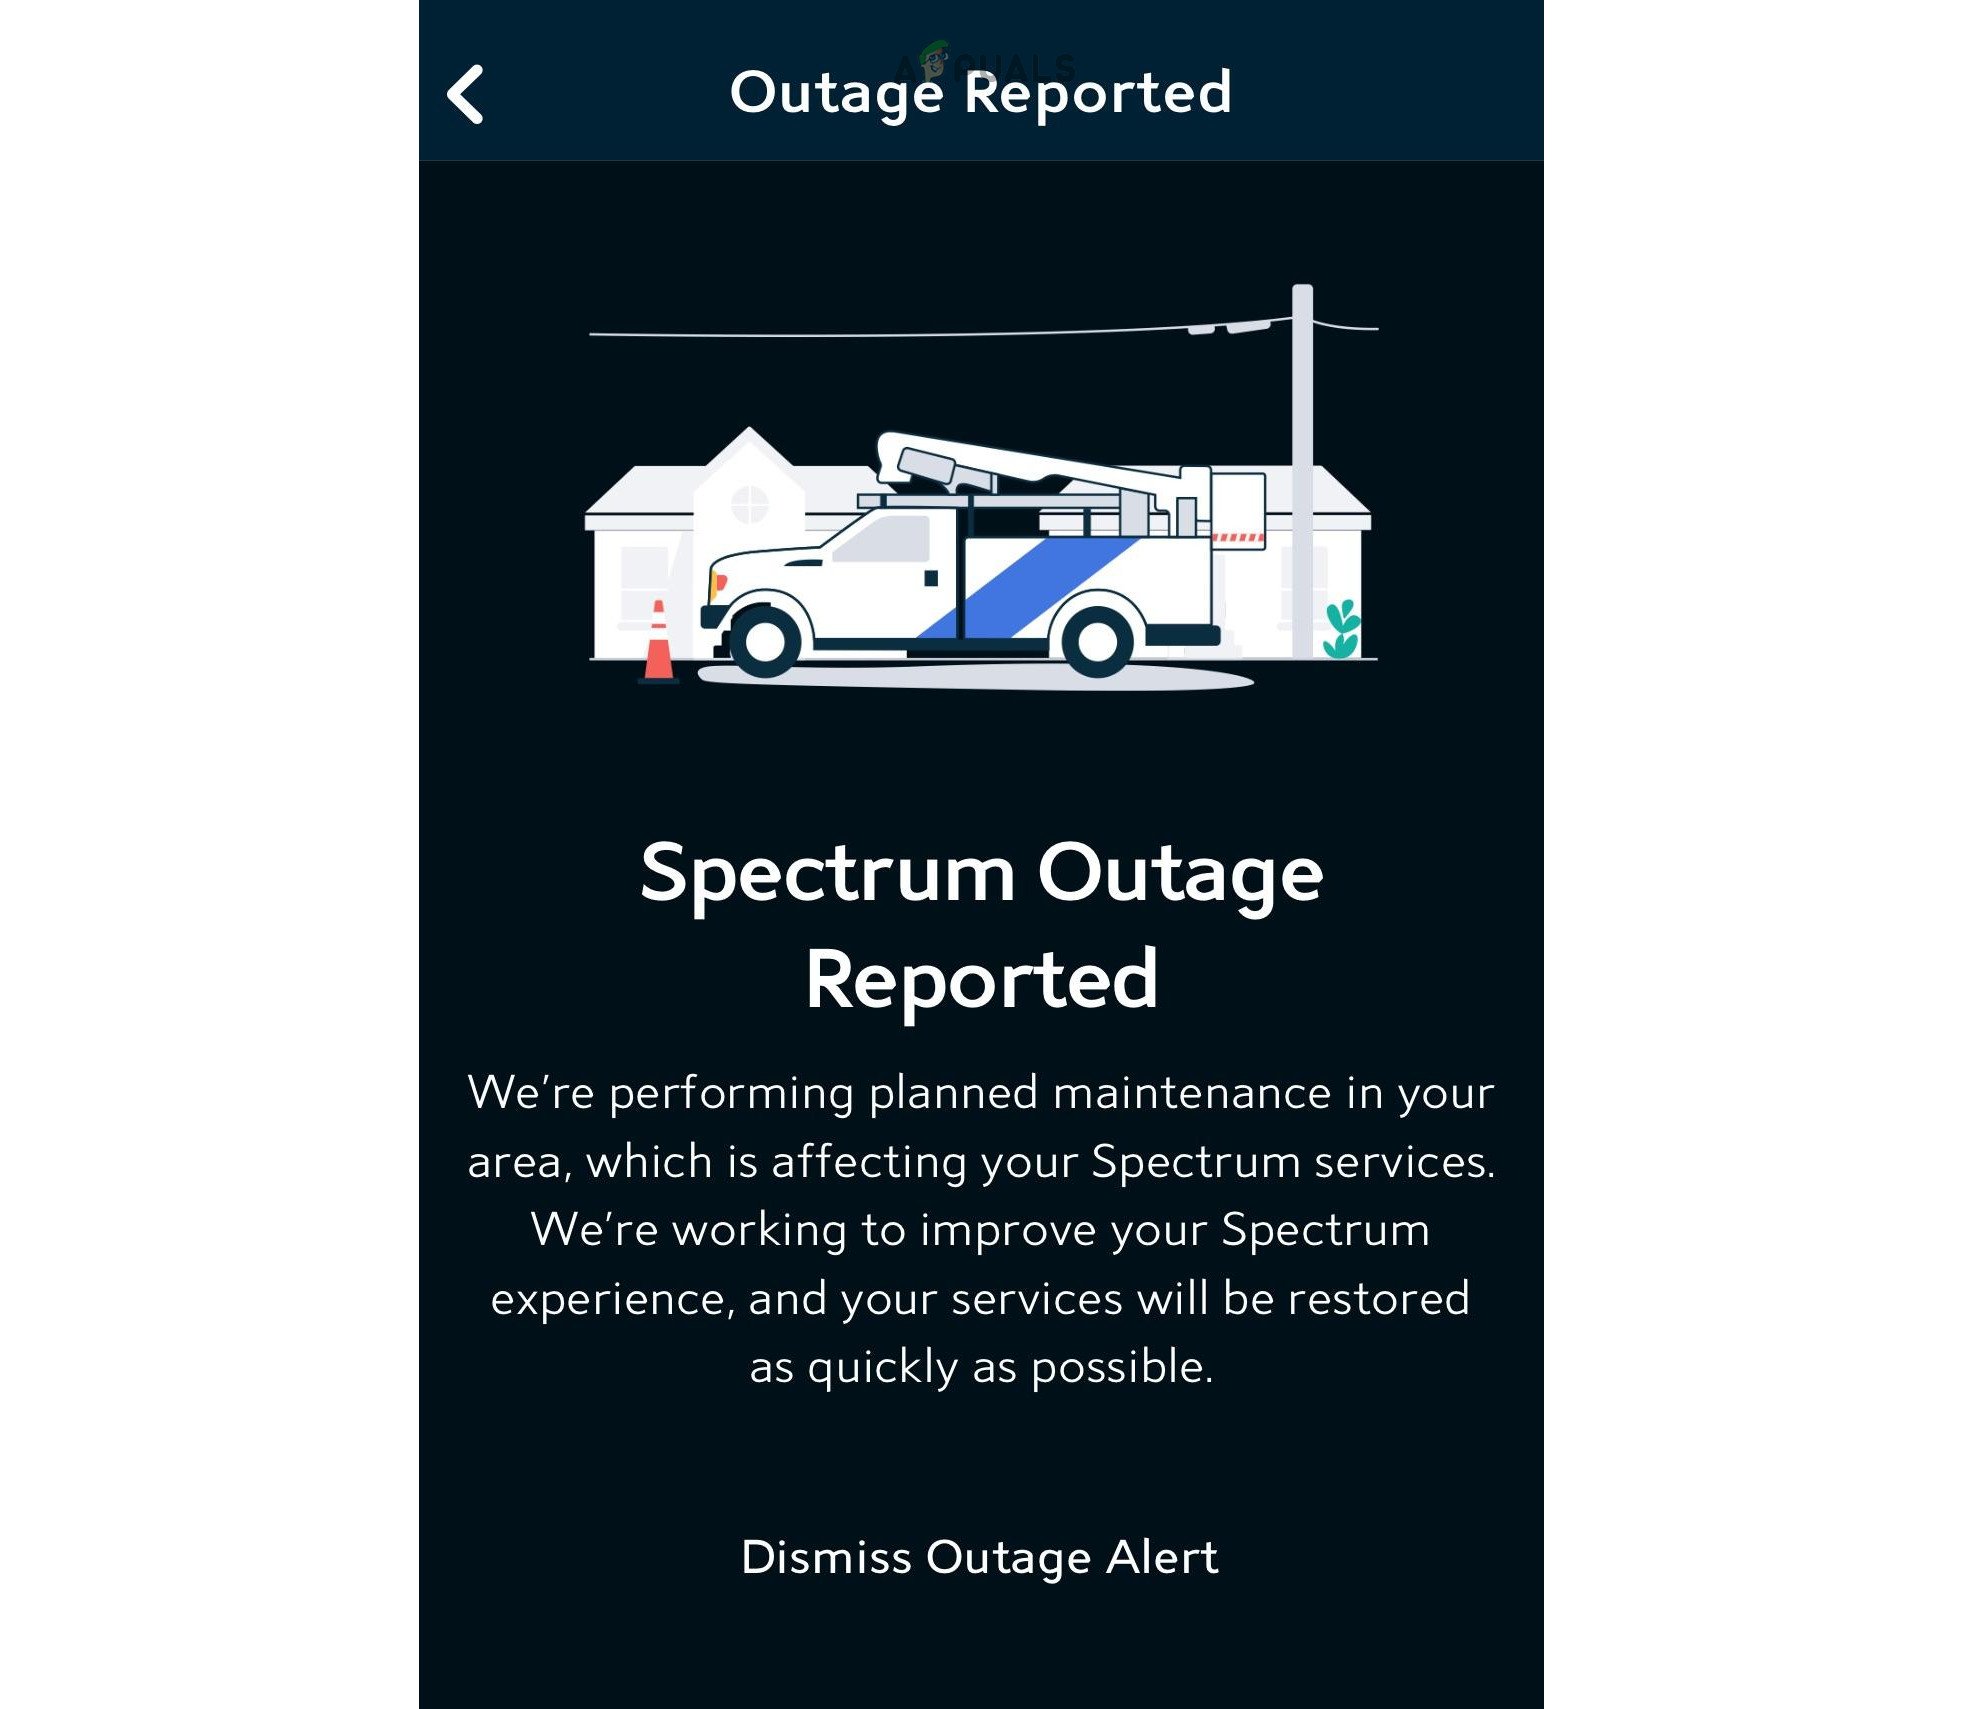
Check the Service Outage in the My Spectrum App - If no maintenance is reported, consult the DownDetector Spectrum page to check for any service outages, and if one is present, wait for services to resume.
- In the absence of outages on the above platforms, consult local social media channels (e.g., local Facebook groups) to investigate any reported service disruptions.
2. Wait for the Completion of the Firmware Update
Flashing blue-to-white lights on the Spectrum modem, accompanied by sequential flashing of power, online, and voice lights, can indicate a firmware update is in progress. In such cases, waiting an hour for the update to complete may resolve the issue.
A firmware update may commence following a power cycle or restart of the modem, which could be the reason for the lights flashing.
- Wait for an hour without powering off or cycling the modem.
Wait until the Firmware Update is completed on the Spectrum Modem - Check if the flashing light issue has been resolved after the wait.
3. Power Cycle the Modem
A Spectrum modem may flash blue and white if an essential firmware module fails to load correctly or crashes during execution. Power cycling the modem can rectify this issue.
- Open the Spectrum app and navigate to Services > Internet > Modem > Experiencing Issues.
- Select Reset Modem. After the modem restarts, assess whether the issue persists.
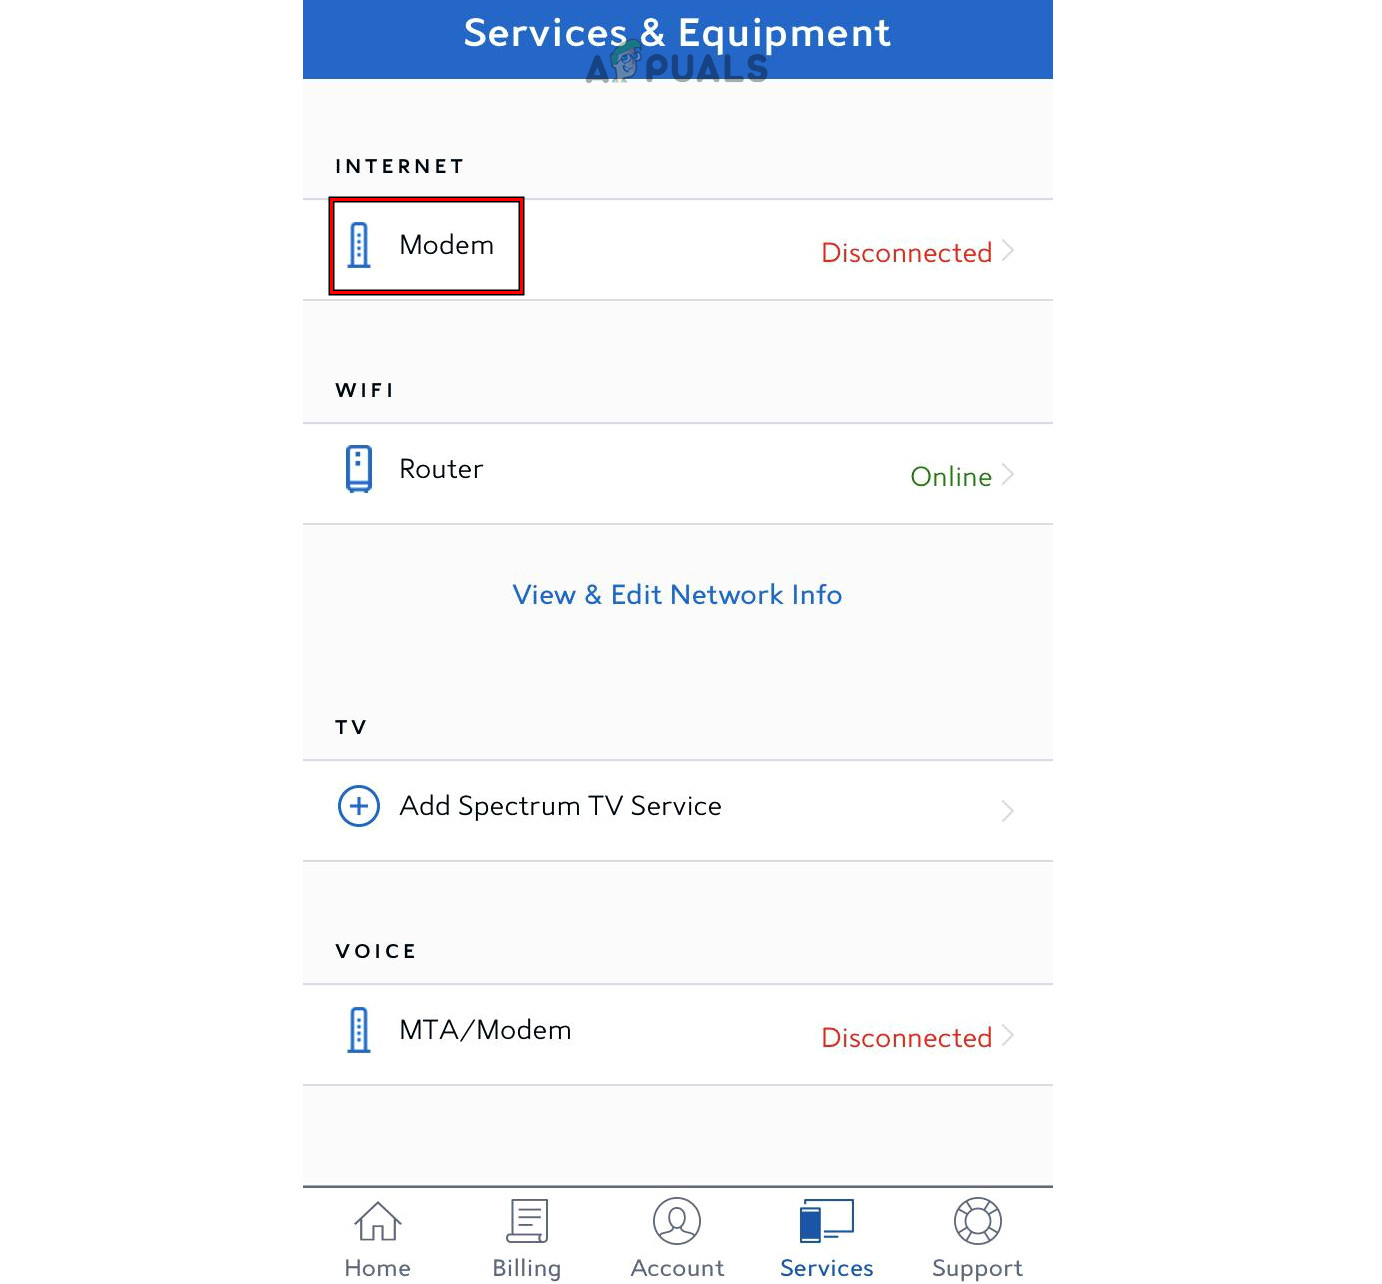
Restart the Spectrum Modem Through the My Spectrum App - Unplug the modem’s power adapter from the outlet and immediately plug it back in.
Unplug the Power Cable of the Spectrum Modem - After the modem powers on, check to see if it no longer flashes blue and white.
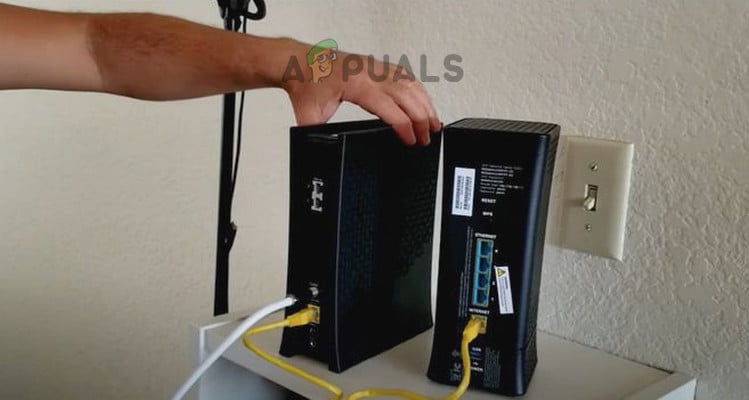
- If the issue persists, unplug the modem’s power adapter again and wait for 5 minutes.
- During this time, switch off any associated networking equipment (such as UDM Pro or routers).
- Reconnect the power adapter and allow the modem to power on completely before checking if the issue has been resolved. The remaining networking equipment can be powered on afterward.
- If these steps are ineffective, try plugging the power adapter into a different power source (avoiding extension cables or surge protectors) and observe whether the problem is resolved.
If the issue still remains and you own a combination device (a modem with an integrated router), resetting the device to factory defaults might solve the problem.
4. Accept Terms & Conditions on the Spectrum Website
You may be required to accept new terms and conditions on Spectrum’s website or app to activate your connection and cease the flashing blue and white lights, especially if your connection is new or there has been a recent change in Spectrum’s policies.
- Open a web browser and visit the Spectrum website.
- Log in using your credentials. If prompted, accept the new terms and conditions, provided you agree with them.
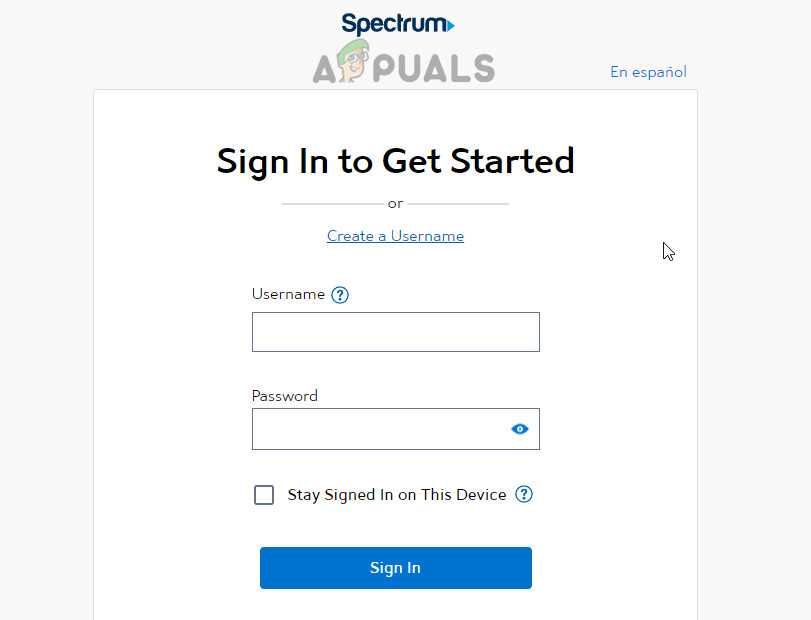
Sign in to the Spectrum Website - After accepting, power cycle the modem and check if it operates correctly.
5. Check/Reseat the Cables/Connections
A flashing blue and white light could be the result of a damaged cable or loose connection preventing the signal from reaching the modem. Inspecting and reseating the cables and connections may address the issue.
- Unplug the modem’s power adapter and inspect the coaxial cable connected to the modem’s back.
- Examine the cable’s entire length for any breakage or damage (such as from pets). If damaged, replace the cable yourself or contact Spectrum support.
- If no visible damage is found, reseat all connections, including those at the back of the modem, at the splitter, and from the wall jack.
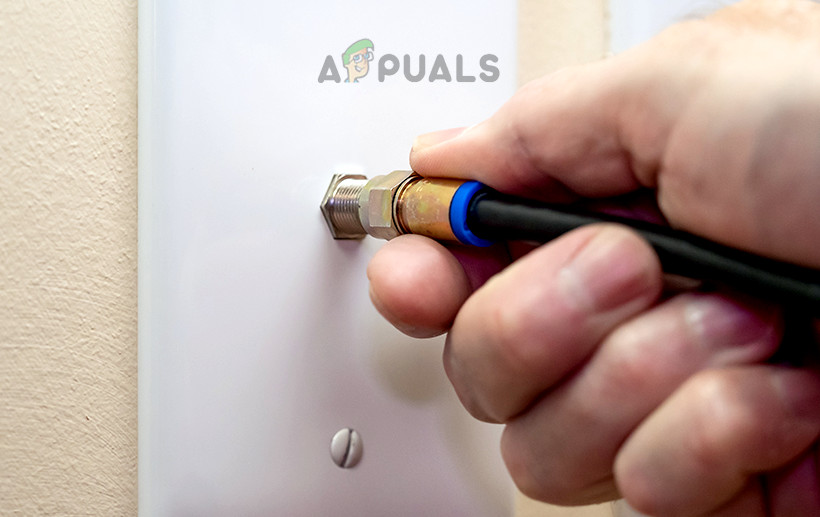
Reseat the Coaxial Plug - Reconnect the power adapter and check if the modem’s online light is stable once it is powered on.
6. Try Another Network Outlet
A faulty network outlet could prevent the modem from receiving a signal, resulting in flashing lights.
- Power off the modem and disconnect the cable from the current network outlet.
- Connect it to a different network outlet. You may need to explore other areas of your premises to locate an alternative.

Insert the Coaxial Cable into Another Network Outlet - Once connected, power on the modem and wait for 5 minutes to determine if the flashing issue has been resolved.
7. Try Another Splitter
A defective splitter may also cause the Spectrum modem issue. Replacing the splitter could resolve this. If you have access to a different splitter, it’s worth testing it.
- Power off the modem and disconnect the cables from the splitter.
- Connect the cables to the new splitter, ensuring that each cable is inserted into the correct port.
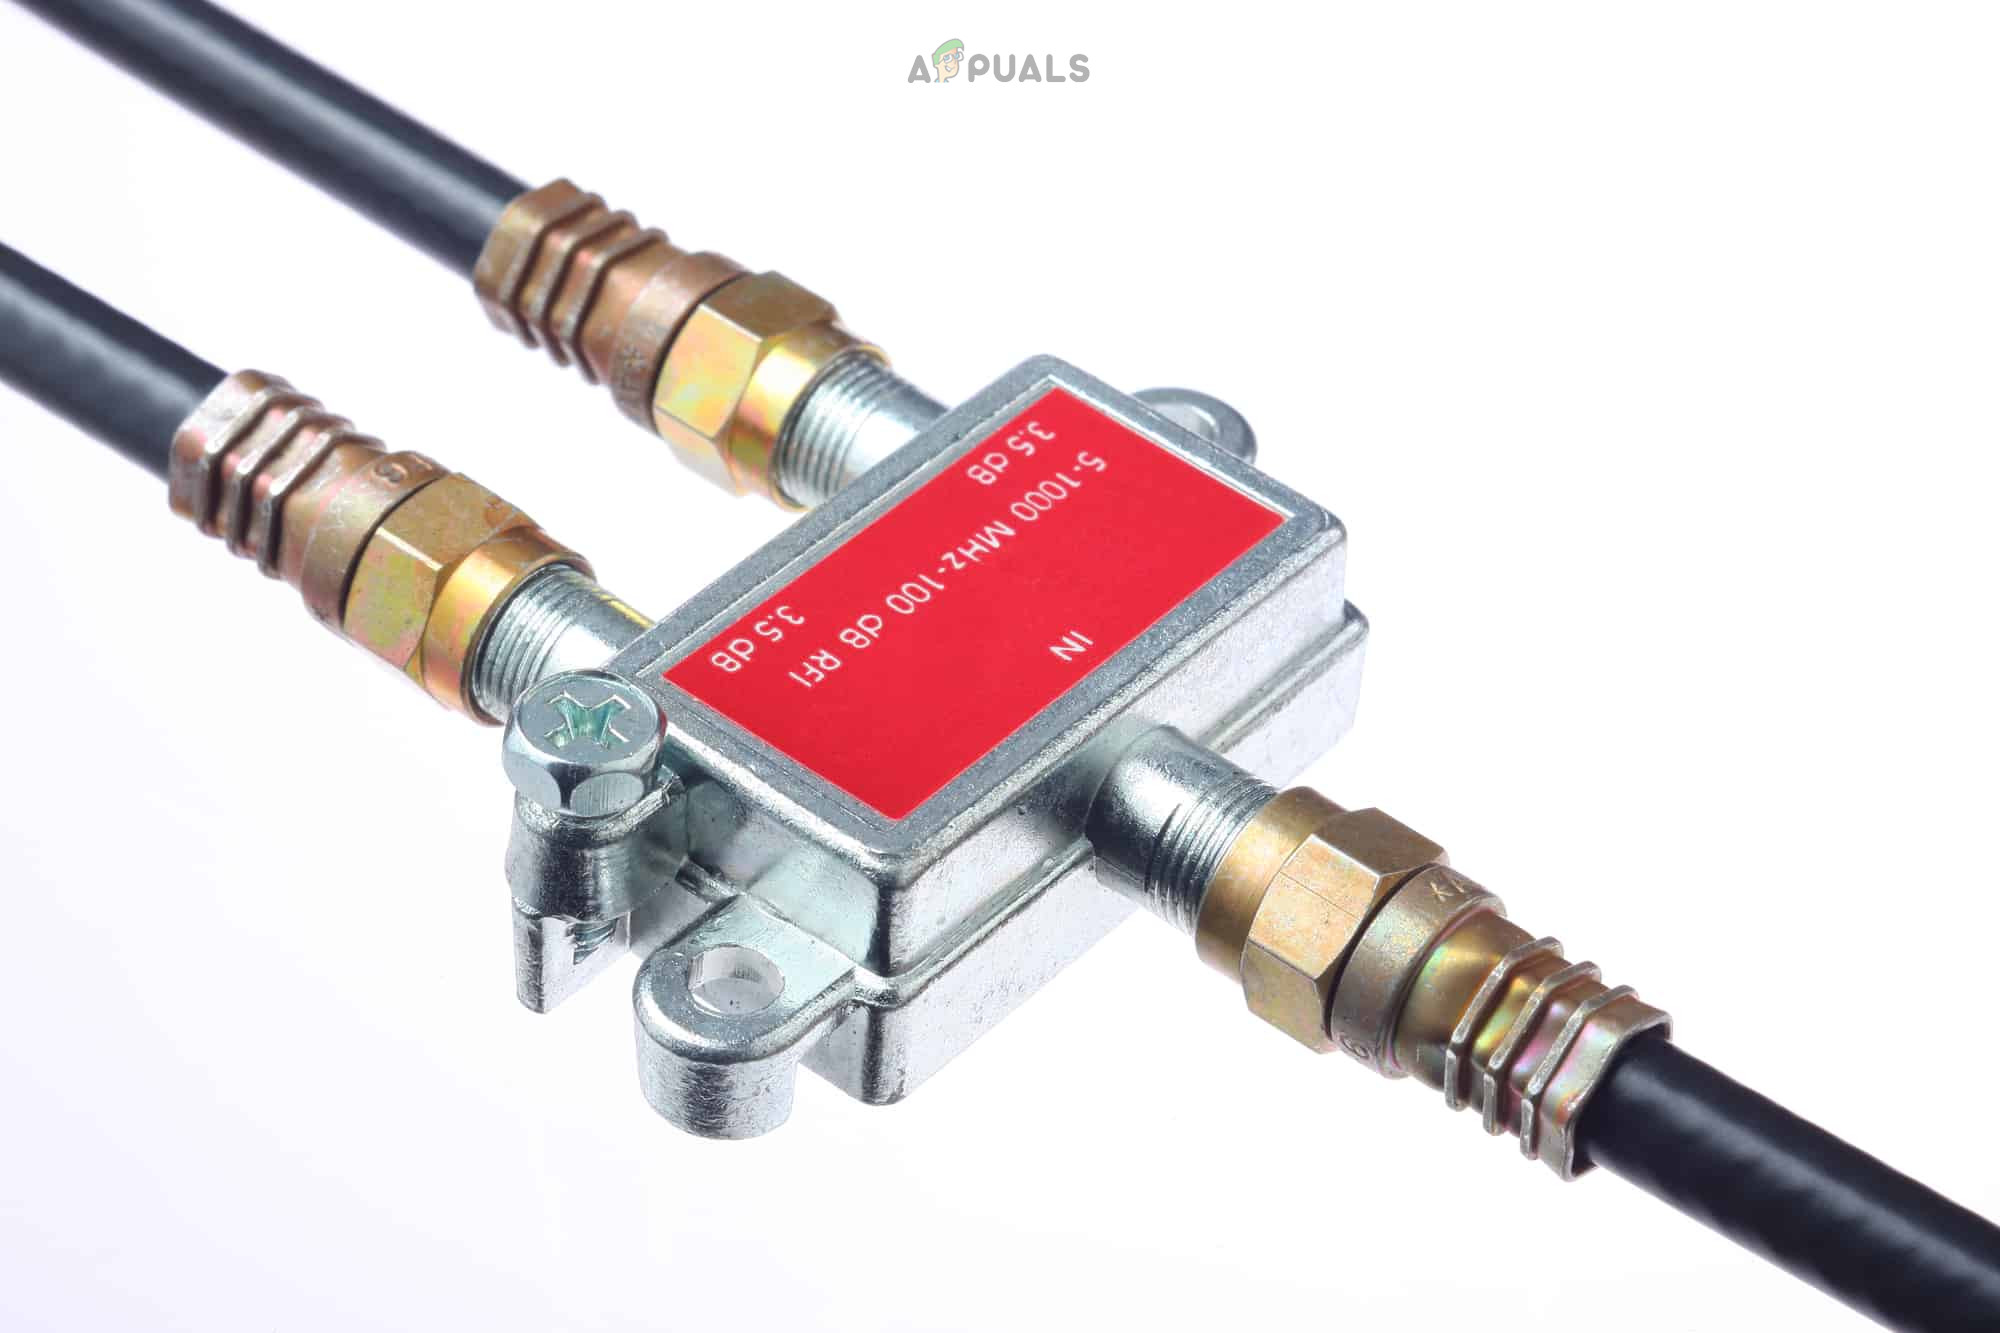
Try Another Splitter with the Modem - Power on the modem and check if the light flashing issue is settled.
8. Replace the Coaxial Plug
A malfunctioning coaxial plug cannot transmit signals to the modem properly, resulting in the modem’s lights flashing. This can be remedied by replacing the plug.
A wire stripper and cable crimper are recommended. Additionally, make sure you have a compatible coaxial plug for your setup.
Caution: Attempt this method only if you feel competent to do so; otherwise, seek professional assistance.
- Unplug the modem’s power cord and detach the network cable from the modem’s back.
- Disconnect the plug from the wall jack and remove it from the cable.
- Trim away part of the wire that was attached to the plug.
- Gently cut around ¾ inch of the outer jacket (white or black) without harming the inner shielding.

Cut Out the Upper Jacket of the Coaxial Cable - Cut and fold back the shielding, leaving about 1/8 inch, and lay the internal shielding over the outer jacket. Leave a ¼ inch gap from where the jacket was cut. Exercise caution, as the shielding can be sharp.

Remove and Fold Shielding of the Coaxial Cable - Trim off ¼ inch of the white plastic insulator to expose the inner copper wire without nicking it.

Remove the White Plastic Layer of the Cable - Slide the plug’s ring onto the end of the cable and push it down.
- Continue sliding until it encapsulates both the shielding wire and the outer jacket.

Slide the Coaxial Plug Over the Cable - Ensure the white insulator contacts the internal hold of the plug, with the copper wire visible within the connector.
- Crimp the plug’s end to fasten the cable. A crimping tool is recommended if available.

Squeeze the Connector Over the Cable - Reconnect the plug to the wall outlet and the other end to the modem.
- Restore power to the modem and ascertain that it is functioning correctly.
If the steps above seem challenging, consider buying a pre-assembled cable with the plug attached.
9. Check the Activation of your Account and Modem
An inactive account or modem not properly provisioned to your account can also lead to the flashing light issue.
- Contact Spectrum via chat or phone.
- Request them to verify the activation status of your account and the modem’s provisioning.
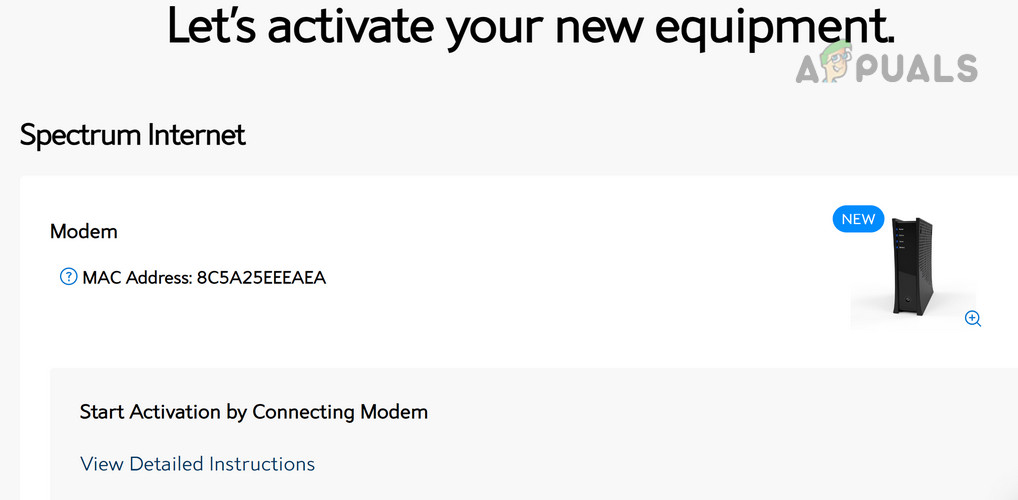
Activate the Spectrum Modem Online - If your account and modem are not active, ask them to initiate the activation process, which should resolve the issue.
If the problem continues, you may need to request Spectrum support to arrange a technician visit to examine whether the issue is related to damaged external cabling, which can occur due to various factors like inclement weather or construction work. It’s also possible that the modem itself is defective and requires replacement.
The post How to Fix a Spectrum Modem with Flashing Blue and White Lights appeared first on Appuals.
]]>The post Arris Router Login: Default Name, Password & IP Address appeared first on Appuals.
]]>
It’s important to know how to log in to your Arris router and adjust its settings as needed. In this article, we’ll walk through the essential steps to log in to your Arris router, configure its settings, and manage your network smoothly and securely.
Why You Might Want to Log in to Your Arris Router
Logging in to your Arris router opens up many options for managing your network. Here are some key reasons why you might want to access your router’s settings:
- Security: Protect your network from unauthorized access and online threats. Logging in allows you to change default passwords, hide your network (SSID), and adjust other important security options.
- Performance: Improve your network’s speed and reliability by optimizing settings. You can adjust your router to work on 2.4GHz, 5GHz, or both bands to suit your needs.
- Customization: Give your network a personal touch by changing its name (SSID) and password, or by exploring advanced features as you wish.
- Troubleshooting: Diagnose and fix problems quickly by accessing your router’s settings.
Arris Router Default Username and Passwords
To log in to your Arris router for the first time, you’ll need to use its default username and password. Typically, these are:
- Default username: admin
- Default password: password
- Default IP address: 192.168.0.1 or 192.168.1.1
You can usually find this information on a sticker on the back of your router or on its packaging. We strongly recommend changing these default login details the first time you access your router’s settings to boost your network’s security.
How to Log in to Arris Router
Now that you have the username and password ready, let’s go through the steps. Here’s how to log in to your Arris router:
Step 1: Connect to Your Router
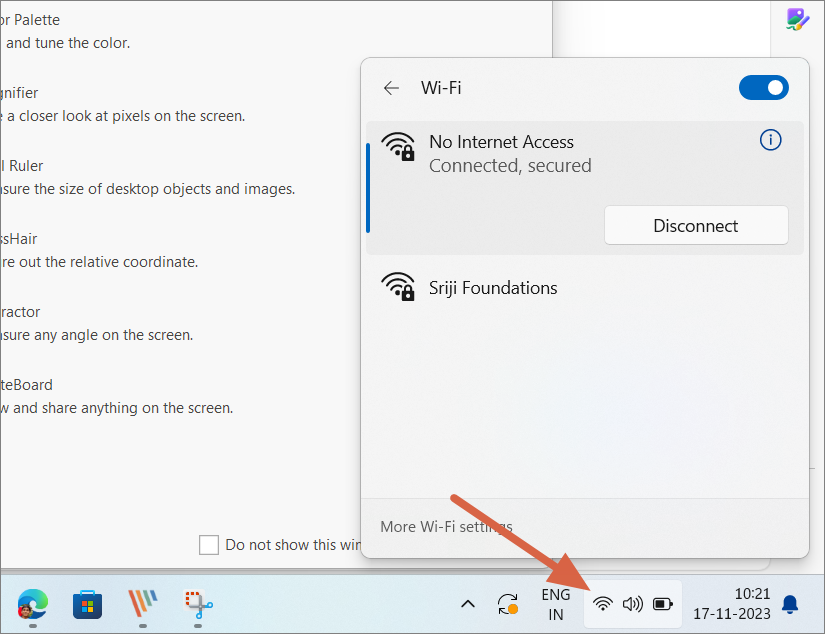
Before logging in, make sure your computer or mobile device is connected to your Arris router’s network. You can do this either by connecting through Wi-Fi or by using an Ethernet cable.
Step 2: Open the Administrator Portal
Open any web browser—such as Chrome, Safari, Edge, Firefox, or another browser of your choice. In the address bar, type the router’s IP address.
The default IP address for Arris routers is generally 192.168.0.1 or 192.168.1.1.
Step 3: Enter the Login Credentials

After you hit Enter, you’ll be taken to the router login page. Here, enter the default username (admin) and password (password). If you’ve changed these before, use your custom credentials.
Step 4: Access Router Settings
Once you’ve entered the correct information, you’ll have access to your Arris router’s settings page. Here, you can adjust a variety of network and security options to fit your needs.
How to Reset Arris Router
If you’ve forgotten your login credentials or want to start fresh, you can perform a factory reset on your Arris router. Here’s how to do it:
Please note that this will erase all your customized settings, so use this option as a last resort.
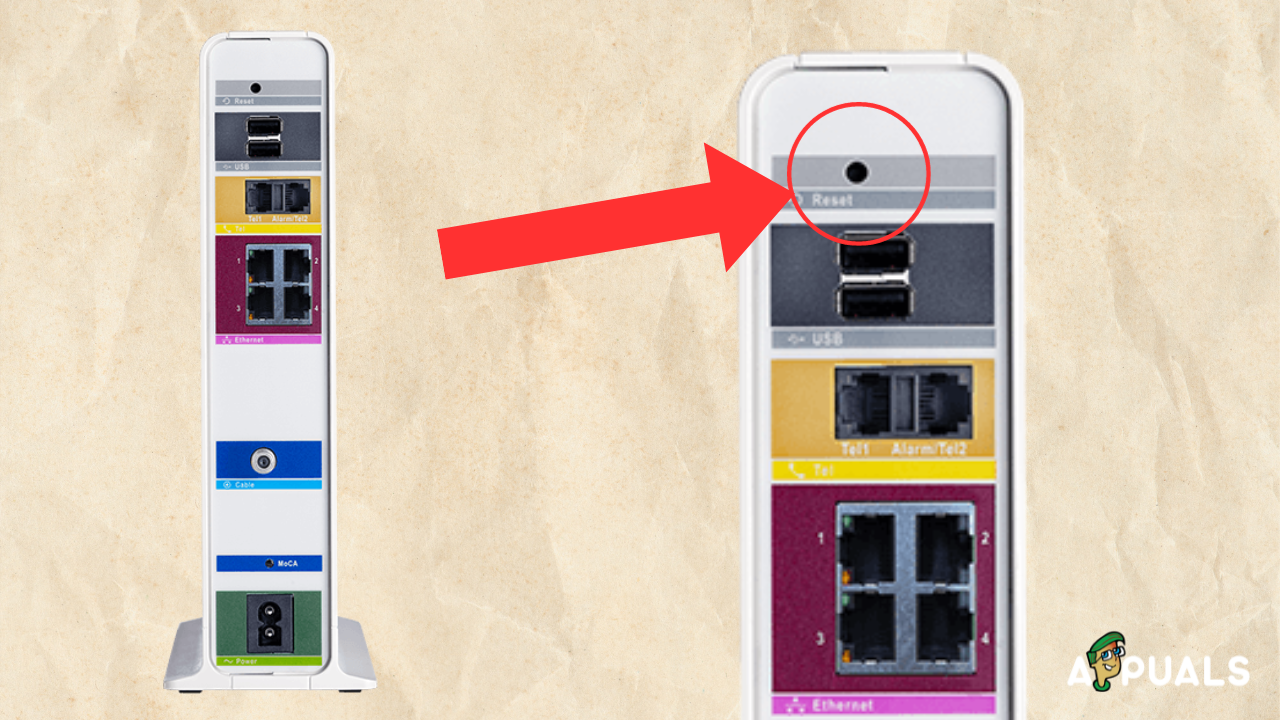
- Locate the reset button on your router. It’s usually a small, recessed button, so you might need a paperclip, SIM ejector tool, or a similar item to press it.
- Press and hold the reset button for about 15–30 seconds until the router’s lights begin to flash. This signals that the router is resetting.
- After the reset, your router will return to its original settings, including the default username and password.
How to Change Wi-Fi Network Name (SSID) and Password on Arris Router
If you want to personalize your Wi-Fi network name (SSID), or if you need to update your Wi-Fi password for better security, it’s easy to do through your router settings.
We have a dedicated guide on how to change Wi-Fi password and SSID for more detailed steps. Or, you can simply follow these instructions to update your SSID and password on your Arris router:
-
Open a new browser window and log in to your Arris Wi-Fi router using the steps above.
-
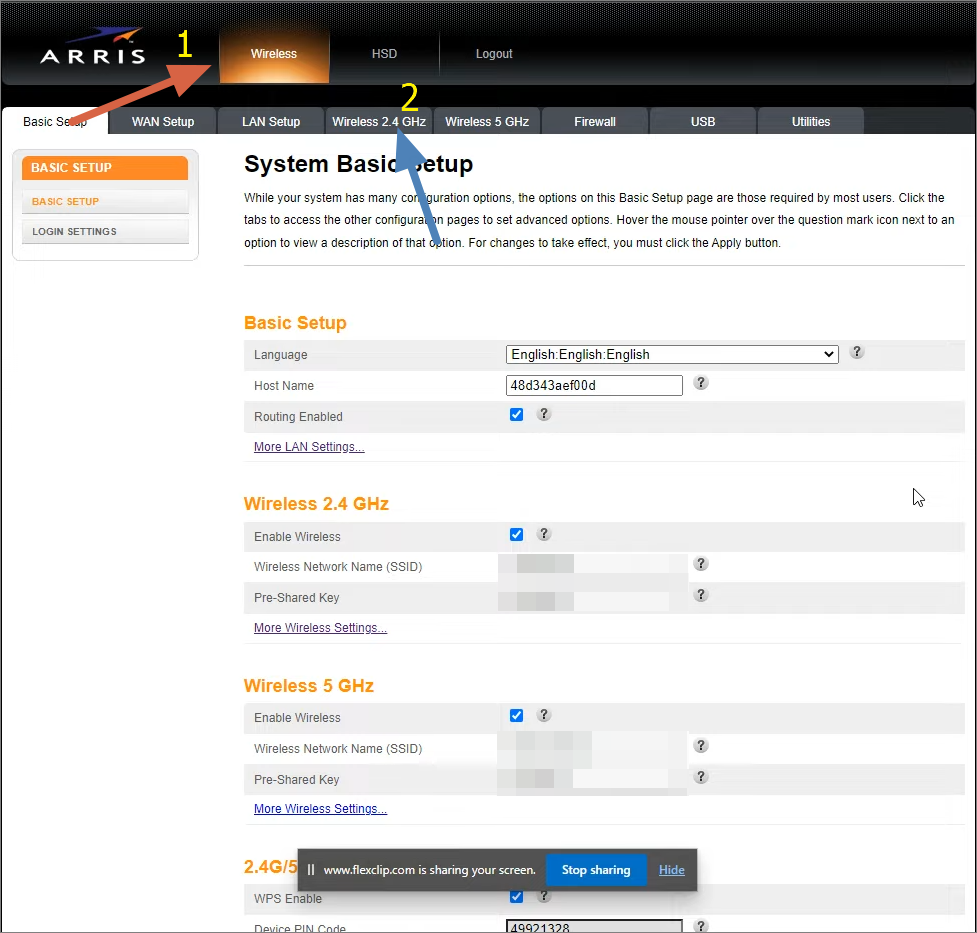
Go to the Wireless tab at the top, and then select Wireless 2.4GHz or Wireless 5GHz depending on which frequency you use, within the router’s settings page.
Head to Wireless Settings on Arris Router -
Find the Wireless Network Name (SSID) and Pre-Shared Key (Password) fields. Change these fields to whatever you’d like.
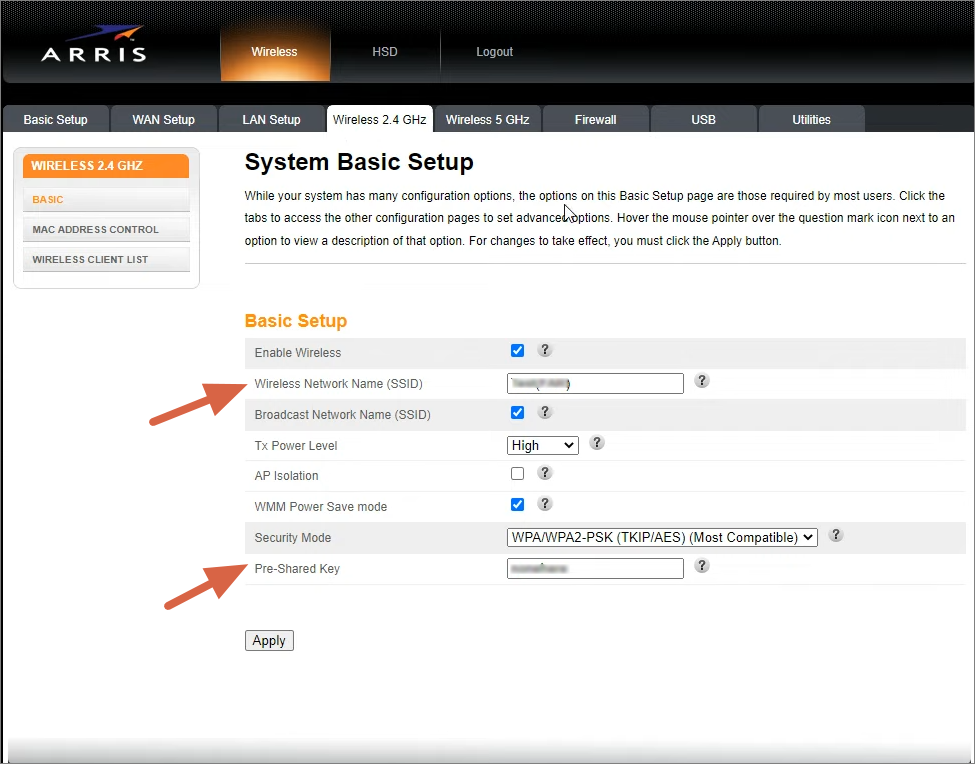
Change SSID Password on Arris Router -
Click Apply to save your changes. Your router will update with the new settings.
Your Wi-Fi network will now show the new SSID and require the updated password to connect.
The post Arris Router Login: Default Name, Password & IP Address appeared first on Appuals.
]]>The post How to Fix “500 Internal Server Error NGINX” for Client & Server? appeared first on Appuals.
]]>
Meaning of 500 Internal Server Error in Nginx
Like other software applications or servers, Nginx can encounter errors, which its built-in error reporting can identify. However, the 500 internal server error presents a unique situation. This error also appears on different web servers, such as Apache and IIS.
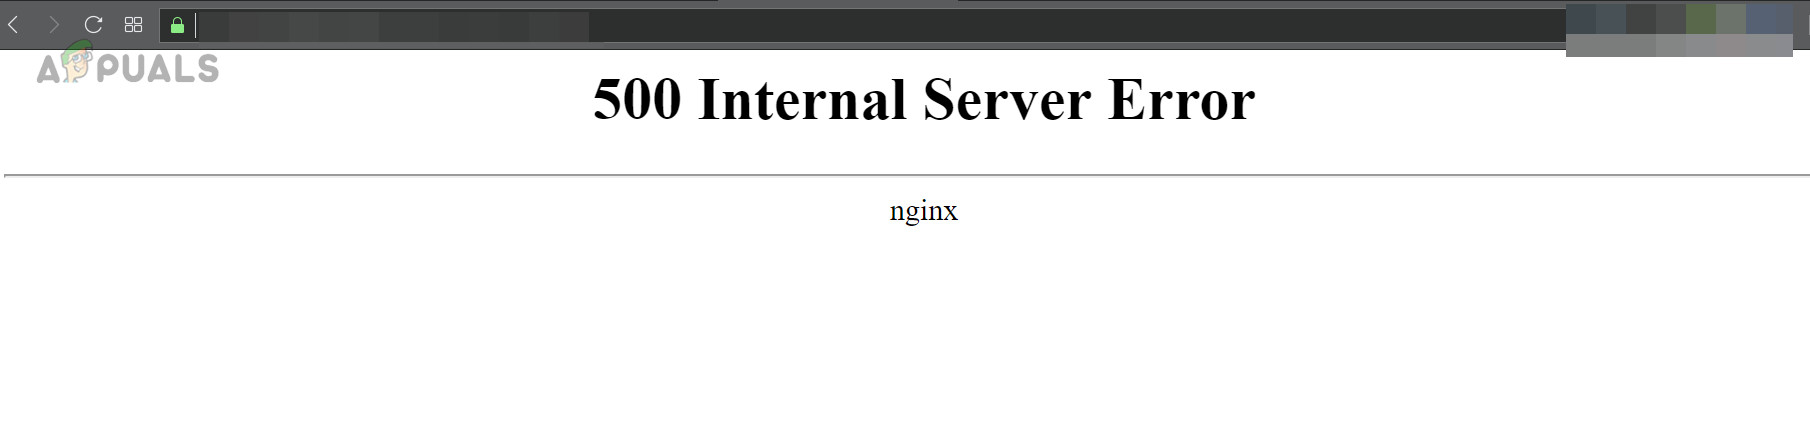
Error 500 is an HTTP status code indicating a server issue for which the root cause is unclear. Unlike other HTTP status codes, such as 403 (Forbidden) or 404 (Not Found), it doesn’t provide a clue about the potential cause.
How to Fix 500 Error on Nginx on the Client Side?
This error code represents a server-side issue that can typically be resolved on the server. However, in rare instances, your browser may contribute by creating a request the server can’t handle.
To verify the browser isn’t causing issues, open the website in a different browser, on another device, and on another network. If it works properly, clear the cache/data of the original browser and ensure that no browser extensions are causing the problem.
If the Nginx website still displays a 500 error, contact the server admin to resolve the issue.
How to Fix Nginx 500 Error on the Server Side?
This error could result from a simple syntax mistake to a backend application issue. As the error doesn’t disclose the root cause, its troubleshooting can be challenging. However, fear not, the systematic approach discussed below can resolve it.
1. Check Server Overload
If your server is overloaded, it may display the internal 500 error due to insufficient resources for essential tasks. Check the CPU usage, memory usage, and disk space availability using the Free, Top, or HTop command. The screenshot below illustrates the output after executing the top command.
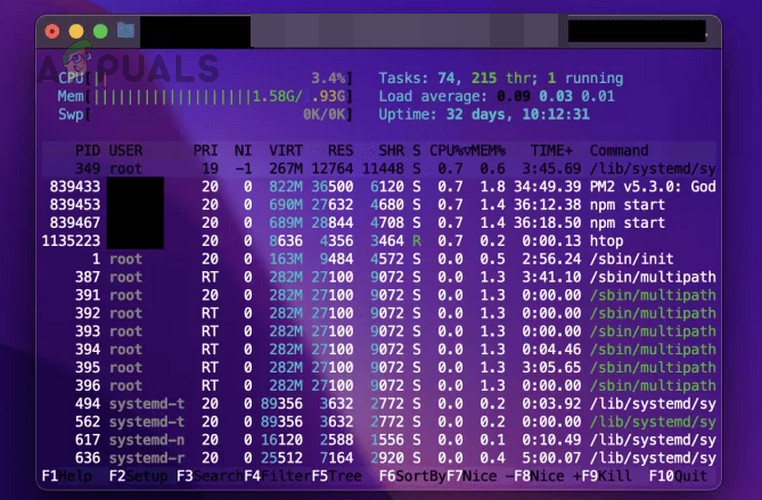
If the server is overloaded, adding more resources should clear the Nginx 500 error.
2. Verify the Configuration Syntax
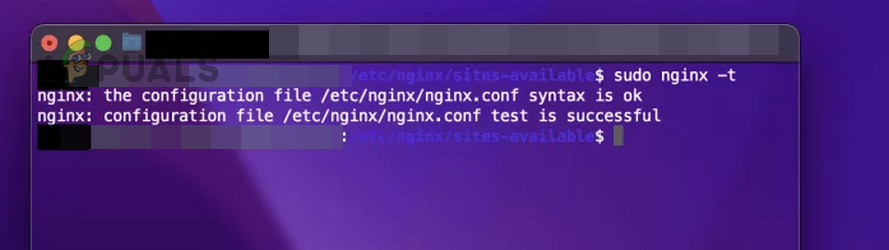
The most common cause of the 500 error on Nginx is incorrect server settings due to an error in the configuration syntax.
To fix this, go through the configuration files of Nginx and closely check the syntax for any errors or misplaced directives.
Next, review your Nginx configuration files for syntax errors or misplaced directives. Use commands such as nginx -t or nginx -t -c /path/to/nginx.conf to validate the syntax and identify any errors. Execute the following commands in the Terminal to detect any errors:
cd /etc/nginx/sites-available nginx -t
You can also use the following:
nginx -t -c /path/to/nginx.conf
If any syntax errors are detected, fix those and execute the following to restart/reload Nginx:
sudo service nginx restart nginx -s reload
In some cases, you may need to amend the configuration file as under:
try_files with try_files $uri =404
or
try_files $uri $uri/ /index.html; with try_files $uri/ $uri /index.php?$query_string;
3. Verify the Server Logs
When Nginx produces a 500 error, it also creates an entry in the internal error log, which can suggest the error’s root cause. Typically, server logs are located at:
/var/log/nginx/error.log
On a Linux distro, execute the following to open the server log:
cd /var/log/nginx cat error.log
On the resulting page, you can go through to check for any indication of the root cause. For example, look at the image below:
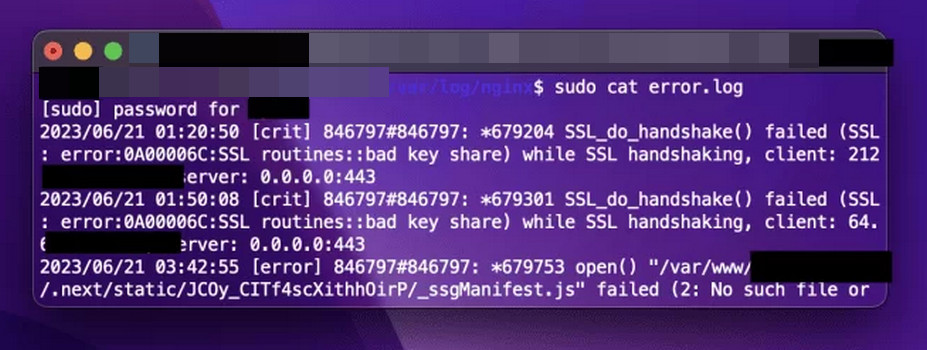
This indicates the server couldn’t establish an SSL/TLS connection with the client due to an SSL certificate issue. After identifying a problem in the logs, you can research potential causes and solutions online.
If you can’t open the log due to a ‘permission denied’ error for the folder, modify the Nginx.conf file by replacing ‘user www-data’ with ‘user root.’ After saving the file, restart Nginx and reopen the log.
4. Disable Cloudflare or Similar Services Temporarily
If you’re using Cloudflare or a similar service on your server, and it’s incorrectly configured or conflicting with recent modifications, temporarily disabling it can help diagnose the issue.
- Navigate to the Cloudflare dashboard and log in using your credentials.
- Go to Overview and expand Advanced.
- Click on Pause Website and confirm to do so. If your hosting provider has Cloudflare integrations, make sure they are also disabled.
- Make sure you have the right IPs for the website and verify if the Nginx 500 internal server error is cleared. Remember to check both HTTP and HTTPS versions of the website.
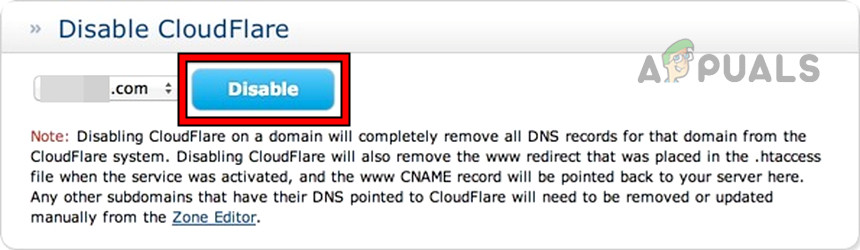
Disable CloudFlare on the Website
5. Check the Server Certificates
If any of your certificates have expired or gone invalid in your current setup, this will certainly cause an internal server error.
- Configure the Nginx to use the IP address of your website, not the domain name.
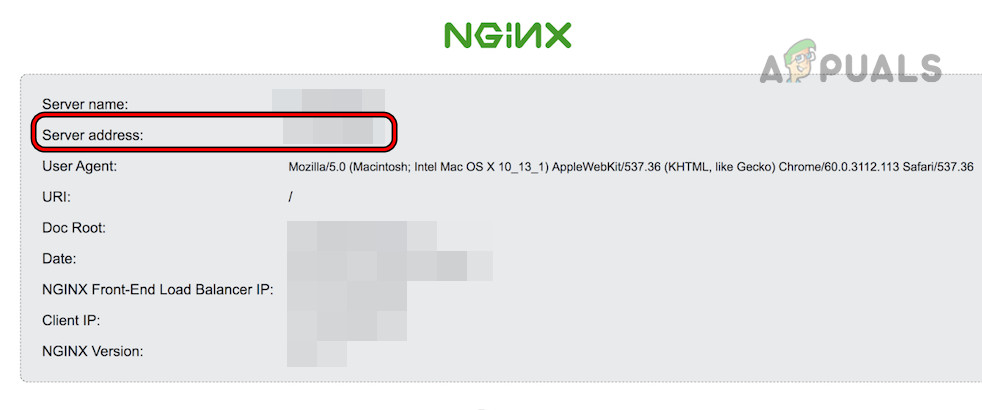
Use the IP Address of the Server in the Nginx Settings - Disable SSL Verification in proxy_pass and add the self-signed certificate to it. You can create one in the Cloudflare Dashboard (SSL > Client Certificates).
- See if the server is working correctly. If so, contact the certification issue authority or check your setup for any improper certificate configurations.
6. Check for any Backend Application Errors
If Nginx forwards client requests to another service, which fails to execute properly, it causes a 500 error. For instance, if the server forwards client requests to a backend application like NodeJS, and the application fails to function correctly, it results in the discussed error.
Remember, if the server log shows no errors, it typically indicates a backend issue.
To resolve this, inspect the backend application logs for any errors or exceptions. For instance, on WordPress, you’ll find the Node JS logs at:
/var/www/<your_site>.com/logs/error.log
7. Insufficient File Permissions
If the Nginx server lacks the necessary permissions to access or execute a file, it will cause a 500 error. For instance, an internal server error will occur on a WordPress site if the Nginx server can’t access or serve PHP or HTML files from the public_html folder.
To rectify this, you can modify the necessary Nginx permissions on the server-accessed files or directories using the chmod command, typically 755 for directories and 644 for files.
8. Verify Plugin Compatibility
Plugins crucially enhance server capabilities. But malfunctioning, outdated, or overly updated plugins may cause internal server errors. For example, updating WordPress can disrupt your website’s functionality as many plugins become incompatible until they are updated.
To resolve this, ensure that each plugin is compatible with the server software and other plugins. Although it may seem tedious, it’s worthwhile. Alternatively, try disabling all plugins to see if this eliminates the error.
If you recently updated your server software, try reverting to the previous version (if possible) to see if the error resolves. This will confirm if the update is causing the issue. You can delay the software update until all plugins have confirmed compatibility.
9. Check for a Faulty Script
Like plugins, scripts are crucial for certain website functionality. An invalid or updated script incompatible with the server environment can cause an internal server error.
You can solve this by disabling scripts and checking the Nginx server. If it works correctly, go through the scripts and try to find out the problematic ones.
10. Increase the Server Timeout Value
If the server timeout value is shorter than Nginx’s response time, you will encounter an internal server error. Similarly, if the server’s request takes longer than Nginx’s response time, the issue will occur.
Increasing your server’s timeout value should solve the issue. You can find specific instructions online.
11. Ensure all the Redirections are Working
Ensure all redirections are functioning correctly when Nginx operates as a proxy server. If the server cannot redirect a client request to the backend server, a 500 error will occur.
Temporarily disable all redirections to verify proper operation. If successful, reactivate each one individually to identify the faulty redirect. Once detected, research online to find potential causes and solutions for this specific redirection failure.
12. Using PHP with Nginx
Nginx doesn’t natively support PHP; therefore, PHP misconfigurations with Nginx can result in an internal server error.
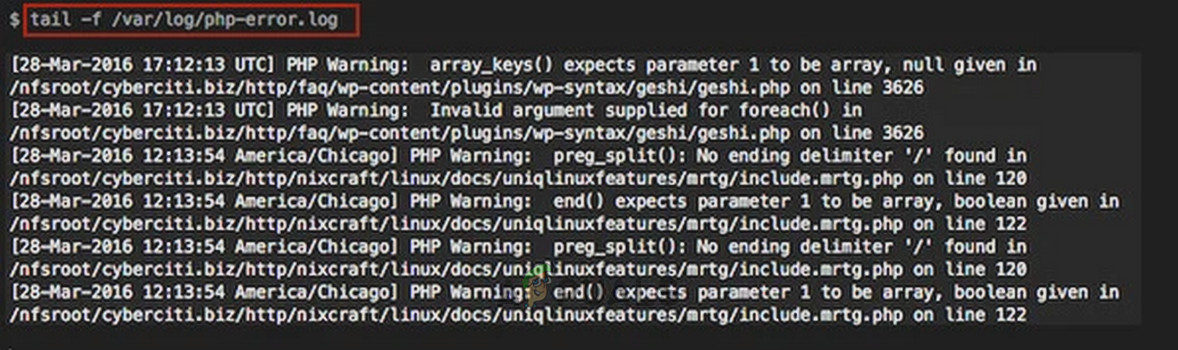
To resolve this issue, verify the PHP integration with Nginx. If PHP display errors are disabled, the server will return an Nginx error 500 when PHP encounters an error. Enabling PHP errors can simplify troubleshooting.
On CentOS 7, execute the following:
tail -f /var/log/php-fpm/www-error.log
Alternatively, go to
/etc/php.ini
And change
display_errors = Off
to
display_errors = On
You may also look for a better PHP handler (such as PHP-FPM) and enable the Nginx cache.
13. Use the Bare Minimum Approach
If you still cannot clear the error 500, you can use the bare minimum approach to solve the problem.
- Create a backup of your site and replace the site content with a simple index.html having some plain text.
- Check if the website is working and start adding the directives, features, services, plugins, scripts, etc. one by one.
- Make sure to test the site after each step and see if the problem reoccurs.
- Add back the content to your site and see if the content is causing the issue.
- Once the problematic element is found, you can fix it by searching the Internet.
How to Avoid the Future Recurrence of the Nginx 500 Server Error
You can take the following steps to avoid any recurrence of Nginx 500 error:
- Perform regular server maintenance.
- Make sure the website code and content (images, videos, etc.) are optimized for your setup.
- Establish a CDN to serve the website through its cache.
If you have a query, we are available in the comments section.
The post How to Fix “500 Internal Server Error NGINX” for Client & Server? appeared first on Appuals.
]]>The post How to Turn OFF BT Wi-Fi on your Smart Hub 2 appeared first on Appuals.
]]>
Now you can either get these services on your BT mobile or a BT broadband router like the Smart Hub. Since BT routers offer free Wi-Fi to those with BT mobiles, you might not want to share your router’s connection with them for some reason.
But for that, you will need to turn off BT-WiFi on your Smart Hub, Smart Hub 2, or any other model that you have. Today, we’ll be looking at how to do this on Smart Hub 2.
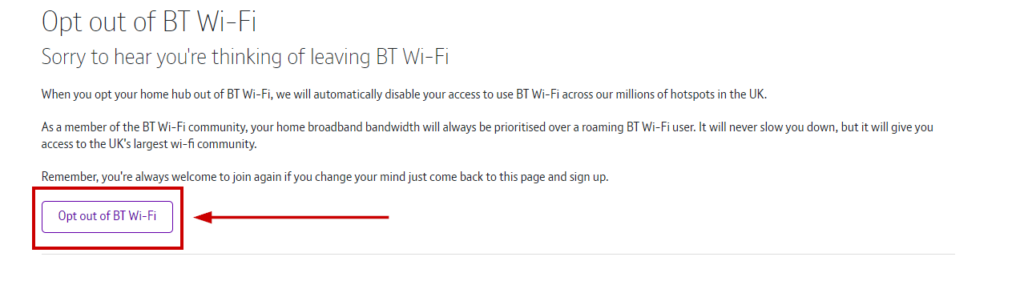
Just for your information, your home broadband bandwidth will be the utmost priority, and any roaming BT Wi-Fi user won’t be preferred over you. This means your internet speed won’t slow down.
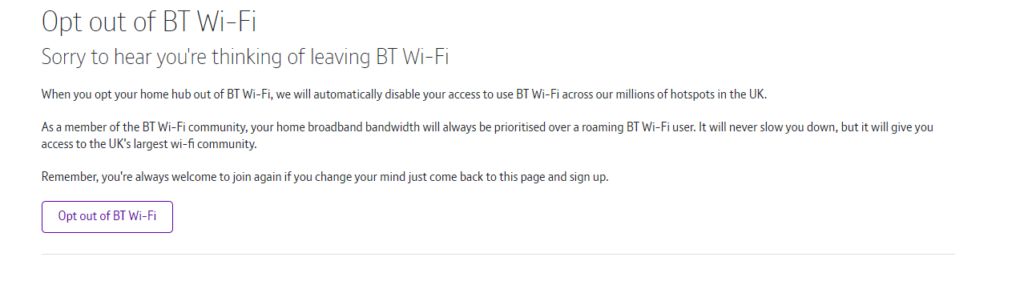
Also, keep in mind that opting out of BT Wi-Fi will disable your permission to use BT Wi-Fi spread across millions of hotspots in the United Kingdom.
How do I Disable BT Wi-Fi on My Smart Hub 2?
Opting out of BT WiFi is a very simple process and can be done from any internet browser. I will list down all the steps below:
- Open any web browser and log in to MyBT.
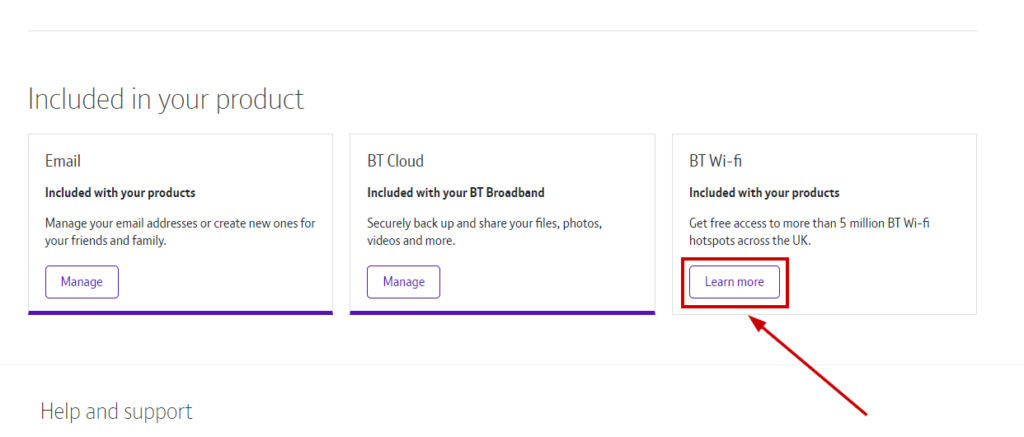
- Select Your Products and go to the Included in your product section.
- Click Learn More inside the BT Wi-Fi section.
- Now click Opt out of BT Wi-Fi.
After opting out, there’s always the option to join them again by signing up for BT once more. The steps will be the same as the first time you signed up for the broadband service.
If you’re unable to go through any step, then write it down in the comments below, and we’ll look into the matter. Moreover, you can contact BT Support for further information related to any issue with your BT Wi-Fi, BT mobile, or BT broadband.
The post How to Turn OFF BT Wi-Fi on your Smart Hub 2 appeared first on Appuals.
]]>The post URI vs URL: Explainer, Differences, Relation & Uses appeared first on Appuals.
]]>This article will delve into URIs and URLs, exploring their differences, relation, and uses.
Table of Contents
What Is URI and URL?
URI: Acronym for Uniform Resource Identifier, URI is used to identify a resource such as an image or video on the web.
URL: Acronym for Uniform Resource Locator, URL is used to locate a resource such as an image or video on the web.
Still not clear about the concept? Let me explain with an example: You go to the public library near your home and ask the librarian, “Do you have the novel The Hobbit?” The librarian replies, “Yes, it is on Shelf 3, Row 7 in the Fiction section.” You go to Row 7 in the Fiction Section and find the novel there. In this example, “The Hobbit” is the URI as it identifies the book, and “Shelf 3, Row 7 and Fiction Section” is the URL as it locates the book in the library.
How are URL and URI Related?
URL and URI are closely related to one another. In most cases, the URL is a subset of the URI. This is because while URI is used to identify the resource, it can also contain the address of the resource. Whereas the URL only contains the address of the resource but does not identify the resource.
SEE ALSO: How to Find Your IP Address on Windows & Mac ➜
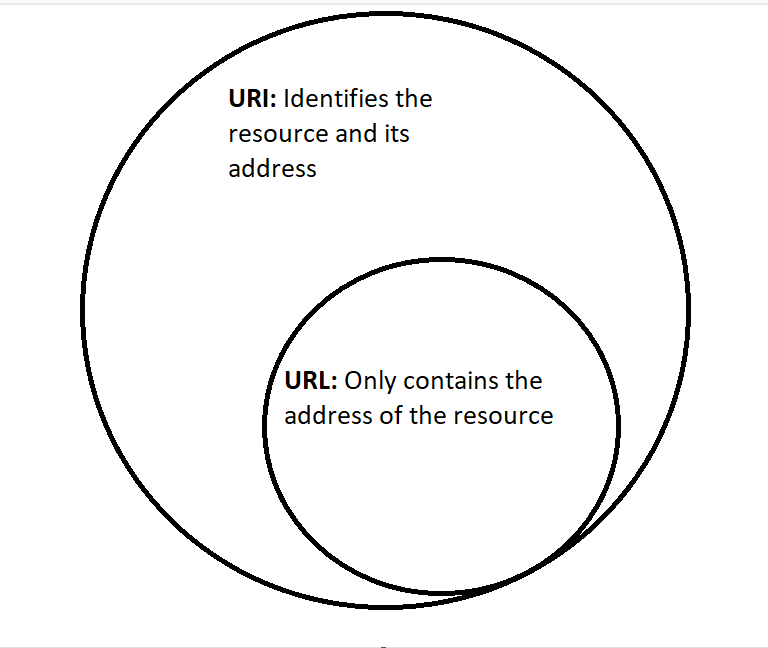
As you can see in the illustration above, all URLs are URIs, but not all URIs are URLs. This is because there is also another subset of URI known as URN, but we won’t be discussing it as it would only further complicate the idea.
URL vs Hyperlinks
Another thing to clarify is the difference between URLs and hyperlinks (links for short). Many people confuse both of the terms and think they are the same. However, this is not the case. As we know from before, URLs locate a resource on the internet. HyperLinks, on the other hand, is an HTML element that allows you to navigate between different URLs on the web. Let me show you an example:
“If you want to know about the best applications for insect identification, click here.”
In this example, the “here” hyperlink will use the URL of our article “The Best Bug Identifier Apps for Android & iPhone in 2023” and load it on your browser on a separate tab. Sometimes it might load in the same tab depending on the website settings, but you get the point.
Syntax of URL and URI
URL is the subset of URI, so their syntax is almost identical. Given below is the generalized syntax for both of them.

- Scheme: Scheme indicates the protocol or method used to access the resource. Typical schemes include “http,” “https,” “ftp,” “mailto,” and more.
- Domain: The domain name (or IP address) identifies the server where the resource is hosted. In this case, the resource was hosted at Appuals.
- Path: The path specifies the location and structure of the resource on the host server.
- Parameters: This is the additional information provided with the resource.
- Anchor: Anchor represents the specific resource on the hosting server. In this example, it was an image, hence .jpg.
These are the main parts of URI and URL; however, kindly note that most are optional. The only required URL parts are Scheme, Domain, and Path. The only mandatory part of a URI is the Scheme.
Difference Between URI and URL
Now that we have a general idea about URIs and URLs, let’s look at their fundamental differences:
| URI | URL |
|---|---|
| URI stands for Uniform Resource Identifier. | URL stands for Uniform Resource Locator. |
| A URI comprises a scheme and the specific resource identifier. | A URL contains the scheme, domain, path, parameter (optional), and anchor (optional). |
| The primary purpose of a URI is to uniquely identify the resource. | The primary purpose of a URL is to locate a resource on the web. |
| URI has two subsets URL (specifies the location) and URN (specifies the name). | URL is the subset of the URI. |
| An example of a URI can be urn:ISBN:0000000000 | An example of a URL would be https://appuals.com |
Uses of URI and URL
We will mention some technical terms while listing the uses of URI and URL. Do not worry if you do not understand them. Those are intended for our technical audience.
URI
- URIs serve as resource identifiers, applicable to multiple types of resources on the web.
- They are used in technologies like XML namespaces to provide unique identifiers for elements in documents.
- URIs are used in distributed computing, naming resources in web services, APIs, and RESTful architectures.
URL
- URLs are important for navigating the World Wide Web, linking between web pages, and accessing resources online.
- URLs provide a complete web address, including the protocol, domain name, and path, providing the exact location and access to web content.
- URLs are used for search engine optimization (SEO) to help search engines rank web pages.
Conclusion
Hopefully, by now, you are pretty clear about URL and URIs, their differences, and their uses. We have tried to keep this article as simple as possible to be accessible to a broader audience. If you are still unclear or have any additional questions, feel free to drop them down below.
FAQs
What is the difference between a URI and a URL?
A URI (Uniform Resource Identifier) is a broad term for identifying any resource. A URL (Uniform Resource Locator) is a specific type of URI that gives the address of a resource.
Can URLs and URIs be changed?
Yes, both of these can be changed. However, for the stability of web resources, you should keep a permanent URI and URL.
What are the essential parts of a URL?
The essential parts of a URL are scheme, domain, and path. All of the other parts are optional.
Do URLs impact search engine optimization?
URLs play a role in SEO because search engines use them to rank web pages. Having clear, descriptive URLs can improve a website’s search engine visibility.
The post URI vs URL: Explainer, Differences, Relation & Uses appeared first on Appuals.
]]>