
Linux distros are operating systems that include the Linux kernel along with various essential programs like package installers, file management apps, etc. They are designed to offer users full control over their system, embodying Linux’s philosophy. They are fully open-source.
The post Fix: Verifying Shim SBAT Data Failed – Security Policy Violation appeared first on Appuals.
]]>This happens because Linux uses an older startup file (called Shim or GRUB) that doesn’t match the latest security rules introduced by Microsoft through recent Windows updates. These updates make Secure Boot more strict. If the Linux bootloader hasn’t been updated or properly configured, the system may fail to boot and show this error.
Luckily, there are a few ways to fix this issue depending on your setup. Whether you’re still using Linux alongside Windows or no longer need it, the following methods will help you get your system booting normally again.
1. Temporarily Disable Secure Boot, Update Shim, Then Re-enable It
The main reason behind this error is that your Linux bootloader (usually Shim) is outdated and no longer trusted by Secure Boot. To fix this, you’ll first need to temporarily disable Secure Boot, then update Shim to a secure version, and finally turn Secure Boot back on for full system protection.
Step 1: Disable Secure Boot
- Restart your PC and enter BIOS/UEFI by pressing the key shown during startup (commonly Del, Esc, F2, or F10).
- Navigate to the Boot or Security tab.
- Find the Secure Boot option and set it to Disabled.
- Press F10 to save changes and exit BIOS.
- Boot into your Linux system.

Step 2: Delete SBAT Policy and Update Shim in Linux
- Once inside Linux, press Ctrl + Alt + T to open the Terminal.
- Delete the existing SBAT policy using this command:
sudo mokutil --set-sbat-policy delete

- Reboot your system once.
- Open the Terminal again and run this command to update Shim:
sudo apt update && sudo apt upgrade shim-signed

- Once the update completes, reboot your PC again.
Step 3: Re-enable Secure Boot
- Restart your PC and enter BIOS again.
- Go to the Secure Boot option and set it back to Enabled.
- Save changes and exit BIOS.
- Your system should now boot normally with Secure Boot turned on and a valid, updated Shim.
2. Change Boot Order in BIOS to Prioritize Windows Boot Manager
If your system still shows the SBAT error or tries to boot into Linux even after fixing Shim, the issue might be due to the wrong bootloader being selected. On dual-boot systems, both Windows and Linux install their own boot managers (Windows Boot Manager and GRUB/Shim). If the system tries to use the Linux one first, it may trigger this error. You can fix this by changing the boot order in BIOS so that Windows Boot Manager loads first.
- Restart your PC and enter BIOS/UEFI by pressing the key shown during startup (usually Del, Esc, F2, or F10).
- Navigate to the Boot tab or section.
- Look for Boot Priority or Boot Option Priorities.
- Set Windows Boot Manager as the first boot option.
- Move GRUB, Shim, or any Linux boot entries to a lower priority.
- Press F10 to save changes and exit BIOS.
- Your system should now boot directly into Windows without loading the Linux bootloader first.

3. Disable Fast Boot in BIOS
If you’re still getting the error, the problem might be caused by a BIOS feature called Fast Boot. This setting speeds up startup by skipping hardware checks, but it can block Linux or other operating systems from loading correctly especially in dual-boot setups. Disabling Fast Boot forces the system to check all hardware properly and avoids conflicts with bootloaders like Shim or GRUB.
- Restart your PC and enter BIOS/UEFI by pressing the key shown during startup (usually Del, Esc, F2, or F10).
- Go to the Boot tab or section. On some systems, you may need to switch to Advanced Mode first.

- Look for a setting called Fast Boot.
- Set it to Disabled.

- Save your changes (press F10 or use the Save & Exit option).
- Restart your PC and try booting again.
4. Reset Windows to Remove Conflicting Bootloaders
If you’re no longer using Linux and just want your PC to boot into Windows without errors, resetting Windows is a reliable fix. This process removes any leftover Linux bootloaders (like GRUB or Shim), repairs damaged Windows startup files, and resets Secure Boot settings to default. It’s a good option when other solutions haven’t worked or if your system still shows the SBAT error after startup.
- Start by force-restarting your PC 3–4 times to trigger the Automatic Repair screen.
- Once the screen appears, click on Troubleshoot.
- Click on Reset this PC.
- Choose Keep my files if you want to preserve personal data, or Remove everything if you’re starting fresh.
- Follow the on-screen steps to complete the reset.

Once the reset is complete, Windows will boot normally using the default bootloader. If needed, you can re-enable Secure Boot through BIOS for added protection.
The post Fix: Verifying Shim SBAT Data Failed – Security Policy Violation appeared first on Appuals.
]]>The post How to Use Cubic to Make Your Own Linux Distro? appeared first on Appuals.
]]>One tool that can help you achieve this is Cubic, which offers a range of features designed to simplify and enhance the process of customizing your Ubuntu distribution and other Debian-based systems.
Let’s take a closer look at what Cubic is, how it works, and why it’s become the go-to modern tool for customizing Ubuntu and other Debian-based distributions.
Table of Contents
 System Requirements
- Step 1: Install Cubic
- Step 2: Launch Cubic
- Step 3: Set Up Your Project
- Step 4: Choose the ISO File
- Step 5: Customize Volume Information
- Step 6: Decompress the ISO
- Step 7: Customize the Filesystem
- Step 8: Customize Desktop Environment and Settings
- Step 9: Finalize Your Custom ISO
- Step 10: Test Your Custom Distro
- Step 11: Finalization and Distribution
- The Bottom Line
Cubic, or Custom Ubuntu ISO Creator, provides a user-friendly graphical interface that allows you to create a bootable ISO image of your customized Ubuntu system with ease. It simplifies the entire process, making it more accessible for users of all skill levels by offering a more streamlined and efficient approach to customizing Ubuntu, compared to older, more manual methods.

With Cubic, you can easily add or remove packages, modify system settings, and even include your own scripts—all within a single environment.
This guide will take you through the entire process, from installation to customization.
System Requirements
Before you begin, ensure your system meets the following requirements:
- Operating System: Ubuntu 20.04 LTS or later, or Linux Mint based on Ubuntu.
- RAM: At least 2 GB (4 GB or more recommended).
- Disk Space: A minimum of 5 GB of free space for the project directory and ISO files.
If your system meets the minimum requirements, you’re all set to follow the guide below.
Step 1: Install Cubic
Before you can start creating your custom ISO, you need to install Cubic on your system. Here’s how:
- Open the terminal by finding it in your applications menu or by pressing Ctrl + Alt + T.

Open a New Terminal - You need to enable the Universe Repository, as this is necessary for installing Cubic.
sudo add-apt-repository universe
Enabling the Universe Repository to install Cubic - Add the Cubic PPA by using the command that adds the repository containing Cubic.
sudo add-apt-repository ppa:cubic-wizard/release
Adding the Cubic PPA for installation - Refresh your package list to include the new PPA.
sudo apt update
Updating the package list to include the new Cubic PPA - Now, install Cubic using the following command.
sudo apt install --no-install-recommends cubic
Installing Cubic from the newly added repository
Note: The –no-install-recommends option keeps the installation lightweight by not including extra packages.
Step 2: Launch Cubic
Once installed, you can launch Cubic by finding it in your applications menu and clicking to open it, or by typing cubic into the terminal.

Step 3: Set Up Your Project
When you launch Cubic, you will be guided through several steps to create your custom ISO.
- Choose a folder where Cubic will store your project files, and it’s best to create a new folder for this purpose.
Example: Create a folder named CubicProject on your Desktop.

Cubic Interface - Click on the folder icon in Cubic and navigate to your newly created folder, then select it.

Browsing to and selecting your newly created folder in Cubic
Step 4: Choose the ISO File
- Start by providing an Ubuntu ISO file. In Cubic, you can use the Ubuntu ISO or any of its derivatives. For this guide, we’ve chosen to work with the Linux Mint ISO, but the process for customizing an Ubuntu ISO is exactly the same. You can download the latest Ubuntu ISO from the official Ubuntu website. If you’re using the Linux Mint ISO, download the latest Cinnamon Edition from its official site.

Downloading the Linux Mint Cinnamon ISO from the official site for customization - After downloading, click on the Browse button in Cubic and locate your downloaded ISO file.

Locating and selecting your downloaded ISO file in Cubic
Step 5: Customize Volume Information
Customize the Volume ID, Name, and Version of your ISO.
Example:
- Volume ID: MyCustomDistro
- Name: My Custom Distro
- Version: 1.00

Explanation: This information will be displayed when you install or boot from your custom ISO.
Step 6: Decompress the ISO
Click Next to start the process of decompressing the ISO. This may take a few moments, depending on your system’s speed.
 Starting the decompression process of the ISO
Step 7: Customize the Filesystem
Once the ISO is decompressed, you will enter a chroot environment where you can customize the filesystem.

- If you want your custom ISO to include the latest software, start by running the following command in the terminal:
sudo apt update && sudo apt upgrade
Using the terminal to update and upgrade software in your custom ISO You can run commands to install software, remove packages, or make other changes.
Example to Install a Package:
sudo apt install package-name
Installing a package in your custom ISO: Example with keepassxc Replace package-name with the name of the software you want to install.
- To remove packages you don’t want in your custom distro, use the following command:
sudo apt purge package-name
Removing unwanted packages from your custom ISO: Example with libreoffice and thunderbird - You can edit configuration files to change system settings; for example, to modify the sources.list file:
sudo nano /etc/apt/sources.listExplanation: nano is a text editor that runs in the terminal. Use it to make changes and save with Ctrl + O, then exit with Ctrl + X.
Step 8: Customize Desktop Environment and Settings
- You can modify the desktop environment settings, such as changing the theme or icons.
Example: To install a new theme, you might run:
sudo apt install gnome-themes-standard - To add files or wallpapers, you can copy them directly into the filesystem. For example, to add a wallpaper:
cp /path/to/your/wallpaper.jpg /usr/share/backgrounds/ - Set the wallpaper you want by typing:
gsettings set org.gnome.desktop.background picture-uri file:///usr/share/backgrounds/custom_wallpaper.jpg
Adjust the command for other desktop environments as needed.
Step 9: Finalize Your Custom ISO
- After making all your desired changes, click Next to exit the chroot environment.

Completing the customization and exiting the chroot environment - You will now see a list of all the packages included in the live ISO. You can check or uncheck packages to include or exclude and choose between a minimal and standard installation (the selected packages will be removed).

Reviewing and adjusting package selections for your live ISO - After customizing the filesystem and reviewing the package selections, you will have the option to choose which kernel to use for booting the live ISO. Select the kernel that best fits your needs (the latest kernel will be selected by default).

Choosing the kernel for booting your live ISO after customization - If you want to automate the installation process, you can create or modify preseed files. This allows you to skip prompts during installation. Navigate to the Preseed tab in Cubic to create or edit these files.

- Finally, select the compression type for your ISO.
Options include:- X-Z: Smaller ISO, longer packing/unpacking time.
- LZ4: Larger ISO, minimal packing/unpacking time.
- GZIP: A balanced option.

Selecting the compression type for your ISO: X-Z, LZ4, or GZIP
- Click the Generate button to create your custom ISO. This process may take some time, depending on the changes you’ve made.

Generating your custom ISO: Click the button to start the creation process
Step 10: Test Your Custom Distro
- To test your new ISO, you can use VirtualBox or another virtualization software. If you don’t have VirtualBox, you can install it using:
sudo apt install virtualbox - Open VirtualBox and click New to create a new virtual machine.
- Choose OS Type: Select Linux and Ubuntu (64-bit).
- Allocate Resources: Assign at least 2 GB of RAM and create a virtual hard disk.
- In the virtual machine settings, go to Storage, select the empty optical drive, and click on the disk icon to choose your custom ISO.
- Start the virtual machine and ensure that it boots from the ISO. You should see your customized version of Ubuntu/Linux Mint.

Step 11: Finalization and Distribution
- Use tools like
Rufus/balenaEtcher (for Windows) orEtcher(for Linux) to create a bootable USB drive from your custom ISO.

- If you want to share your custom ISO, consider uploading it to a file-sharing service or hosting it on a personal website. If you followed all the steps carefully, you have successfully created your own custom Linux distribution using Cubic.
Feel free to explore further customizations and enjoy your new distro! If you have any questions or run into issues, don’t hesitate to seek help from the Linux community, as they are often very supportive and knowledgeable. Let’s wrap up by addressing a common question: Is it better to use Ubuntu as is, or should you consider customizing it?
The Bottom Line
Deciding whether to stick with Ubuntu’s default setup or customize it with tools like Cubic really comes down to what you need. The default setup is perfect for its simplicity and reliability, but customization can give you a more personalized and potentially powerful experience. Ubuntu’s flexibility lets you choose what suits you best.
If you run into any issues while customizing your Ubuntu ISO with Cubic, you can always revisit this guide for help or reach out to the supportive Ubuntu community, which is likely to have solutions for you. And if you have any other questions about this guide, don’t hesitate to leave a comment below. Thanks for reading!
The post How to Use Cubic to Make Your Own Linux Distro? appeared first on Appuals.
]]>The post The Best Linux Distros for Gaming [Max Performance] appeared first on Appuals.
]]>
Linux distros, or distributions, are operating systems based on the Linux kernel with added components like installation programs and management tools. Each distro has unique strengths and capabilities. Since Linux is open-source, anyone can create or modify a distro, making it highly customizable for gaming and other uses.
Without further ado, let’s dive into some of the best Linux distros for gaming:
1. Nobara
Pros
- Debloated OS
- Pre-installed GPU drivers
- Supports OpenRGB and OBS Studio
- Supports Blender
- Pre-installed WINE layers
- Pre-installed Proton and Steam
- Optimized for streaming
Cons
- Slow updates
- Can be a bit buggy for some users
Nobara is a modified version of Fedora, which itself is a Linux distro. While Fedora is more suited for general everyday use, Nobara is primarily focused on gaming. By debloating (removing unwanted system apps) Fedora, implementing WINE layers, including GPU drivers for both AMD and NVIDIA out-of-the-box, pre-installed Steam and Proton, and much more.
Although it may be relatively new, Nobara is definitely the best Linux distro for gaming. It comes with all the essentials pre-installed to get you started with gaming, minus the usual bloatware, offering enhanced performance compared to most distros. It also supports OBS Studio and OpenRGB for the best gaming experience possible.
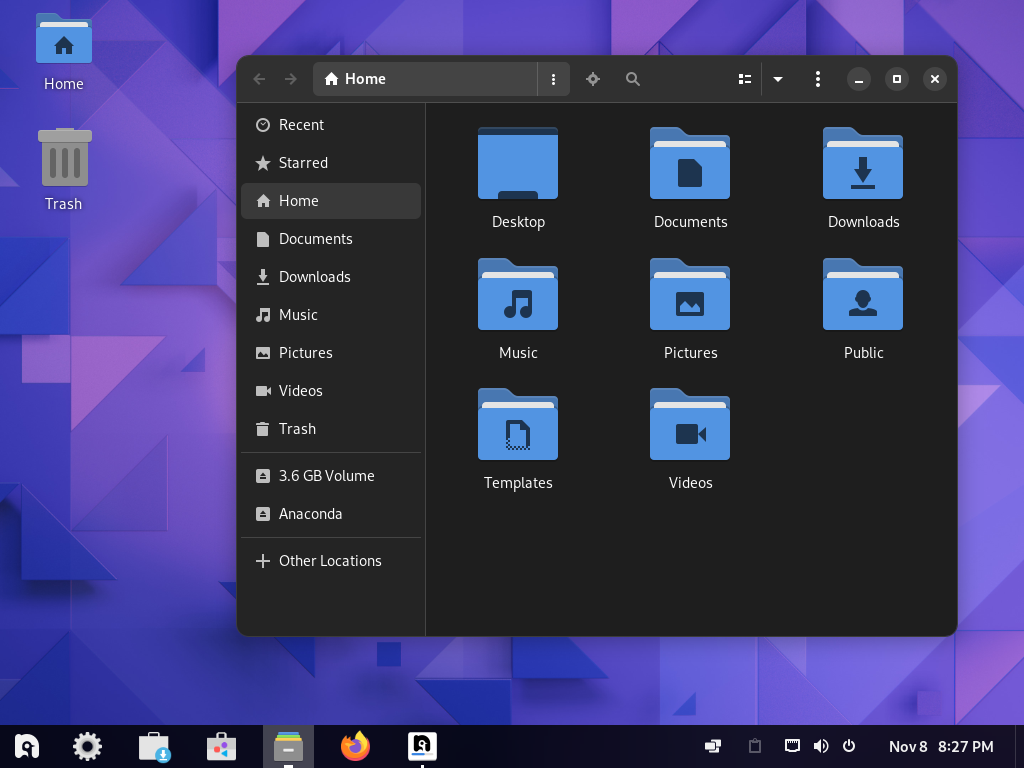
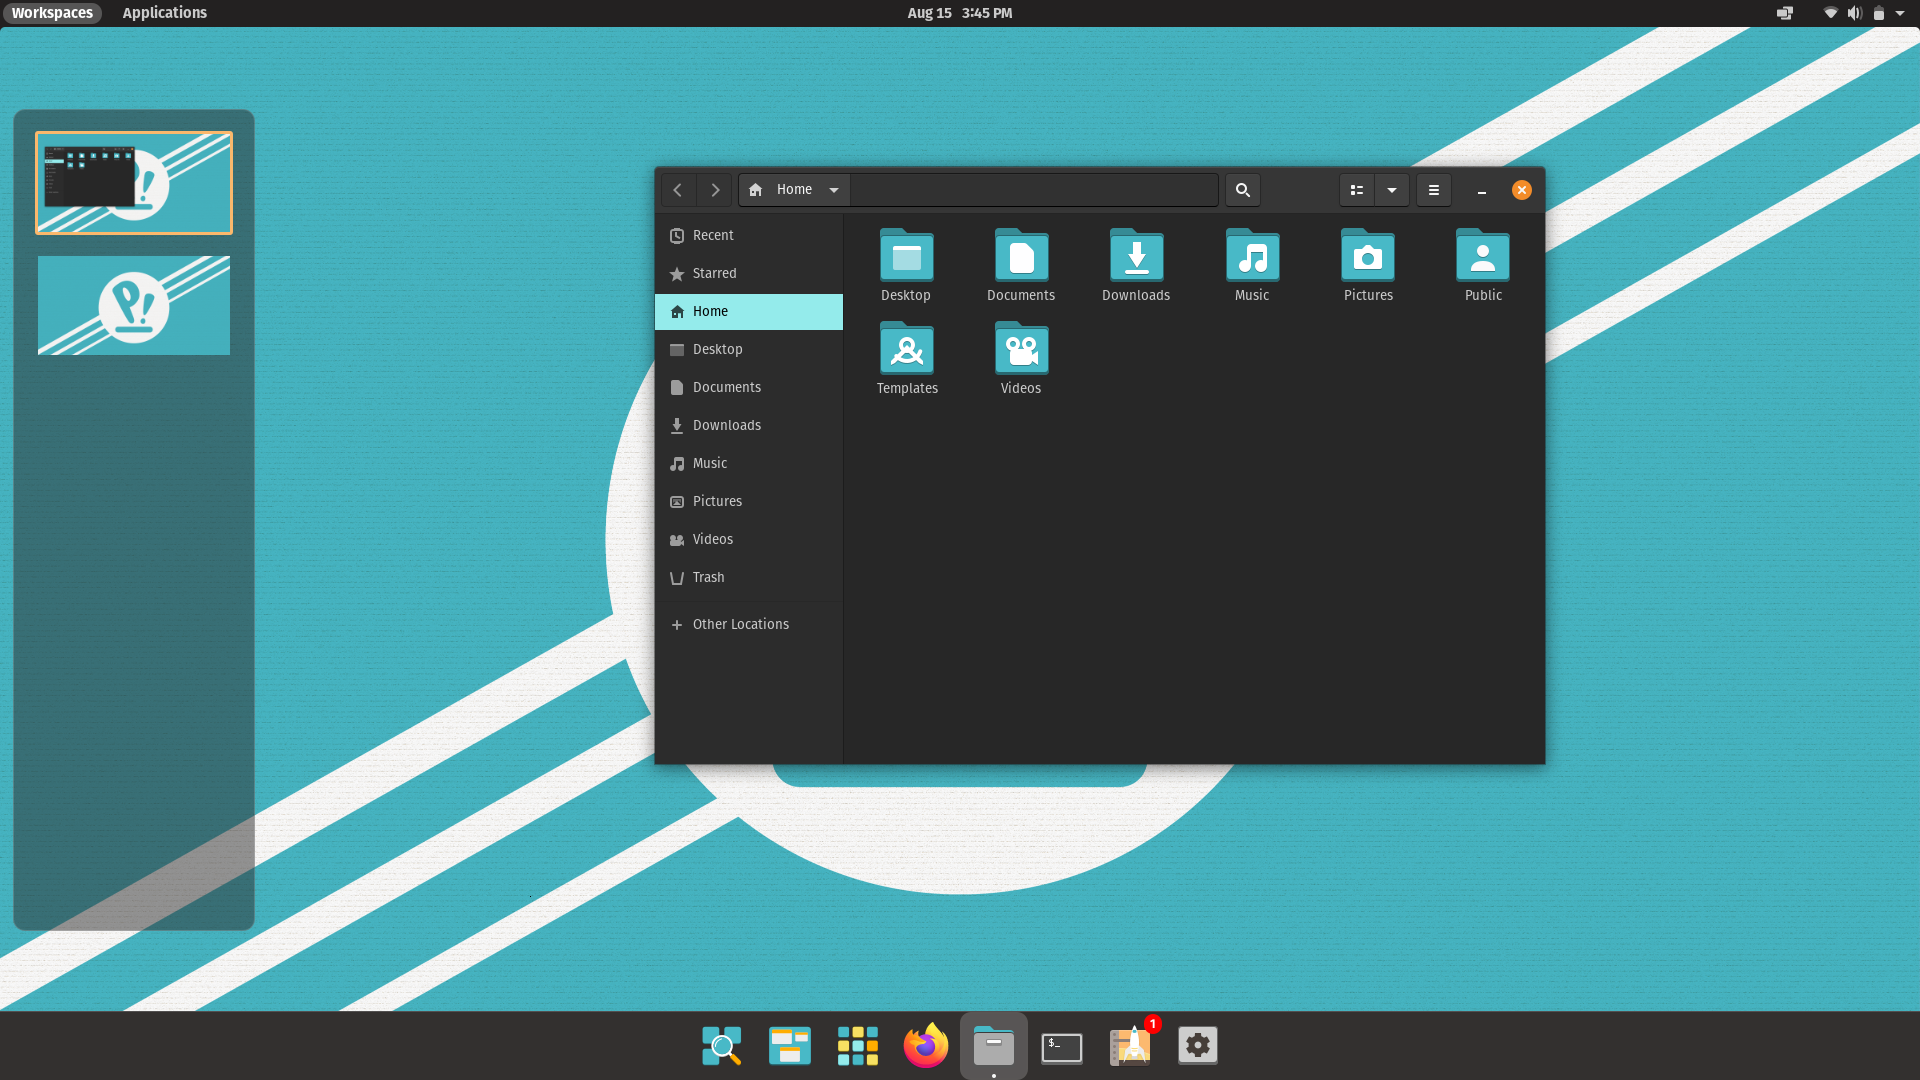
2. Pop!_OS
The Most Versatile Linux Gaming Distro
Pros
- Separate ISO with NVIDIA GPU drivers
- Auto-update installer
- Useful for developers and casual users apart from gamers
- Easy Steam installation
- User-friendly interface
- Stable
- Pre-installed drivers and necessary software
- Regular updates and support
- Compatibility with most everyday applications
Cons
- GNOME can be problematic for some users
- Bloatware
- Limited and sometimes unclear installation options
- Lack of updates means losing support for drivers and other programs
Pop!_OS is derived from Ubuntu, the most prominent Linux distro. It aims to preserve the best aspects of Ubuntu while catering to diverse users, including developers, gamers, and coders. Pop!_OS boasts a sleek user interface and frequent updates to ensure you stay up-to-date with the latest advancements.
In most distros, since AMD GPU drivers are included by default in the kernel, you usually need to install NVIDIA drivers manually. In Pop!_OS, a separate ISO is provided with pre-installed NVIDIA drivers, making it the most versatile gaming distro.
However, GNOME’s interface is troublesome for some, and the limited installation options might require extra consideration.
3. Fedora
The Most Up-to-Date Linux Gaming Distro
Pros
- Useful for developers and casual users apart from gamers
- Easy Steam and other apps installation
- User-friendly interface
- Simple to work with
- Regular updates and support
- Wide custom installation options
- Compatible with most daily applications
Cons
- NVIDIA driver installation can be challenging
- Requires substantial setup
- Frequent updates may cause instability
- Unsuitable for older hardware
Many Linux veterans recommend Fedora as a fantastic starter distro. With over two decades in circulation, it has multiple spins (distros officially based on Fedora). Fedora’s long-standing reputation for reliability, ease of use, and compatibility makes it a stellar choice for beginners and experts alike.
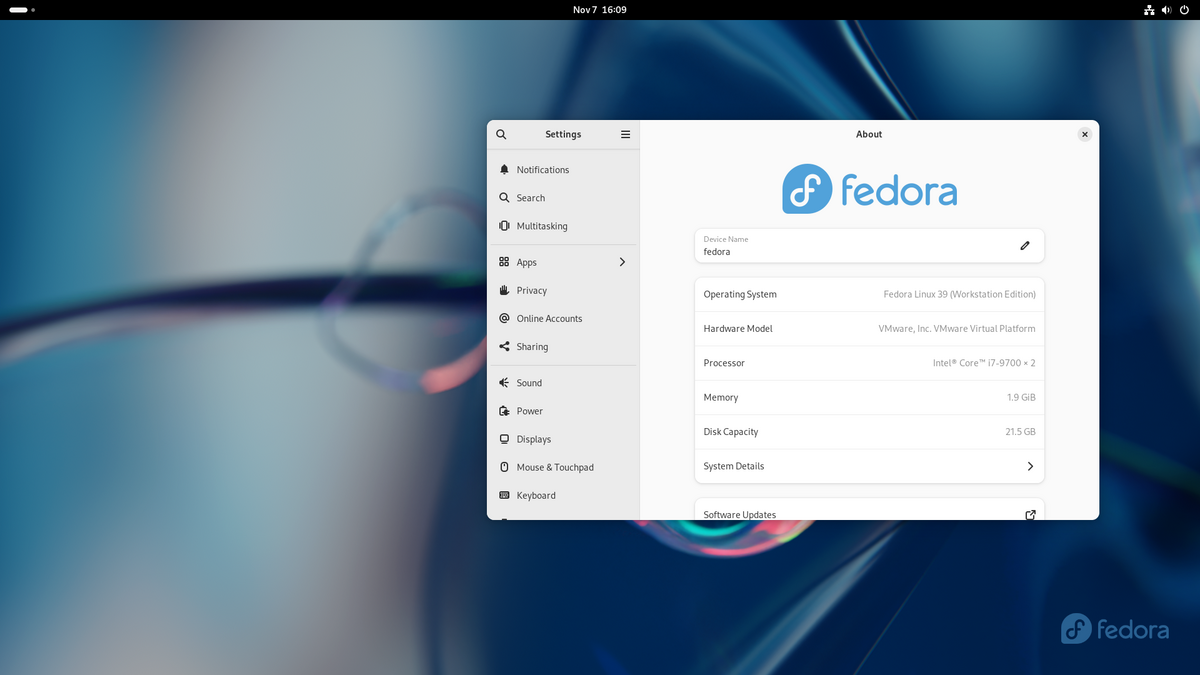
However, Fedora isn’t without its quirks. Its setup process can be hefty, and frequent updates may lead to occasional instability. While GNOME may contribute to this issue, it can easily be swapped out, thanks to numerous installation choices. On the whole, Fedora is a solid choice for gaming if equipped with modern hardware.
4. Garuda
The Most Stylish Linux Gaming Distro
Pros
- Stunning aesthetic
- Useful for developers and casual users apart from gamers
- Easy Steam and other apps installation
- Emulation support
- Pre-installed necessary software
- User-friendly interface
- Beginner-friendly
- Regular updates and support
- Wide array of installation options
- Highly customizable interface
Cons
- Very unstable
- Includes a fair amount of bloatware
- Customization can be overwhelming
- Toxic community
- Not advised for NVIDIA GPUs
- Unsuitable for older hardware
Garuda is a rolling release distro, meaning it is continuously updated, which makes it unstable. Despite this, Garuda remains one of the most visually appealing distros, with its striking designs and ample customization options.
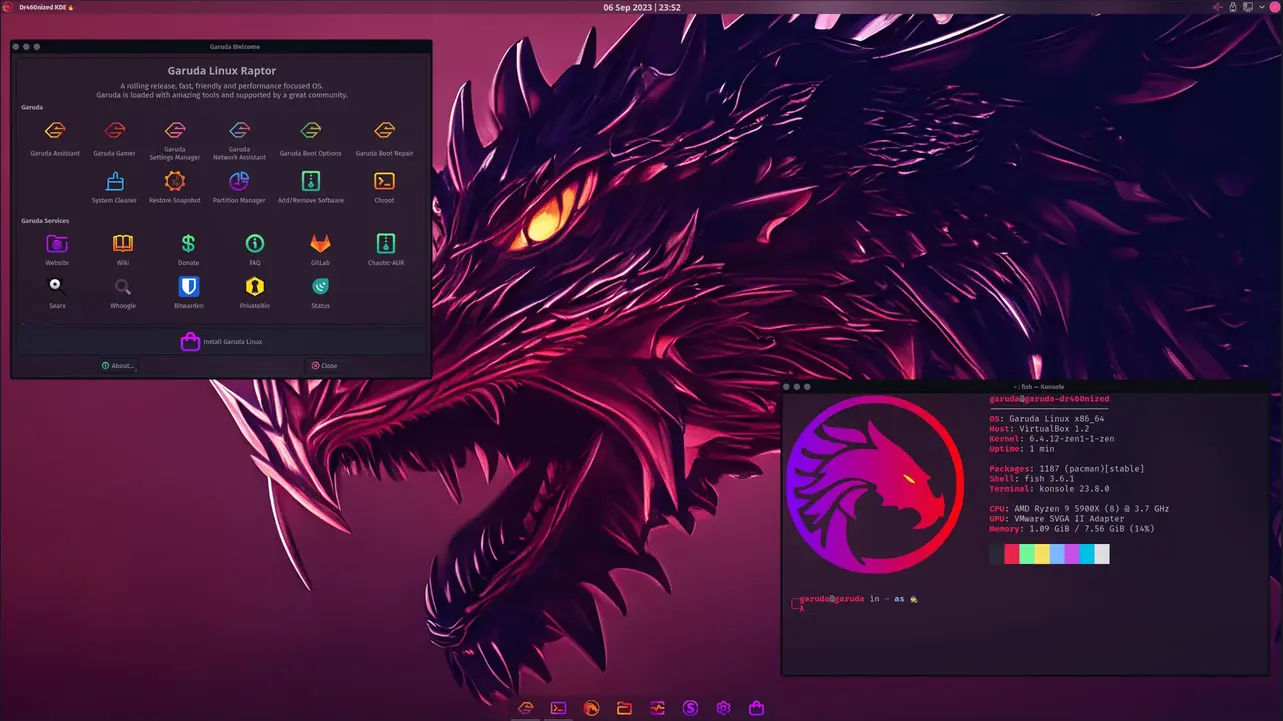
Garuda is tailored for gaming, allowing easy installation of a wide range of gaming software and offering emulation support. Unfortunately, due to its instability—mostly causing minor breaks—it’s not recommended for NVIDIA GPUs. Additionally, relying on a hostile community for solutions is not a wise move, especially with Garuda.
5. Ubuntu
The Most Stable Linux Gaming Distro
Pros
- Highly stable
- Excellent hardware support
- Appeals to developers and casual users alongside gamers
- Beginner-friendly
- Simple app installation
- User-friendly interface
- Frequent updates and support
- Highly secure against malware
Cons
- New features may be delayed compared to other distros
- Gaming prerequisites require manual installation
- NVIDIA GPU drivers need manual installation
- GNOME can be troublesome for some users
No list of Linux distros would be complete without Ubuntu, perhaps the most renowned and widely adopted Linux distro. Ubuntu, seen as the face of Linux, is the go-to choice for introducing newcomers to the Linux ecosystem. It stands out for its unmatched stability, even if it results in slower incorporation of new features when compared to other distros.
Despite its stability, Ubuntu doesn’t entirely break away from Linux’s do-it-yourself ethos. Users need to manually install software like WINE, Proton, and if applicable, NVIDIA graphics drivers. With these preparations completed, however, Ubuntu offers a smooth experience and is highly user-friendly. It’s also extremely secure and even doubles as a server platform, frequently used by enterprises for this very reason.
FAQs
What are Linux distros?
What is the best Linux distro for gaming?
Many Linux experts agree there’s no single “best” distro; only the ones you prefer. However, we find Nobara to be the best gaming distro as it provides all essentials for Linux gaming pre-installed, allowing you to dive into gaming immediately.
The post The Best Linux Distros for Gaming [Max Performance] appeared first on Appuals.
]]>The post How to Fix SystemCTL Command Not Found Issue? appeared first on Appuals.
]]>
What’s an init system?
Init system is the first process that runs after your kernel boots up. There are more than one init systems out there for Linux but the most popular one is systemd, and it is used in many of the major Linux operating systems. Systemd is a set of daemons and libraries which controls all the other daemons and libraries e.g. starting or stopping a daemon, enabling or disabling a daemon. A daemon in Linux is equal to a service in Windows which runs in the background.
How you can fix systemctl command not found in Linux distributions:
In order to fix this error, you have two choices.
- Install systemd and replace your current init system with systemd. Since systemctl command not found error comes because you don’t have systemd installed on your system.
- Use the init system your linux distribution has to manage different daemons/services. This solution is for those of you who don’t have systemd installed but don’t want to install systemd on their machine or if systemd is not available in your distribution’s repositories.
1. Install systemd (if not installed):
If you are using a Debian/Ubuntu based operating system, you can type a command to do a search that whether systemd is installed or not.
Type this command if you are using Ubuntu or Debian based operating systems and press enter.
sudo dpkg -l | grep systemd.
For arch linux based distributions, use this command:
pacman -Qs systemd
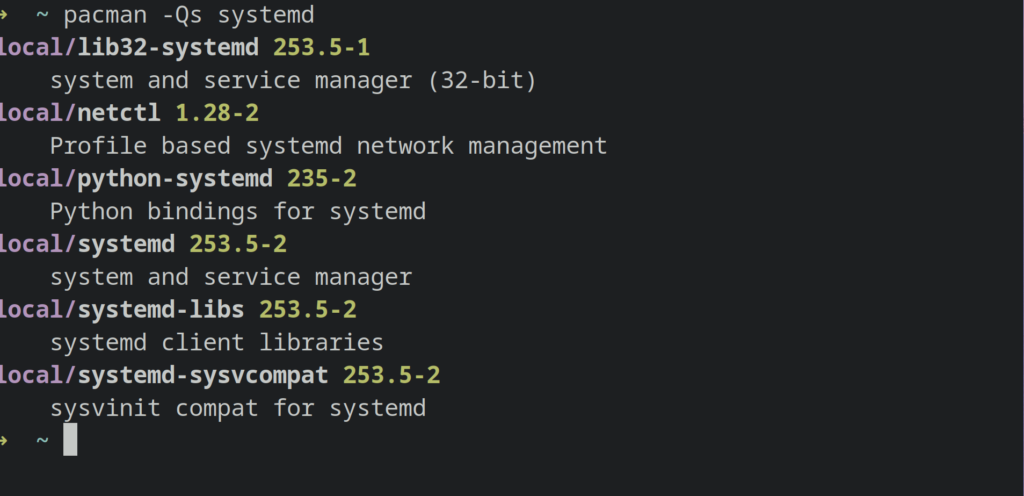
If you see some text as output of this command, then it means systemd is installed on your system and it might be corrupted.
You then need to reinstall systemd for the systemctl command to work.
To do that type this command in a terminal and press Enter.
sudo apt-get install --reinstall systemd.
This will reinstall systemd with apt package manager that’s used by Debian/Ubuntu based distributions.
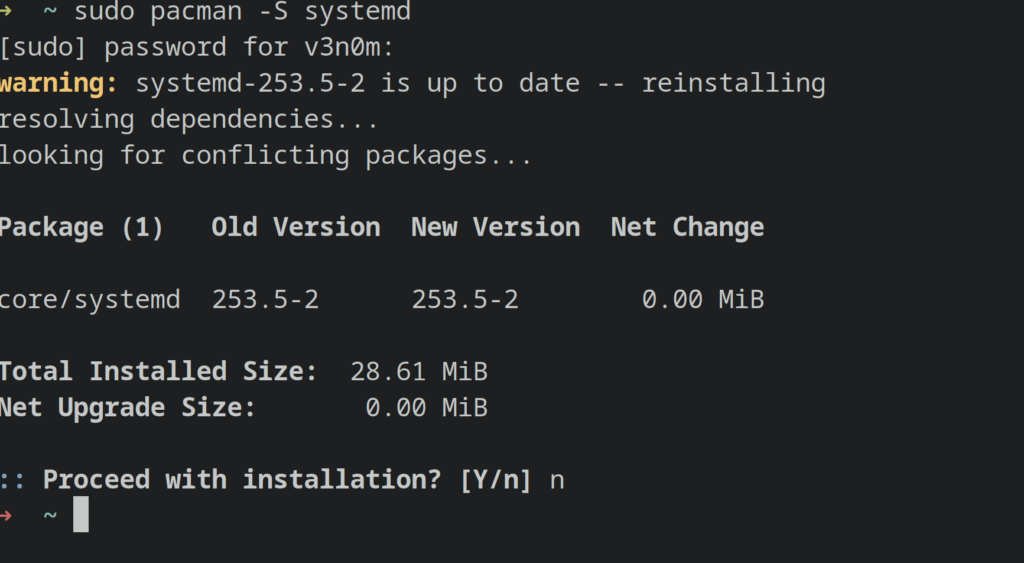
For arch linux or its derivatives, use this command:
sudo pacman -S systemd
If you didn’t get any output from the sudo dpkg -l | grep systemd command above, then it means systemd is not installed on your distribution.
In such a scenario, you can either use the init system your distribution has or install systemd.
To install systemd on debian/Ubuntu based distributions, type this command in a terminal and press Enter:
sudo apt-get install systemd
For arch linux, type pacman -S systemd as root user or using sudo.
This will install systemd on your operating system. You will now be able to use the systemctl command without any errors.
2. Use the init system of your distribution:
Another, and preferably the best solution for this error is to use the init system your Linux distribution already has to manage dameons/services.
To see which init system your computer has, you can type this command in a terminal and press enter.
ls -l /sbin/init

The /sbin/init is a symlink to the init system your linux distribution uses. If you see the symlink of /sbin/init to /lib/sysvinit/init , then it means that your distribution uses sysv init system and you will have to use the service command instead of systemctl to manage services or daemons.
The syntax of sysv init system to manage services is also pretty simple:
service [service_name] [action]
You can thus start a service by typing service [service_name] start
e.g :
If you want to start the bluetooth daemon/service you can type the command:
sudo service bluetooth start
Then to check whether it is running without any errors, you can type the command
sudo service bluetooth status
If you want to restart or stop a service, you can use the commands “service [service-name] restart” and “service [service-name] stop” respectively.
For example, if you want to stop the bluetooth service, you can type:
sudo service bluetooth stop
It is possible that your init system might not be sysvinit either and some other init system. For that, you just need to do a simple Google search on the output of the symlink of /sbin/init. Then you can use the commands that are applicable to the init system your machine has.
Many init systems usually have the same commands as start, stop, restart but the commands to run them are different as sysvinit has service command to start or stop services and the systemd has systemctl command for it.
If the above solutions didn’t work for you, keep following the article as the solution listed below might work for you.
How to fix systemd-resolve command not found?
Another error related to systemctl status command not found is the systemd-resolve command not found. Users can be mistaken that they don’t have systemd installed and that’s why, systemd-resolve is not working. But instead, in versions of systemd 239 and above, the systemd-resolve command has been changed to resolvectl.
You can thus use “resolvectl ” to interact with the systemd-resolve utility in your linux distributions.
The post How to Fix SystemCTL Command Not Found Issue? appeared first on Appuals.
]]>The post Fix “zsh: permissions denied” Error in Linux or macOS appeared first on Appuals.
]]>
Let’s take a look at the main cause of this error, then we can try each solution to see which one works the best.
Mainly this error occurs when you don’t have permissions to execute, write or read the file.
Let’s assume we are inside a Zsh shell in a Linux operating system and you are trying to list the contents of a file using ‘cat’, but you receive a ‘permission denied’ error.
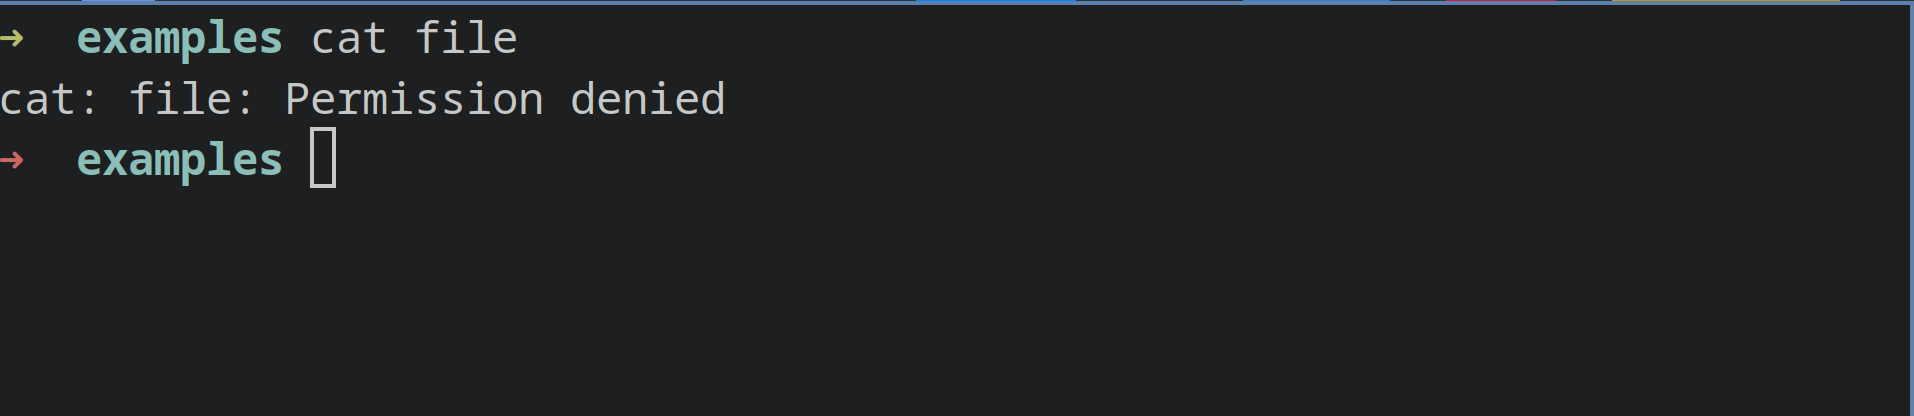
Now to fix this error, first we need to list the permissions of the file. We execute “ls -l” to see the permissions.
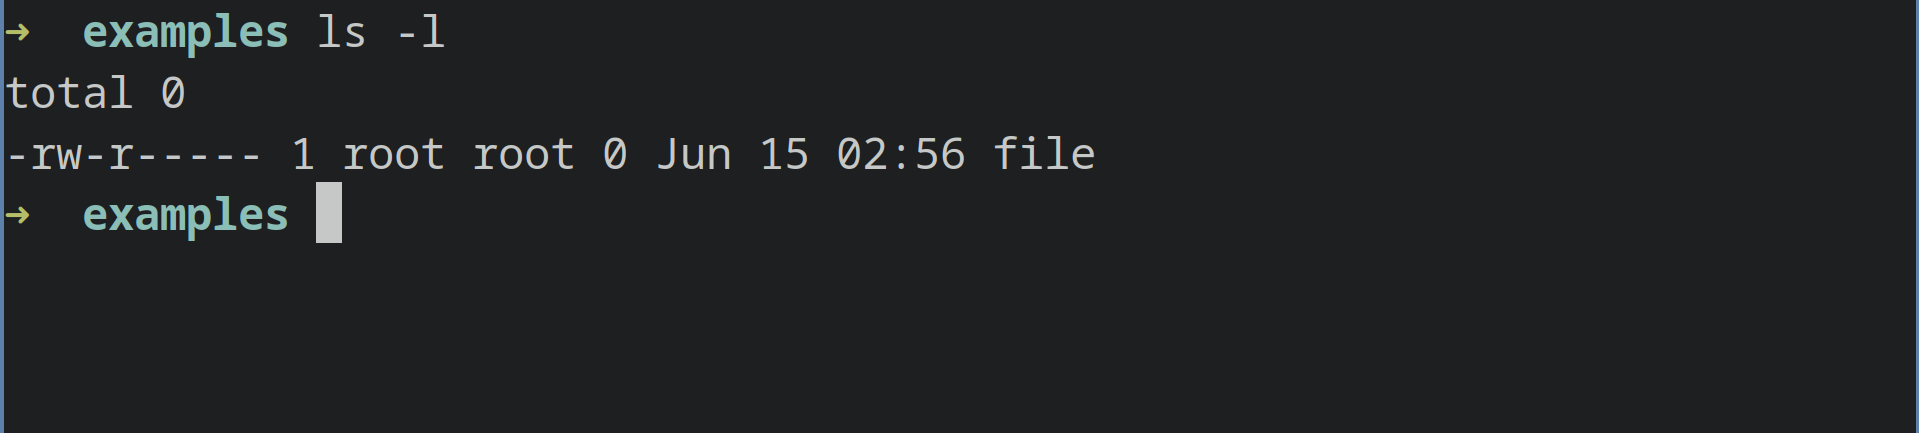
As you can see, the permissions are such that only root user and root group can read the file, while the root user can only write on the file.
1. Use sudo
To fix this, the simplest solution would be to use ‘sudo’ with the command we want to run. This will execute the command as the root user. In your case as well, you can use ‘sudo’ when you are confident that the command you want to execute or the task you want to run won’t harm your computer.
We can thus run:

sudo cat file
2. Change permissions of the file or files
The next thing we can do is to change permissions of the file. Since permission denied error is usually caused by read or write permissions, we can change the permissions of that particular file or files.
By executing ‘ls -l’ inside the directory where the file is located, we can see that the owner and group of the file are root.
We can change the owner to our user and then do what we want to do with the file.
We can run:
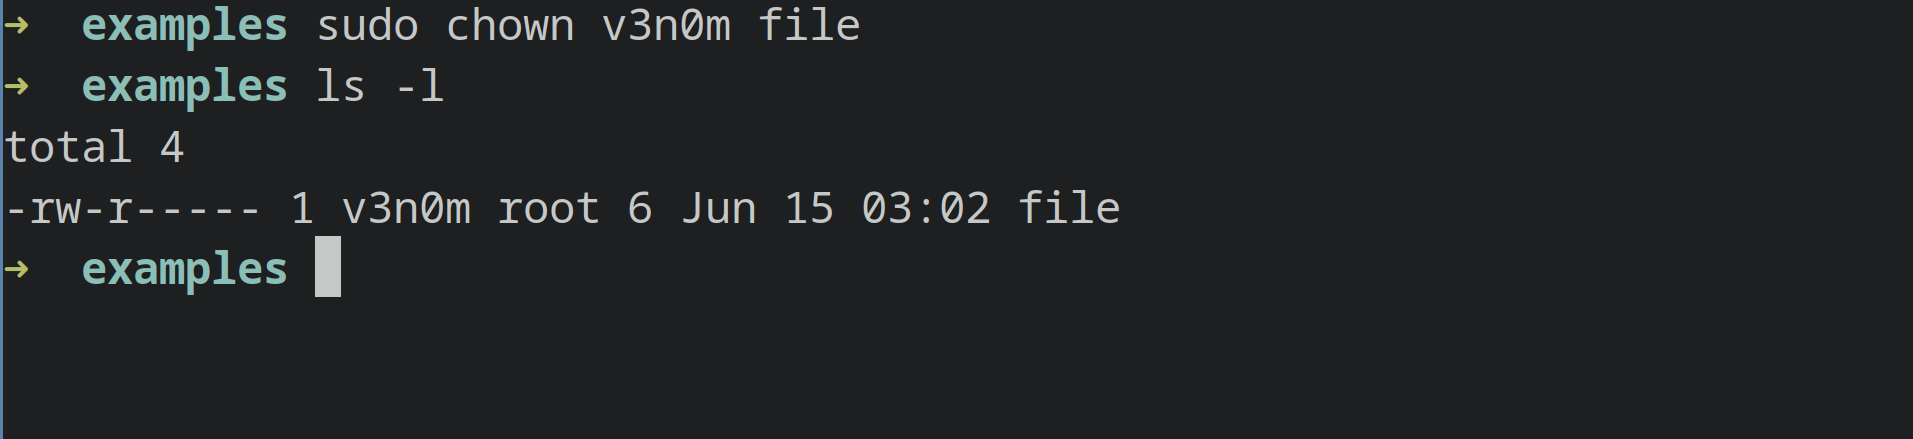
sudo chown [user] [file-name]
In our example, as v3n0m is the user we are logged in as, we will issue the command as:
sudo chown v3n0m file
v3n0m here is our user. In your case it would be your username.
Now, we can run cat on the file as it would no longer give us a permission denied error.
3. Enable Execute permissions
You can use ./ with a filename in zsh or other shells to execute a file as a program. But if the execute permissions are not set on a file, it will give you zsh : permission denied error.
Let’s say we want to execute a script called script1. We type ./script1 in our terminal and it gives us this error:
We do ls -la on the file to see the permissions. As you can see the execute permissions on the file are not set.
The solution here is simple, add the execute permissions on the file.
We issue a simple command
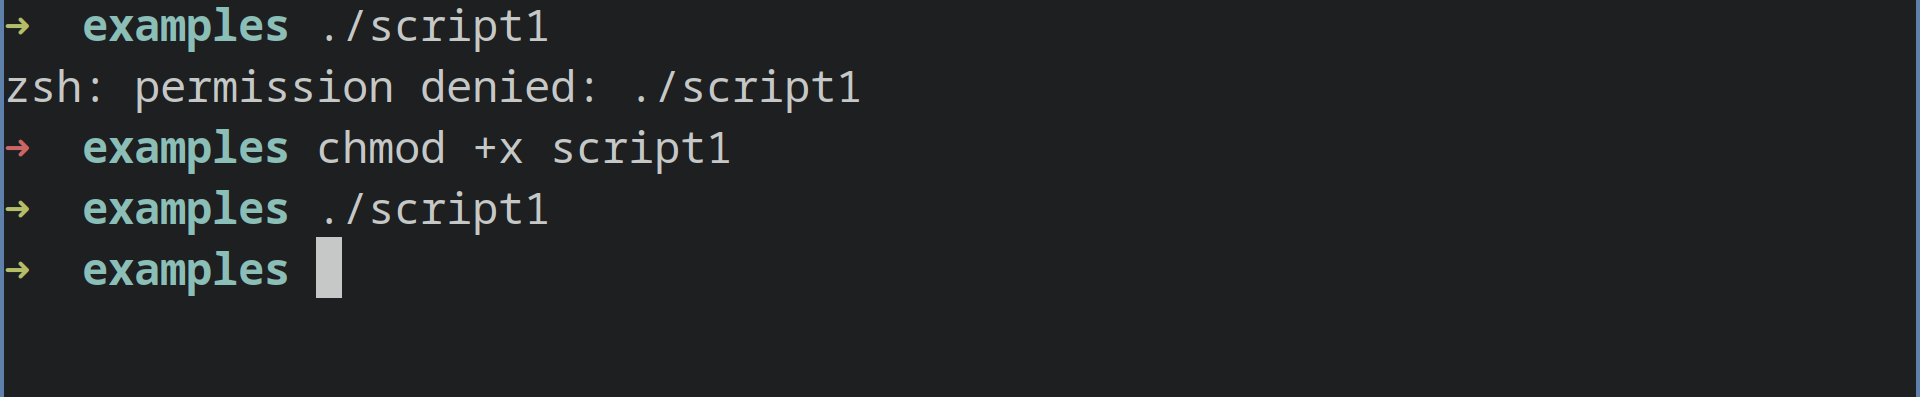
chmod +x script1
chmod +x would add the execute bit on the file’s permission for owner, group as well as others.
Now we can run the file as program by typing ./script1 without any error.
This should fix the error if you are facing it on Linux, however, if you are facing this error of MacOS or Gradle keep following the article.
Edit your zshrc File (macOS)
Some users have reported in their MacOS using zsh when they are not inside the directory from where they want to execute a command.
If you face a similar issue, then the fix for it is really simple.
You need to edit your .zshrc file in your home/username directory and add this to the end of the file.
setopt auto_cd
This will enable the option of auto_cd in zsh.
In order to edit the .zshrc file, you can use any graphical text editor or a command line text editor like vim or vi.
Use CHMOD Command to Set Permissions (Gradle)
Zsh permission denied error can occur if you are working on gradle and the gradlew file doesn’t have the correct permissions.
In order to fix such an error, you need to set the correct permissions on gradlew.
You can type this command in your terminal,
chmod 755 gradlew
This will make the gradlew file executable and the error will be fixed.
Or you can simple type this command chmod +x gradlew
This will also make the gradlew file executable.
If none of these solutions worked for you, feel free to comment down below and our technician will be happy to help you shortly
The post Fix “zsh: permissions denied” Error in Linux or macOS appeared first on Appuals.
]]>The post How to Fix ‘rmdir: Directory not empty’ error? appeared first on Appuals.
]]>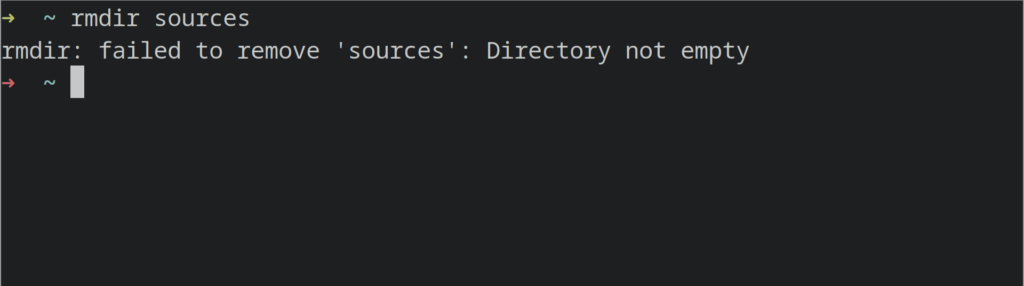
The ‘rmdir: directory not empty’ error occurs when you run the rmdir command on a directory that is not empty, meaning it contains files or other directories inside it. This is the expected behavior of the rmdir command, and it will give you an error when you run it on a non-empty directory in Linux or other operating systems that have the rmdir utility.
How can I fix ‘rmdir: directory not empty’ in Linux?
There are a few simple fixes you can try in order to get rid of this error. Apart from running the command in a non-empty directory, this error can also occur due to symlink issues, among other things.
We will let you know about the various fixes you can try to get rid of this error.
1. Use the “rm -rf” parameter
You can use the ‘rm’ command line utility in Linux to delete directories that are not empty if you are encountering this error. To verify whether the directory is not empty and the error is not caused by anything else, simply issue an ‘ls -a’ command on the directory you want to delete. If you see files in the directory, as the output of ‘ls -a’ would show you, then you can issue the ‘rm -rf’ command to delete the directory.
Example:
We want to delete the directory abcd.
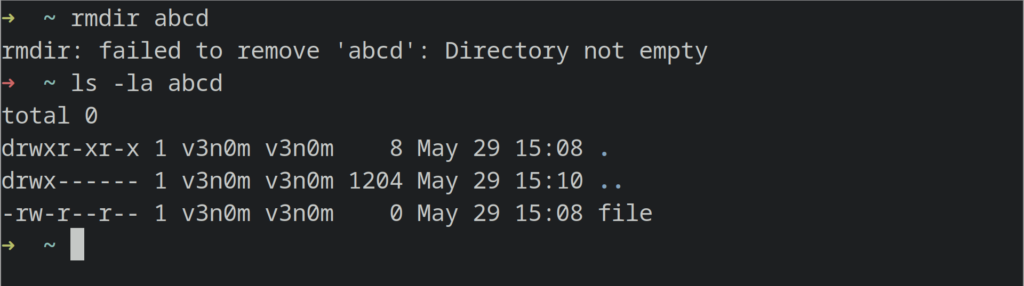
We issued an ‘ls -a’ command to check whether the directory was not empty, and it showed us that there were some files present inside the directory.
We can issue rmdir command on the directory but it will give us an error since the directory is not empty.
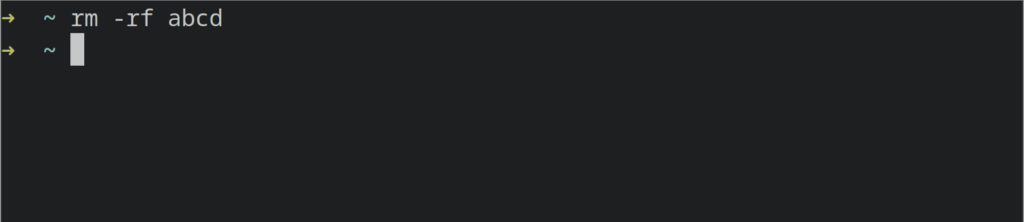
The simplest solution here is to use rm -rf on the directory.
rm -rf abcd
The -r option means recursive i.e delete everything inside the directory recursively (other directories inside it will be deleted too.)
The -f means to force delete, i.e in this case, the force option implies that delete the directory even if it’s not empty.
If you want to delete a directory on which your user doesn’t have write permissions, then you can use:
sudo rm -rf
Using sudo with rm is only recommended when you know what you are doing and the directory you want to delete isn’t a system directory as the root user can delete system directories too.
2. Use a file manager to delete the directory:
In some scenarios, for unknown reasons users have reported that they couldn’t delete files using the rm utility even by using the -f and -r flag and were able to delete the files using a file manager. You can also try that.
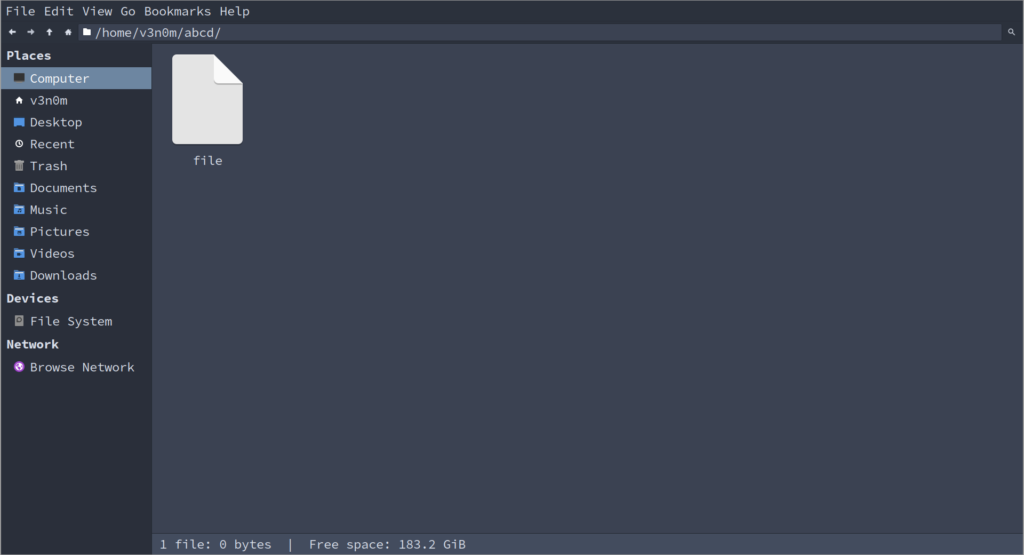
In Ubuntu and many other Linux distributions, file managers are installed by default. You can use such file managers to delete directories or folders as well.
If you are using Ubuntu, you can use the Nautilus file Manager which is installed in it by default to delete directories. Other file managers can be used as well. Nautilus is just an example.
Fix rmdir: directory not empty in Windows:
This error can also occur in Windows when trying to delete a directory using the command prompt or PowerShell. In order to fix this error in Windows, you can try the following:
- Use rm -rf method as shown in the Linux fix above.
- Make sure the directory you want to delete isn’t accessed by any other program. If it’s, use the task manager to kill that program.
Then try and delete the directory afterwards in cmd or powershell using rmdir or rm -rf
The post How to Fix ‘rmdir: Directory not empty’ error? appeared first on Appuals.
]]>The post SCP Permission Denied: What causes it? How to Fix? appeared first on Appuals.
]]>The SCP ‘permission denied’ error can occur due to a variety of reasons, such as incorrectly specified paths or a writing permission error. We will explore some of the reasons as to why this error occurs and how to resolve it.
Cause : Not having write permissions
One reason this error occurs is that your user does not have write permissions for the specific directory on the host where you are trying to write files. To check these permissions, you can use the ‘ls -l’ command, which will display the write permissions.
Look for a ‘w’ in the first four alphabets in the first column of the output. If you see one, it means your user has write permission for that directory. Alternatively, you can always create a file using the touch command in that directory. If you receive no errors, such as ‘permission denied,’ then it means your user has write permissions.
Example:
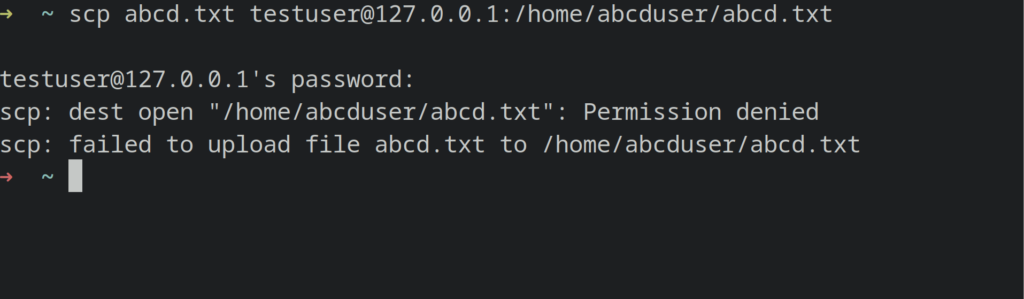 Let’s say you want to copy a file to a remote host using SCP, and you get permission denied because of write permissions.
scp abcd.txt user@127.0.0.1:/home/abcduser/abcd.txt
Solution 1 : Use the root account to transfer files
To fix such an error, you need to grant write permissions to your user for that directory. For that, you need root privileges or sudo. Another thing you can do is to copy the file to a directory where your user has write permissions.
In such a scenario, you either need to allow your current user the write permissions on /home/abcduser or you can use the root user account to copy that file.
To allow the root user to copy a file using scp, you need to allow root login on ssh which is not recommended for security reasons but you can use it anyway in such scenarios and disable it afterwards.
To do that, open the openssh config at /etc/ssh/sshd_config and uncomment PermitRootLogin in a text editor in the remote host
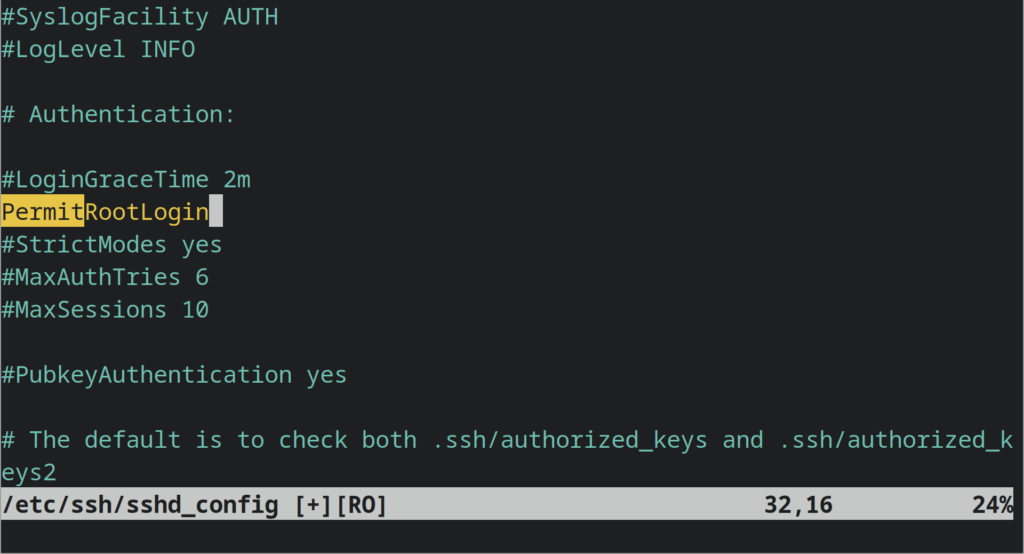
Afterwards, connect to the remote host using its root account.
Then run the command like this:
scp abcd.txt root@127.0.0.1:/abcduser/abcd.txt
Or simply this will do
scp abcd.txt 127.0.0.1:/abcduser/abcd.txt
As they are both the same.
Solution 2: Add your user to the write permissions group:
To have a user write on a directory/file in linux, you either need to add a user to the group that owns the directory or file or make the file owned by that user.
In our example, we run ls -l on the /home/ directory on the remote system to see which group owns /home/abcd.
The ls -l command will give you an output, where the contents of the 4th column is the group which owns a corresponding directory/file.
In our example, it’s the abcduser group which owns the directory /home/abcduser then we can
Simply run this command on the remote system.
sudo groupadd user abcd
It’s the ‘abcd’ group we want our user to be part of and the user we want to change the group of, is ‘user’.
Run the ls -l command again and if you see a ‘w’ in the 6th place of the output in the first column, then it means the group has write permissions on that directory.
Then rerun the command again, which in our case would be:
scp abcd.txt user@somepc:/home/abcduser/abcd.txt
Solution 3: Use the user that owns that directory to copy the file
The simplest solution of all is to use the user which owns that directory to copy the file to it.
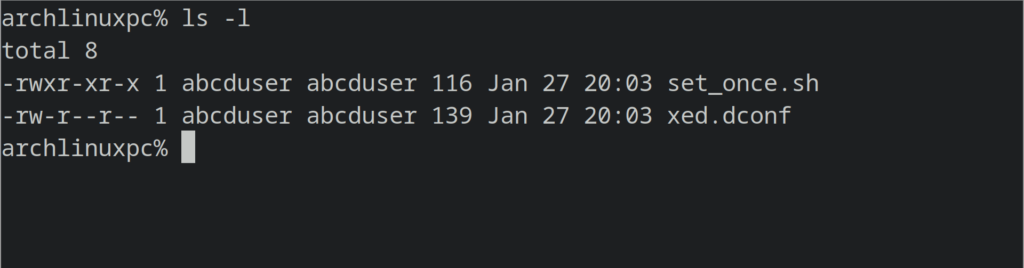
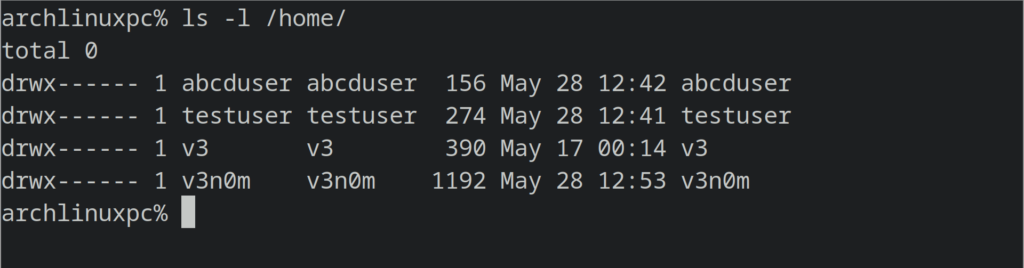
Simply run ls -l on the directory. In our case it would be:
ls -l /home/
The output of the third column will be the user that owns that directory corresponding to the name of the directory you are interested in. In our case, it’s abcduser owns the directory /home/abcduser as seen in the screenshot above.
Then use that particular account while copying the file using scp to the remote host.
In our case, we run the command as follow:
scp abcd.txt abcduser@127.0.0.1:/home/abcduser/abcd.txt
Cause 2: Not having a private key for that user of the remote host
You might get an error where it would say scp permission denied (public key) when you are trying to transfer files between hosts.
That’s an authentication issue of ssh and the reason for that is you haven’t added a private key to scp while running it.
Example:
scp somefile user@127.0.0.1:/home/user/somefile.txt
Solution:
A simple fix for it is to run the scp command with the -i flag, thus adding the private key for that user using which you want to connect to the remote host and transfer files.
You need to make sure you have the private key for that user and if you don’t, you need to generate it on the remote machine, and then have scp utility use it using the -i flag.
In our case, the solution would be:
scp -i key.pem somefile user@127.0.0.1:/home/user/somefile.txt
Where key.pem is the private key file for the user ‘user’.
Note: We have used 127.0.0.1 as the remote host just for example, in your case the remote host would likely be a remote machine and not your localhost.
The post SCP Permission Denied: What causes it? How to Fix? appeared first on Appuals.
]]>The post How to Fix ‘SCP: Not a Regular File’ Error? appeared first on Appuals.
]]>
The error message “scp not a regular file” can occur on various operating systems, including Unix-like systems such as ‘Linux’, ‘macOS’, and ‘BSD’. It can also occur on Windows systems that have the SCP command installed, typically as part of third-party software like ‘PuTTY’ or ‘Cygwin’
To assist you in resolving this error, we have curated a troubleshooting guide that will help you address this issue in detail.
1. Syntax issues
Unix and Linux have a reputation for strict adherence to well-defined syntax rules and standards governing commands, shell scripting, and configuration files. Following the prescribed syntax is crucial to ensure proper execution and expected behavior in these operating systems.
So, if an imperfection in the syntax is discovered, the system automatically prompts the user with an error; in this case, the error is “scp: not a regular file.” There are a number of considerations one should keep in mind when trying to copy a file.
1.1 Check Spaces
Checking for spaces in file or directory names is an important task in Unix/Linux. It ensures that there are no leading or trailing spaces that could potentially cause issues when working with commands or scripts.
For instance, let’s consider a scenario in which you have a file named ‘my_file.txt’ located in the ‘/home/user’ directory. To verify the presence of spaces in the file name, you can use the following command:
ls -Q/home/user
The -Q option is employed to display file and directory names within quotes. If any spaces exist in the file name, they will be visibly enclosed within the quotes upon running this command.
For instance, if the output shows a particular result, we should take the necessary action
"myfile.txt"
It signifies the presence of a space in the file name. In such cases, it is recommended to handle spaces in file names by using special characters or enclosing the name in quotes when working with commands or scripts.
To prevent potential issues associated with spaces in file or directory names, it is generally advisable to use filenames that do not contain spaces
1.2 Missing or extra colon
The SCP command requires the use of colons to specify the remote server and file paths. For example, using incorrect syntax like ‘scp user@host filepath’ instead of ‘scp user@host:filepath’ can cause an error. So, in order to avoid the error “scp not a regular file,” make sure that you adhere to the syntax limitations.
1.3 Mixing up Source and Destination
When using the SCP command, mixing up the source and destination paths can cause errors or unexpected behavior. It is important to maintain the correct order to ensure a successful file transfer.
To clarify, the SCP command follows the syntax:
scp <source> <destination>.
If you mistakenly swap the source and destination paths, it may lead to files being copied in the wrong direction or trigger the “scp not a regular file” error if the destination is invalid.
For instance, let’s consider copying a file named “file.txt” from the local machine to a remote server:
Correct: scp file.txt user@remote:/path/to/destination
Incorrect: scp user@remote:/path/to/destination file.txt
The incorrect usage would attempt to copy the remote file named “file.txt” to the local machine, resulting in undesired outcomes or an error. To ensure smooth file transfers, always double-check and maintain the correct order of the source and destination paths when using the SCP command.
2. Use the option “-r”
The reason you’re facing this error is that you’re probably copying a directory while not specifying to the operating system that you’re copying a directory.
By default SCP treats the file as regular files, so option -r must be added when copying a directory. The error “scp not a regular” occurs when the user is trying to copy a directory and does not specify this action by using the -r option.
When you want to copy an entire directory, along with all its subdirectories and files, you would use the “-r” option. Without the “-r” option, SCP would only copy individual files, not directories.
Here’s an example usage of scp with the “-r” option:
scp -r /path/to/source_directory user@remote:/path/to/destination_directory
This command would recursively copy the contents of the “source_directory” and all its subdirectories to the “destination_directory” on the remote server.
The post How to Fix ‘SCP: Not a Regular File’ Error? appeared first on Appuals.
]]>The post Fix: ModuleNotFoundError: No module named ‘tensorflow’ appeared first on Appuals.
]]>
This article will explain the reasons behind the “no module named TensorFlow” error and provide solutions to fix it.
Why does the ‘no module named TensorFlow’ error occur?
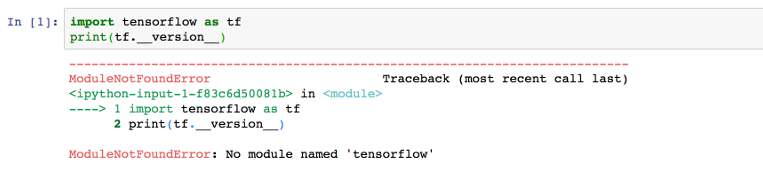
The ‘no module named TensorFlow’ error occurs when the TensorFlow module is not installed on your system, or when the installation is incomplete or corrupt. When you attempt to import the TensorFlow module, Python cannot locate it, resulting in this error.
Here is an example of the error message:
Solution: Install the TensorFlow Module.
To fix the no module named tensorflow error, you need to install the TensorFlow module on your system. Here are the steps to do so:
Step 1: Install pip
pip is a package installer for Python that allows you to easily install and manage Python packages. If you do not have pip installed on your system, follow the steps below to install it:
For Linux:
$ sudo apt-get install python3-pip #For Debian and Ubuntu-Based Distributions $ sudo yum install python3-pip #For CentOS/RHEL $ sudo dnf install python3-pip #For Fedora $ sudo pacman -S python-pip #For Arch-Based Distributions
For macOS:
$ sudo easy_install pip
For Windows:
Download the pip installer from https://bootstrap.pypa.io/get-pip.py and run the following command in the command prompt:
python get-pip.py
Step 2: Install TensorFlow
Once you have pip installed, you can install TensorFlow by running the following command:
pip install tensorflow
This will install the latest version of TensorFlow on your system.
Step 3: Verify the installation
To verify that TensorFlow is installed correctly, open a Python shell and enter the following code:
>>> import tensorflow as tf
If the installation was successful, no error message will appear and you’ll be able to proceed with using TensorFlow. However, if an error message appears, it may indicate that the installation was not successful or that there is a compatibility issue with your system. In this case, you may need to reinstall TensorFlow or consult the TensorFlow documentation for further troubleshooting steps.
The post Fix: ModuleNotFoundError: No module named ‘tensorflow’ appeared first on Appuals.
]]>The post Fix: Failed to load module canberra-gtk-module appeared first on Appuals.
]]>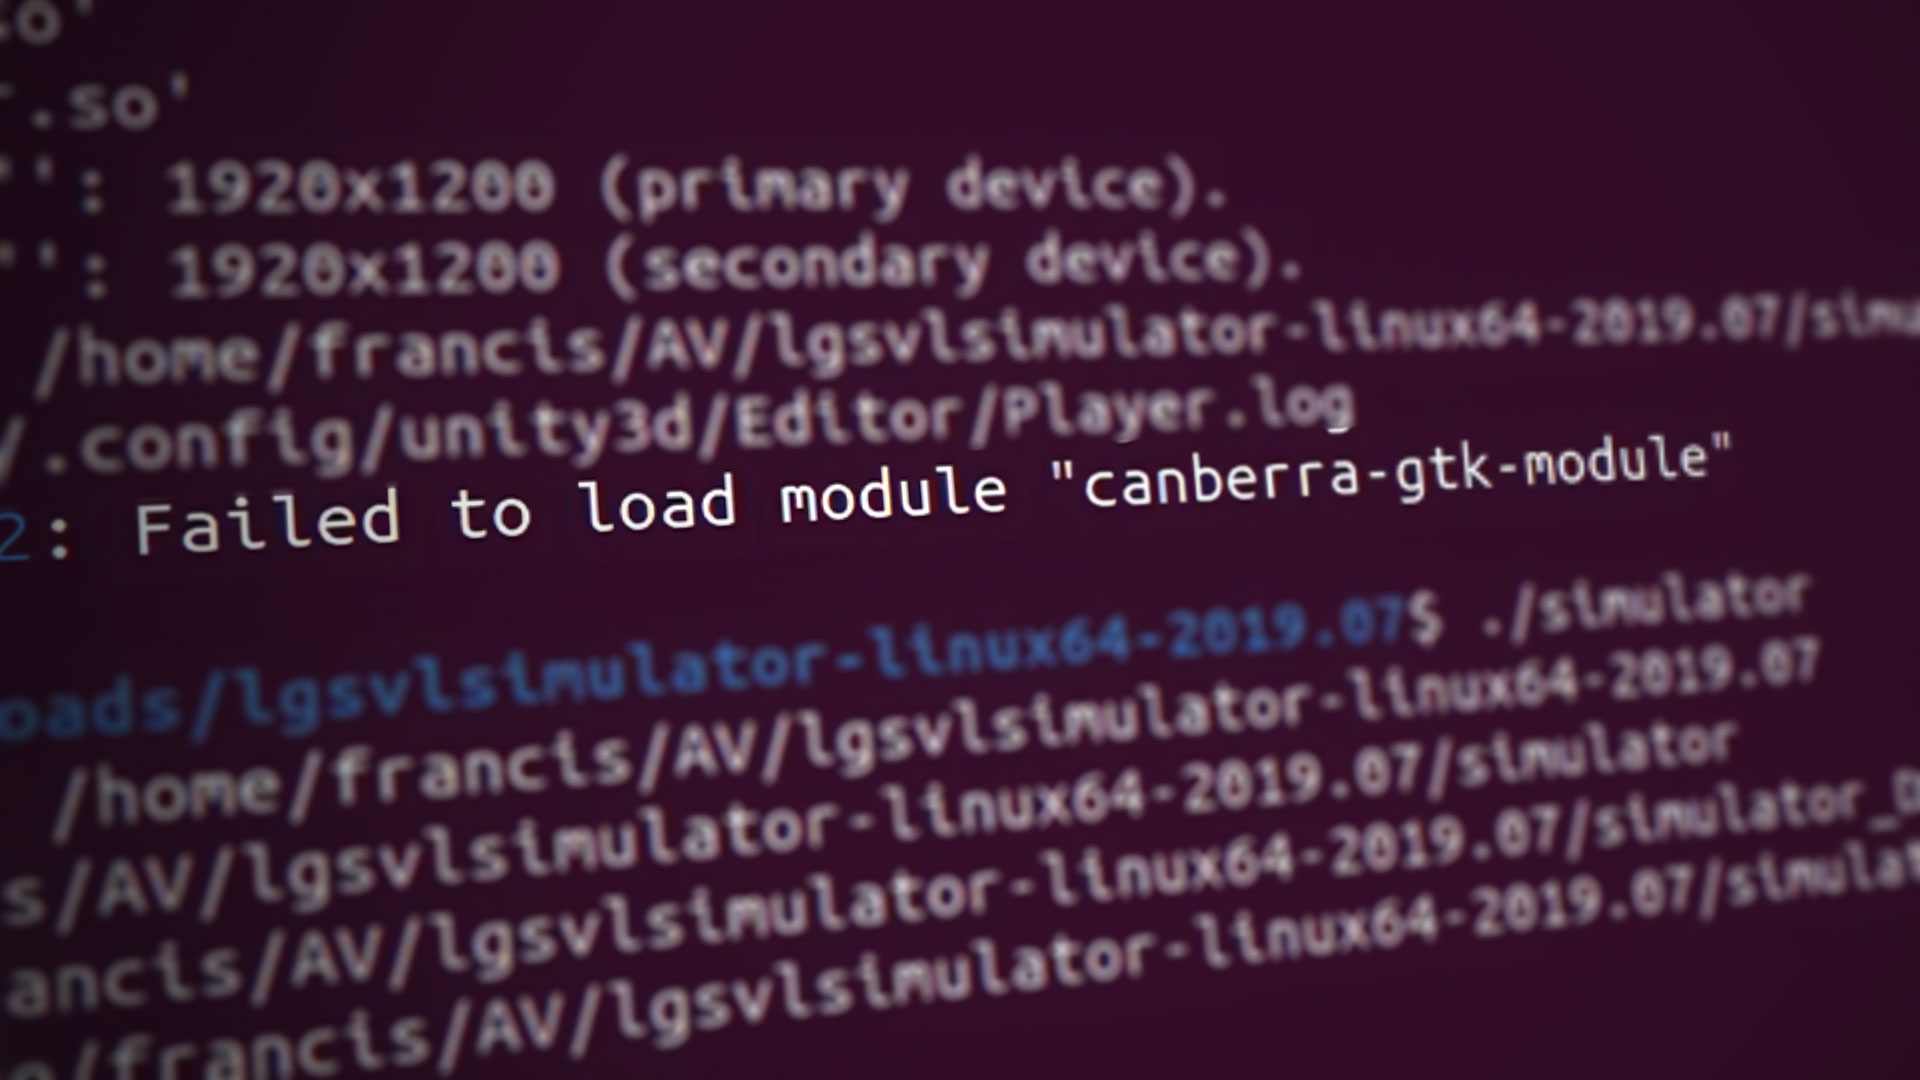
The error “failed to load module canberra-gtk-module” occurs when any application tries to load the “canberra GTK” module on Linux.
This post will uncover the possible reasons and the solutions to fix the error “failed to load module canberra-gtk-module.”
What causes Failed to load module canberra-gtk-module Error?
The following are the major causes of this error:
- When the program (usually a GTK-based application) requires the “gtk” module and the machine cannot load it.
- If the module is not installed on the system.
- If you run the command “canberra-gtk,” it will also throw the same error, which authenticates that the system cannot find the module.
1. Install the canberra-gtk-module on Linux
The only solution to this error is to install the gtk-module on Linux. Follow the steps and the commands to install the canberra-gtk-module on various Linux distributions are provided below:
- The module is available on the default repositories of all the well-known Linux distributions. So, get the updated list of packages using the commands:
For Debian/Ubuntu:sudo apt update
update the packages list For Arch-Based:
sudo pacman -SyuFor CentOS/RHEL:
sudo yum check-updateFor Fedora:
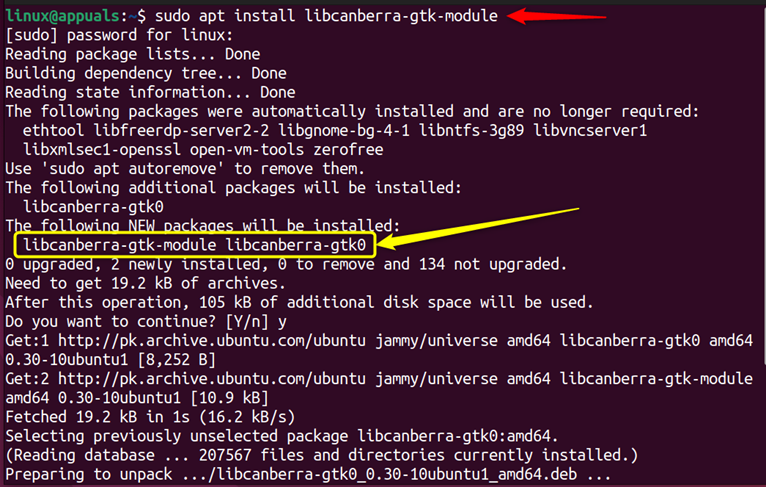
sudo dnf check-update - Once the packages list is updated, use the commands listed below to install the module. The module is named libcanberra-gtk3 in Fedora/Centos, and install libcanberra-gtk-module in Debian/Ubuntu-based distributions:For Debian/Ubuntu:
sudo apt install libcanberra-gtk-module
install the libcanberra package For Arch:
sudo pacman -Syu libcanberra
For CentOS/RHEL:
sudo yum install libcanberra-gtk3
For Fedora:
sudo dnf install libcanberra-gtk3
- Lastly, use the export command to set the “GTK_modules” environment, which will allow loading the module correctly:
export GTK_modules-gtk-module

2. Reinstall the canberra-gtk Module
There might be a possibility that the installed module is corrupted and the system cannot detect the module. For that, the users must remove the module first and completely reinstall the fresh copy. The steps to completely remove and reinstall the module are listed below:
- The complete removal of the module depends on the Linux distribution you are using:
For Debian/Ubuntu:sudo apt autoremove canberra-gtk-module
For CentOS:
sudo yum autoremove canberra-gtk-moduleFor Fedora:
sudo dnf autoremove canberra-gtk-module - Now, go to “Solution 1” in the above section and follow steps 1 and 2 to reinstall the module. Afterward, execute “step3” to set the GTK_modules environment in your system.
The error “failed to load module canberra-gtk-module” occurs in Linux-based systems when the machine tries to find or use the GTK module, and the system cannot get it. There are two possible fixes to rectify the error, i.e., install the canberra-gtk module or reinstall (uninstall and install) the fresh copy of the canberra-gtk module. After installing, the user needs to add the environment variable of the canberra-gtk-module as well.
The post Fix: Failed to load module canberra-gtk-module appeared first on Appuals.
]]>