Try repairing your Outlook installation through the Control Panel or restarting Outlook in Safe Mode.
The post Fix: ‘Your Account Will Be Deleted in 29 Days’ Google Account Error appeared first on Appuals.
]]>
If the birth date associated with your Google account shows you are younger than 13, Google will schedule your account for deletion. You will be given 14 days to take action and recover your account. If no action is taken, the account will be disabled, and all data will be permanently deleted on the 30th day.
You can recover your Google account by either setting up parental supervision or verifying your age. If you are under 13, you can add parental supervision with the help of your parents. Alternatively, you can verify your age using a credit card or a government-issued ID.
Warning: Do not upload fake or altered documents. This can lead to permanent account suspension. If you use a credit card, ensure it belongs to you or a consenting parent/guardian. Once supervision is set up, your account will become a managed child account and certain features may remain restricted.
How Can I Verify My Age Using a Valid ID?
If your account is showing the deletion message, you can recover it by verifying your age using a valid government-issued ID. This can include a national ID card, driver’s license, or passport with your date of birth. Google uses these documents to confirm your eligibility to own the account.
Once you submit the proof, your recovery request is typically processed within a few days (usually 24–48 hours).
To do this:
- Go to Google’s official account recovery service.
- Click on the Account Recovery page.

- Enter the login details of the account showing the deletion message.

- Once logged in, click on “Confirm my age” and then click Next.

- Click on “Yes, I’m 13+” when prompted.

- Click on the “Use a valid ID” option to verify your age (you can also use a credit card if available – Google may place a small temporary transaction to verify).
- Click on “Next” to proceed with the upload.

- Upload a clear, uncropped image of your ID to verify your age. Ensure all corners and details are visible for faster approval.
- Once the image is uploaded, click on “This is correct” to confirm.

- After completing the process, sign in to your account.

Tip: If you accidentally entered the wrong date of birth when creating your account, this process will help correct it.
How Can I Set Up Parental Supervision?
If you are under 13, you can recover your account by adding parental or guardian supervision. This prevents your account from being deleted but enables parental controls. Your parent or guardian will be able to restrict apps, monitor activity, and set screen time limits.
To do this:
- Open the Gmail app and log in to your account.
- Click on your Profile icon > Google Account.

- Click on “Set up supervision” on the warning message.

- Click on “My parent is here” to proceed.

- Click on “Set up supervision”.

- Click on Next to continue.

- Click Next again to sign in to the supervising account.

- Enter the login details of the supervising account.

- Read the details carefully and click Next twice.
- Enter the password for the account that is receiving the warnings.

- Check all the condition boxes and click Agree.

- Enter the password for your parent’s account and click Next.

- You will receive an email confirming supervision has been set up.

Note: Once parental supervision is added, your account will remain supervised until you meet the age requirement or create a new account without supervision.
If you do not have access to a valid ID or cannot set up supervision, visit the Google Account Help Center to contact Google Support for further assistance.
The post Fix: ‘Your Account Will Be Deleted in 29 Days’ Google Account Error appeared first on Appuals.
]]>The post Fix “Your Google Account Was Disabled by Your Google Workspace Administrator” appeared first on Appuals.
]]>
A disabled user loses complete access to all associated Google services such as Gmail, Drive, Calendar, Google Docs, Sheets, Slides, and other core Workspace tools, significantly affecting productivity. You may also see a specific error indicating an internal account suspension. This clearly means you need to contact your organization’s IT team rather than Google Support.
What to Do If You’re a User
If you are facing this error, contacting your organization’s IT administrator is the only way to regain access. Google Support cannot assist you with admin-level account disablement. When reaching out, provide your admin with the exact error message to help them quickly locate your account. Avoid making multiple login attempts or creating support tickets with Google, as these will eventually redirect you back to your organization’s IT team.
If the issue was caused by unpaid invoices for your organization’s Workspace subscription, only the super administrator (not delegated admins) can resolve the billing issue and restore access.
What to Do If You’re an Admin
If you are a Google Workspace administrator, you can reactivate a disabled account directly through the Google Admin Console. Keep in mind that if the account was disabled by Google due to policy violations, the Reactivate button may not appear, and you will need to file an appeal with Google Support. Additionally, accounts can only be reactivated five times per year. Frequent suspensions indicate recurring policy or security issues, so it’s important to address the underlying cause before restoring access.
Reactivating a disabled account through the Google Admin Console reverses the administrative action that blocked access. This action directly lifts the suspension flag placed on the account, bypassing the need for external appeals or support requests. Before reactivating, complete Google’s Administrator Security Checklist to ensure the account is not compromised.
- Launch your browser.

- Go to Google Admin in your browser.

- Sign in using your Google Workspace administrator account.
- In the left-hand navigation panel, navigate to Directory > Users.

- Locate the suspended user from the list.
- Click the Reactivate button for the selected user.

- Review the suspension reason displayed on the page and confirm the reactivation.

- Wait up to 15 minutes for the account to be re-enabled.
If the Reactivate button is missing, wait at least 24 hours, especially if the account exceeded Gmail sending limits. If the issue persists, review the suspension details, ensure billing is up to date, and complete all steps in the Administrator Security Checklist to prevent re-enabling compromised or high-risk accounts.
The post Fix “Your Google Account Was Disabled by Your Google Workspace Administrator” appeared first on Appuals.
]]>The post How to Fix “Outlook Out of Memory or System Resources” Error? appeared first on Appuals.
]]>
Table of Contents
1. Close Background Programs
On PCs with insufficient memory capacity or when programs use more resources than are available, it is recommended to close background applications to free up resources. Sometimes, certain apps or services running in the background can consume a large portion of the available memory resources.

2. Adjust the Paging File Size
When your computer does not have enough memory to run certain applications simultaneously, you can set a portion of your disk drive as “virtual memory.” This essentially creates an “overflow area” where applications can use the space whenever the data exceeds the installed memory capacity.
- Open the Windows Start menu and type “View advanced system settings.”
- Under the “Advanced” tab, you’ll see a “Performance” section. Click on the “Settings” button in front of it.

Open System Properties, and go to “Advanced.” - In the “Performance Options” dialog that pops up, select “Advanced” and under “Virtual memory,” click the “Change” button.

Under “Performance Options,” go to “Virtual memory.” - Uncheck “Automatically manage paging file size for all drives.”
- Under “Space available,” check the “Custom size” option.

Choose a custom paging file size. - Calculate 1.5% of your total RAM available (in MBs) and enter that in the field provided.
- Restart your computer for the changes to take effect.
3. Run the System File Checker (SFC)
Although extremely rare, your system may have a corrupt Windows file. SFC scans your computer and looks for such files. If found, it tries to repair and resolve the issue. Outlook may be in conflict or have a corrupted file that leads to frequent crashing.
- From your desktop, press the Windows + X key combination.
- From the list that appears from your taskbar, choose Terminal (Admin).

From the menu that pops up, choose “Terminal (Admin).” - On the User Account Control (UAC) prompt, click “Yes.”
- In the terminal, type “sfc /scannow” and press Enter.
- The process will start, and SFC will examine your system files.

SFC will start examining your system files. - Once complete, try restarting Outlook to see if the issue persists.
4. Clear OST Files
If your mailbox has become too large, you may be running into storage issues. This may lead to unexpected problems and potentially prevent you from updating Outlook as well. Over time, you may have to delete an OST file if it’s consuming a lot of storage space since it may be hitting the maximum possible mailbox size.
Since an OST file is more or less a cache for mailbox content, it can be deleted without losing access to your data. It is essentially recreated, syncing the data with the current status of your mailbox.
- Press the Windows key + R to open the Run dialog.
- Type %localappdata%\Microsoft\Outlook and hit Enter.

Accessing the Microsoft Outlook directory. - Locate the OST files within the Outlook folder that opens, right-click them, and select Delete.

Deleting OST Files from within Outlook’s main directory.
5. Repair Microsoft Office
In some cases, the error is caused by issues specific to a machine or user. In such cases, a simple repair or reinstalling of the application entirely can potentially clear out any bugs. If Microsoft Office itself is corrupt or damaged, you may encounter frequent crashes when using Outlook.
- Open the Control Panel, select Programs, and then click on “Uninstall a program.”
- Find Microsoft Office on the list and click Change.

Choose Microsoft Office from the list of programs. - Choose “Quick Repair” and click on “Repair.”

Choose “Quick Repair.” - Complete the repair process by following the on-screen instructions.
- Once finished, a message stating “Done Repair” should appear on the screen.
The post How to Fix “Outlook Out of Memory or System Resources” Error? appeared first on Appuals.
]]>The post How to Resolve Yahoo Emails Not Reaching Recipients? appeared first on Appuals.
]]>
1. Basic Troubleshooting
Before we explore more complex solutions, let’s begin with some basic troubleshooting.
- Restart: Turn off your PC or phone and router. After waiting for a minute, turn on the router. Then power on the phone or PC.
- Update: Ensure that your system or phone’s OS, mailing app, and browser are all up-to-date.
- Full Mailbox: Verify that the recipient’s mailbox is not full.
- Spam or Junk: Sometimes, emails are incorrectly marked as spam and end up in the recipient’s spam or junk folder. Ask the recipient to check these folders and consider adding your email to their contacts to prevent this.
- Check Sent Items or Outbox: Look in the Sent items of your Yahoo mail to confirm the email is there. If not, check the Outbox.
- Multiple Accounts: If the recipient has multiple accounts, ensure they are checking the correct one for your message.
2. Perform a Test
To determine whether the problem lies with your setup or on the recipient’s end, conduct a simple test.
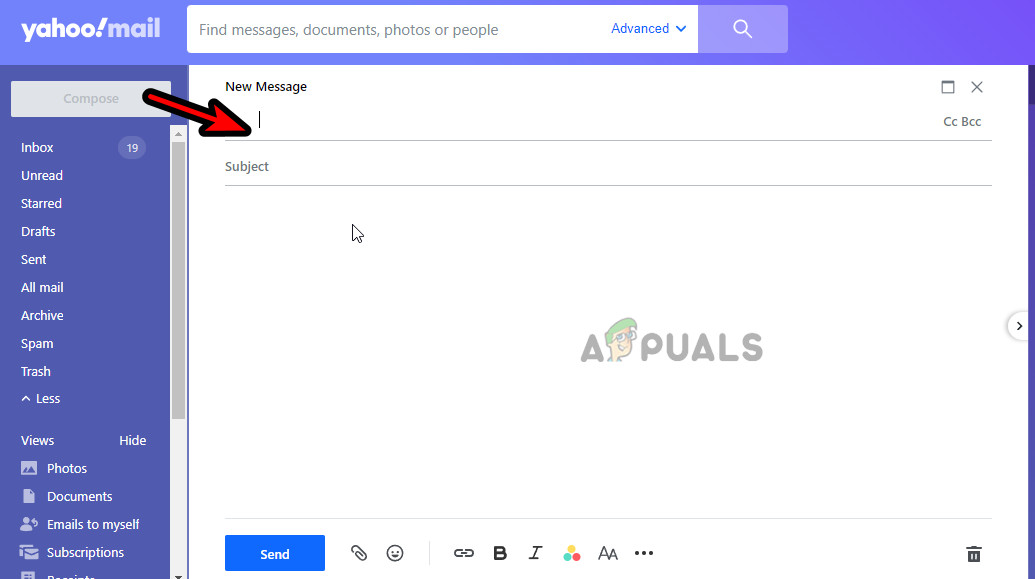
- Compose a new email message in Yahoo Mail.
- Add the problematic recipients but also include one of your non-Yahoo accounts as a BCC to ensure the BCC address is different from the main recipient’s service.
- Send the email. If it reaches your BCC address, Yahoo has sent the email correctly, and the issue is on the recipient’s end (e.g., due to filters).
If the email is not delivered to your BCC address, the issue lies with your account or with Yahoo.
3. Try to Send Mail through a Browser
If your mail app is not correctly handing off emails to the Yahoo service because of a malfunction, try sending an email through a web browser to confirm the issue.
- Open a web browser and visit the Yahoo website.
- If necessary, log in and attempt to send a new email message.
Compose a New Email Message in Yahoo - Send the email to at least one recipient who hasn’t been receiving your emails and monitor the outcome.
3.1 Try Another Browser
If you continue to face issues in your current browser, try sending the emails using a different browser to see if the problem persists. The issue may be related to an extension or the cache/cookies in the original browser.
4. Try Another Network
Network interference or your ISP marking your connection as spam could prevent emails from reaching recipients. To confirm this, switch to a different network.
- Disconnect your system or phone from the current network, then restart the device.
- Connect to a different network and try sending the email again via the Yahoo website.
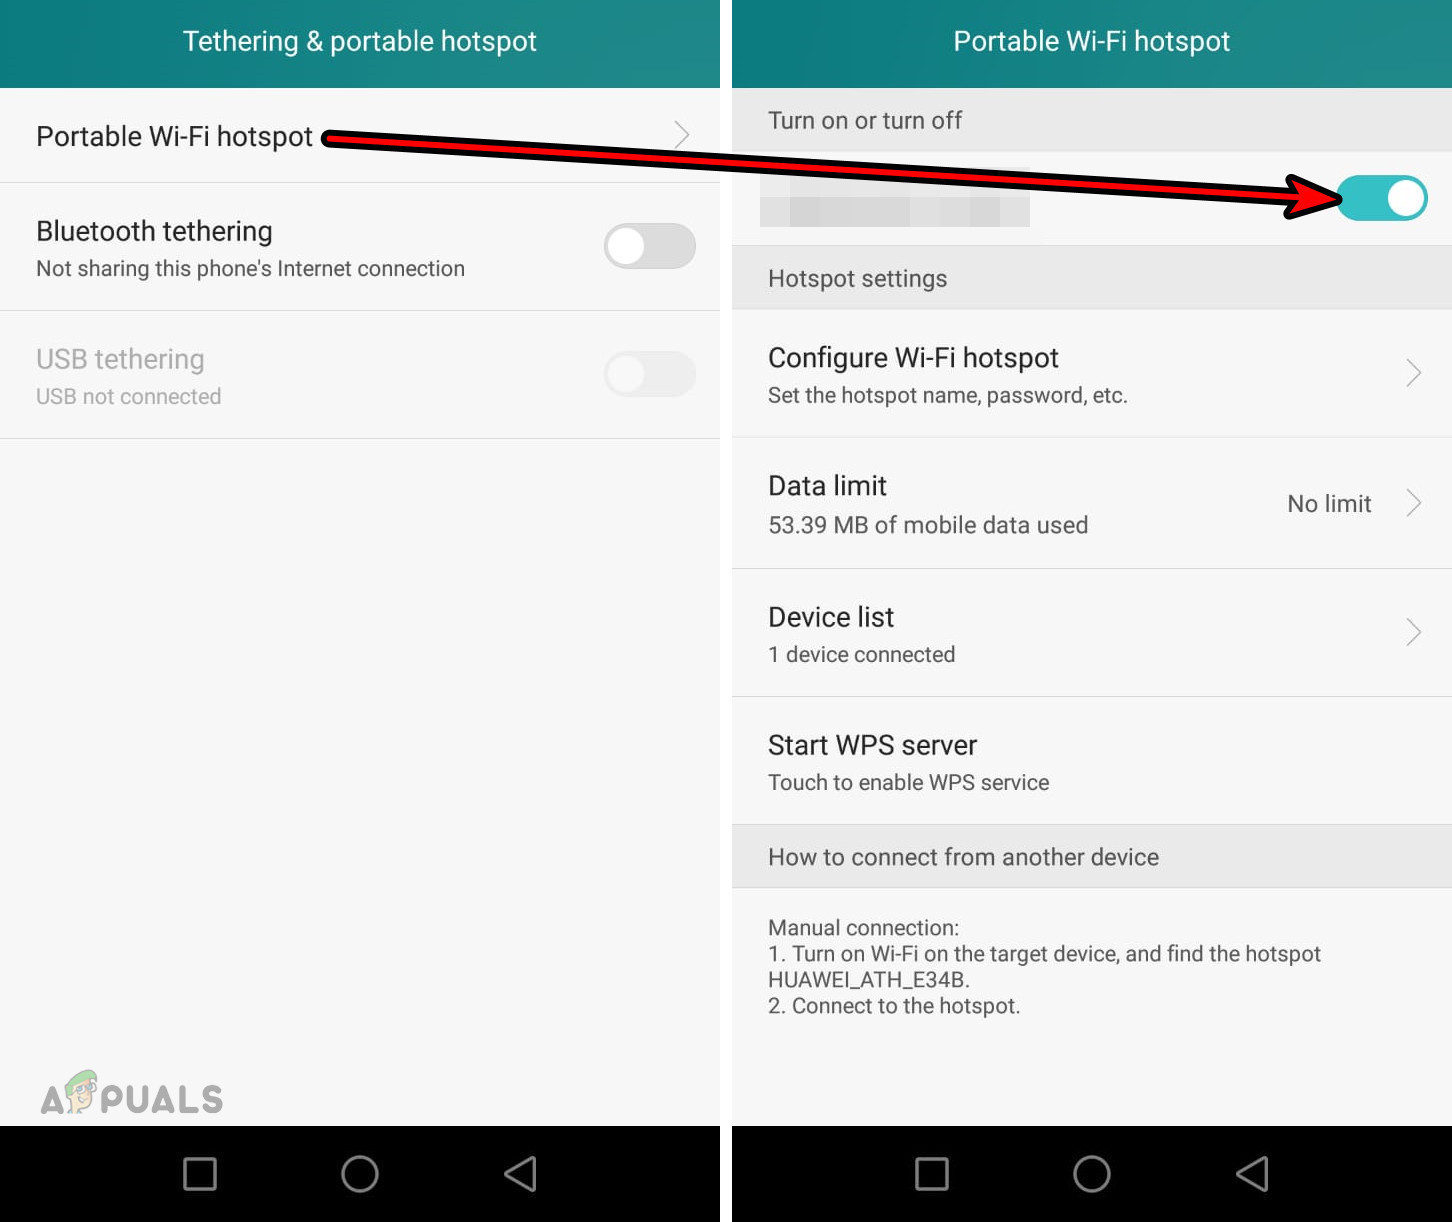
Enable the Android Phone’s Hotspot - If the issue persists, attempt to send emails from another device using a different network to evaluate the result.
5. Send Test Emails through Another Account
The issue may not be with your account but rather on the recipient’s end. Sending emails via another Yahoo account can help confirm this.
- Access Yahoo Mail using a web browser.
- Log in with another Yahoo account. If you do not have another account, you can create a new free one.
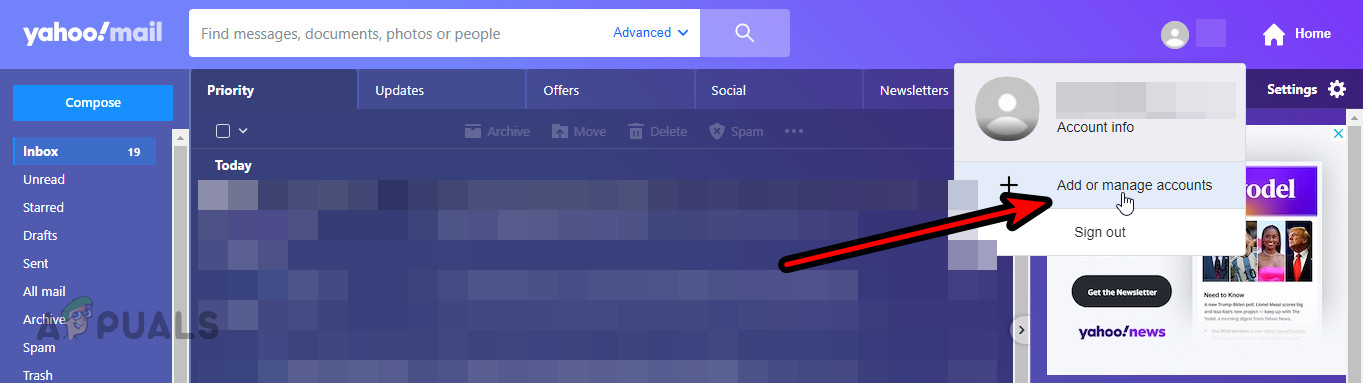
Send Emails Through a New Yahoo Mail Account - Send an email to the problematic recipients and observe whether the emails are received.
- If not, try sending emails from another email provider, such as Gmail. If emails from other services are delivered but not those from Yahoo, the issue likely rests with Yahoo. If emails from your alternative Yahoo account are received but not from your main account, the problem may be related to your account’s reputation or recipient filters.
6. Check the Mail Content and Signatures
Email content or signatures that trigger spam filters on the sending or receiving end can prevent your emails from being delivered. Reviewing your mail content and signatures may help.
- Review the mail content for anything that might appear suspicious and send a test email without attachments or links.
- Go to Yahoo Mail Settings and navigate to More Settings > Writing Email.
- Temporarily disable the Email Signature and send the email. If it’s delivered, something in your signature or content might have caused the problem. If you re-enable the signature, be sure to exclude URLs or images.
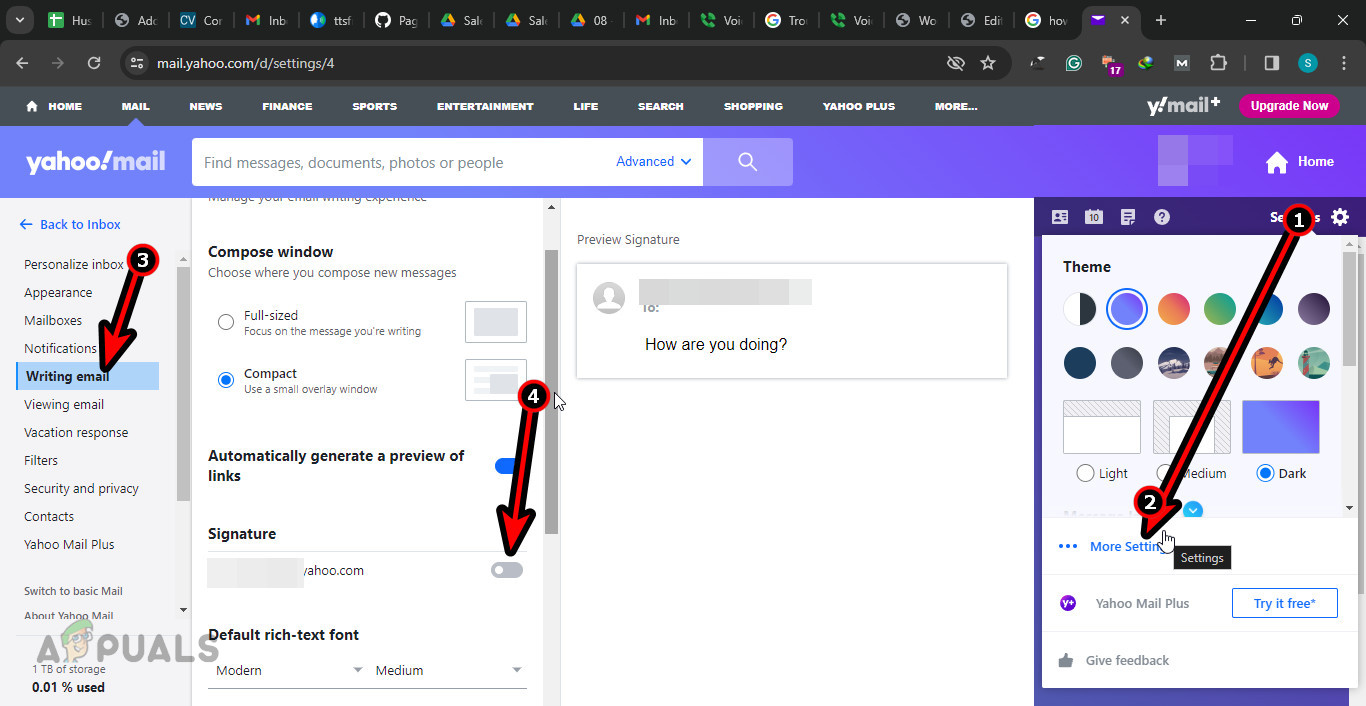
Disable Signatures in the Yahoo Mail Settings
7. Check the Filter or Forwarding Settings of the Recipient
The recipient’s filters could be stopping your emails from reaching them. Inspecting and adjusting these settings may resolve the issue.
- Use a web browser to access Yahoo Mail.
- Enter Settings > More Settings.
- Examine Filters to determine if any could be the source of the problem. You can also choose to delete or disable filters.
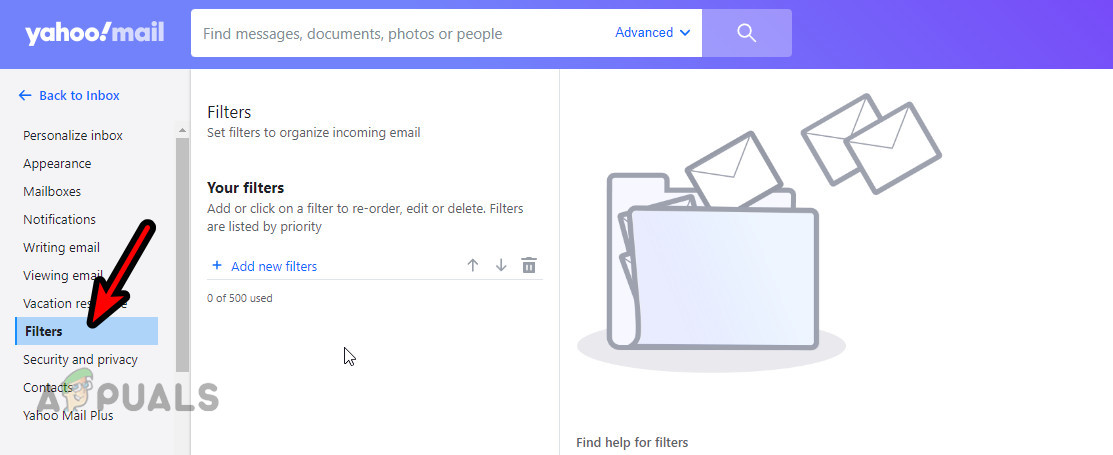
Check the Yahoo Filters of the Recipient - If you still encounter problems, work to have your Yahoo mail address whitelisted on the recipient’s end and observe whether this changes the situation.
8. Get Suspicious Activity Tag Removed from your Yahoo Account
If your account is incorrectly flagged for suspicious activity by Yahoo’s filters, your emails might not be delivered. Removing this tag could fix the delivery issue.
- Open a web browser and visit the Yahoo Product Assistance page.
- Select Mail under Choose Your Product and provide your Yahoo Mail ID.
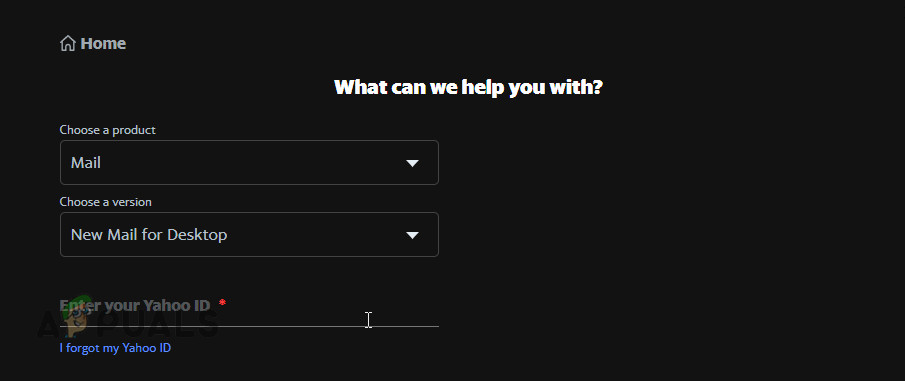
Use the Yahoo Help to Remove the Suspicious Tag from Your User Account - Follow the on-screen prompts to complete the process and then retest sending emails from your Yahoo account.
9. Further Troubleshooting
Should the problem remain, consider the following steps:
- New IP: If your IP has been marked as spam or blocked by email services, request a new IP from your ISP or ask the email service to unblock the IP. Note that this blockage might not stem from your actions but perhaps from previous misuse of the IP for spamming activities.
- Use a Service: Consider relaying your emails through another service like Proofpoint.
- Check for Country Restrictions: Emails may not be delivered if the recipient’s country filters messages, often due to national firewalls.
- Contact Support: Depending on the outcomes of your tests, reach out to Yahoo Support or the support team of the email service used by the recipients.
We encourage you to share your experiences with these solutions in the comments section.
The post How to Resolve Yahoo Emails Not Reaching Recipients? appeared first on Appuals.
]]>The post How to Fix Outlook Inbox Not Updating on Windows? appeared first on Appuals.
]]>
The issue of an Outlook inbox not updating can stem from server problems, conflicts with antivirus or firewall settings, and outdated software. Other potential causes include a poor network connection, an oversized local cache, damaged or corrupted PST files, or synchronization issues between offline and online items.
Simple actions such as restarting your computer, verifying your internet connection, or relaunching Outlook can often resolve the error of the Outlook inbox not updating.
The following are some solutions that may help you address this issue:
1. Clean Up a Folder
An overloaded email inbox may lead to the Outlook Inbox not updating. Thus, cleaning up unnecessary emails or folders can free up space for new messages. Note that redundant emails are transferred to the Deleted Items folder.
- Right-click the folder you wish to clean.
- Select the Clean Up Folder button from the drop-down menu.

Clean up a Folder - Click Clean Up Folder in the pop-up window that appears.

Clean up a Folder - Confirm your action by clicking OK in the warning dialog box.

Clean up a Folder
2. Create a New Outlook Profile
A corrupted profile could be causing the problem. Creating a new one might resolve the issue, allowing you to toggle between the old and the new account, thus updating emails and recovering any missing data.
- Close Outlook and go to the Control Panel.
- Find and click on Mail (Microsoft Outlook) (32-bit), then select Show Profiles.

Create a New Outlook Profile - Press Add, assign a new profile name, and click OK.

Create a New Outlook Profile - Enter your email credentials manually, including your username and password, then click Next.

Create a New Outlook Profile - Complete any additional steps as prompted, and select Finish when the account has been added.
3. Clear OST Files
Corrupt or damaged OST files can prevent your Outlook Inbox from updating. Deleting these files may alleviate the problem and create additional storage space for incoming emails.
- Press Windows key + R to open the Run dialog.
- Type %localappdata%\Microsoft\Outlook and hit Enter.

Clear OST Files - Locate the OST files within the Outlook folder that opens, right-click them, and select Delete.

Clear OST Files
4. Increase Inbox Refresh Rate
Outlook is configured by default to automatically refresh every 30 minutes when connected. During this time, it downloads incoming messages and sends any messages in your outbox. This interval might be causing your Outlook inbox not to update your emails promptly.
However, this interval might be too slow for some users. You can increase the refresh rate, but be cautious not to set it below five minutes, as Outlook could be interrupted mid-download.
- Open Outlook and select the File tab.
- Click on Options and then Advanced.
- Go to the Send/Receive section.
- In that section, adjust the settings in the Send/Receive box.

Increasing Inbox Refresh Rate - Set a preferred interval for automatic send/receive.
- Close the dialog box and click OK to save your settings.

Increasing Inbox Refresh Rate
5. Enable Send Immediately Option
In Microsoft Outlook, the option to send emails immediately is crucial, as without it, emails may remain in your inbox until a set schedule. Enabling this option can rectify the issue of the inbox not updating since emails might be stuck in the outbox.
- Open Outlook, navigate to the File tab.
- Choose Options, and proceed to Advanced.

Allow Send Immediately Option - Find the Send and Receive section.
- Tick the box for Send immediately when connected, and then press OK.

Allow Send Immediately Option
6. Verify Outlook Settings
It’s essential to ensure that email credentials and account settings are correctly configured to connect with the mailbox server and synchronize mail items.
- Open Outlook and access the File tab.
- Select Account Settings and choose your email account.

Verify Outlook Settings - Click on Change.
- Review and, if necessary, update your email information, then select Next.

Verify Outlook Settings - Once the verification is complete, click Done.

Verify Outlook Settings
7. Repair Your Microsoft Office
If Microsoft Office itself is corrupted or damaged, this could be impacting Outlook’s ability to update the inbox. Repairing Microsoft Office might solve this issue.
- Open the Control Panel, select Programs, and then click on Uninstall a program.
- Locate Microsoft Office in the list, and click Change.

Repair Your Microsoft Office - Opt for Repair in the following window and click Continue.

Repair Your Microsoft Office - Choose Quick Repair from the repair window, then click Repair.

Repair Your Microsoft Office - Complete the repair process following the on-screen instructions.
- Once finished, a message stating Done Repair should appear on the screen.
If these steps fail to correct the issue, you may seek further assistance by contacting the Microsoft Support team.
The post How to Fix Outlook Inbox Not Updating on Windows? appeared first on Appuals.
]]>The post How to Move Outlook Navigation Pane to Bottom? appeared first on Appuals.
]]>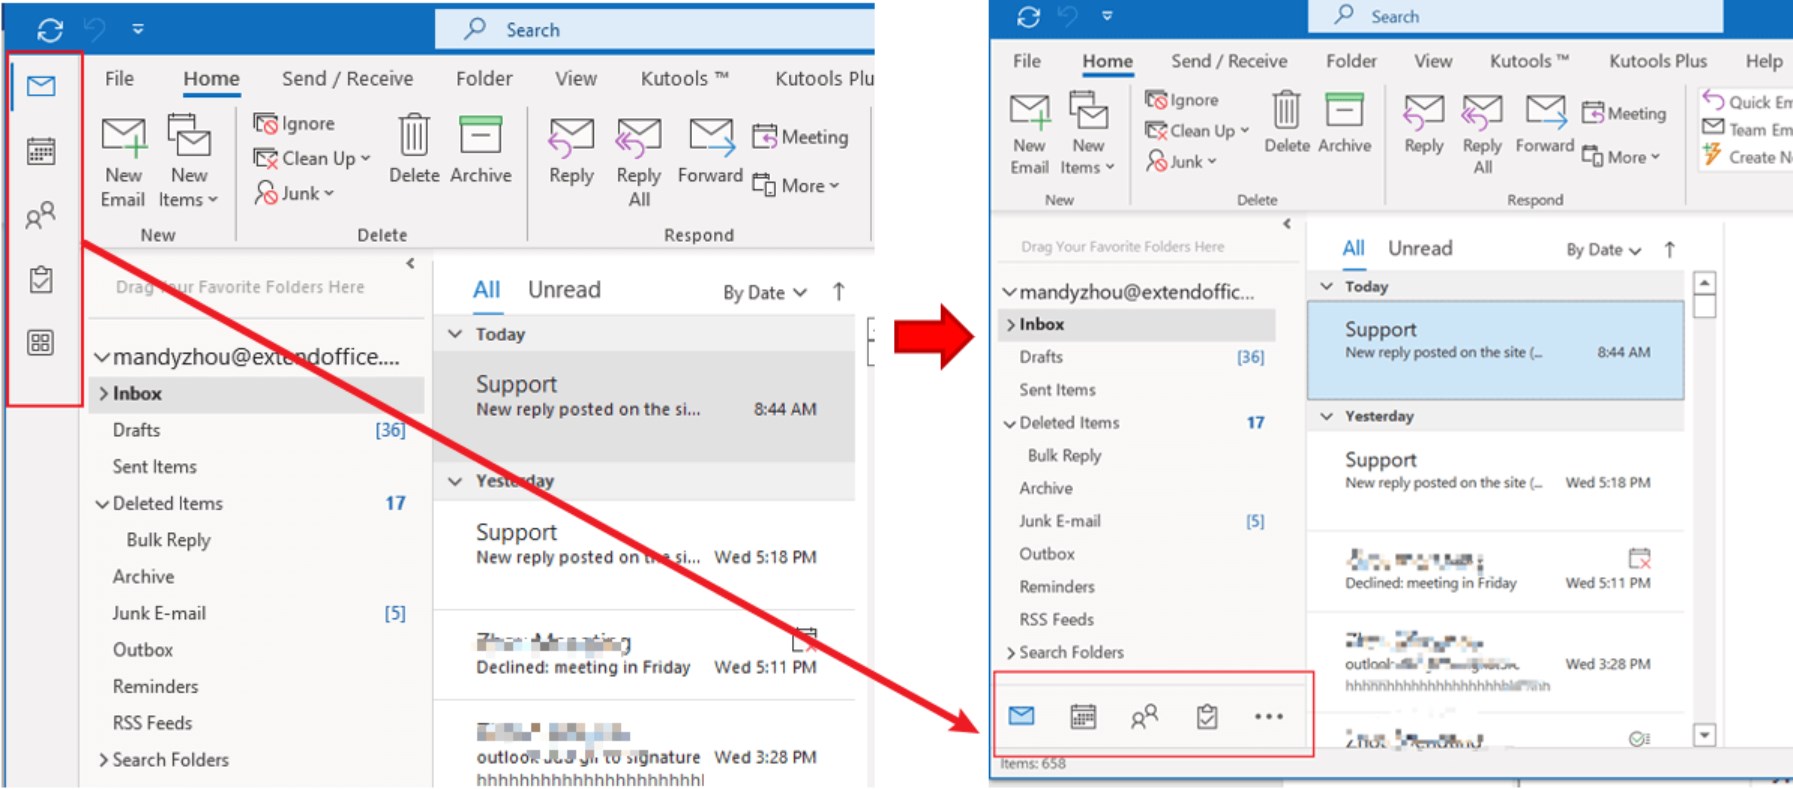
If you prefer having the Navigation Pane at the bottom, we’ll explore two methods to customize this setup.
1. Via Outlook Settings
To relocate your Outlook toolbar to the original position, follow these steps:
- Click “File” in the top-left corner of your Outlook app.
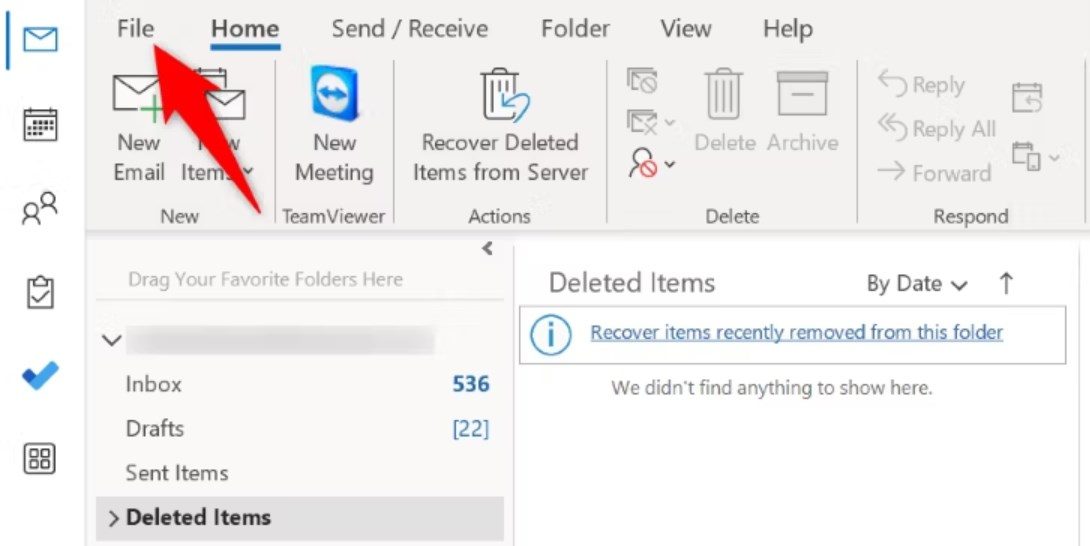
Click on File - Choose “Options” from the left sidebar.
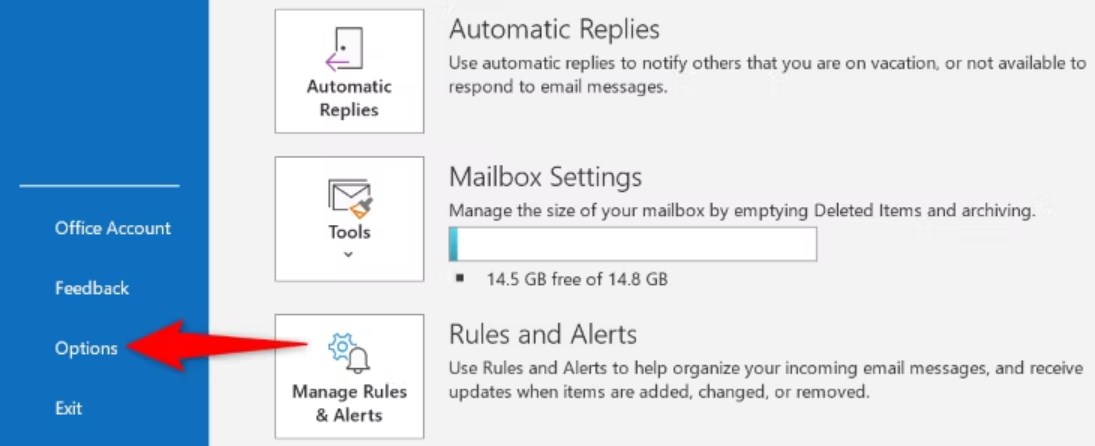
Select Options - Next, select ” Advanced.”
- Turn off the “Show Apps in Outlook” option in the right pane.
- Save your changes by clicking “OK” at the bottom. Close and reopen your Outlook app to apply the changes. Your toolbar will now appear in the bottom bar of the app.
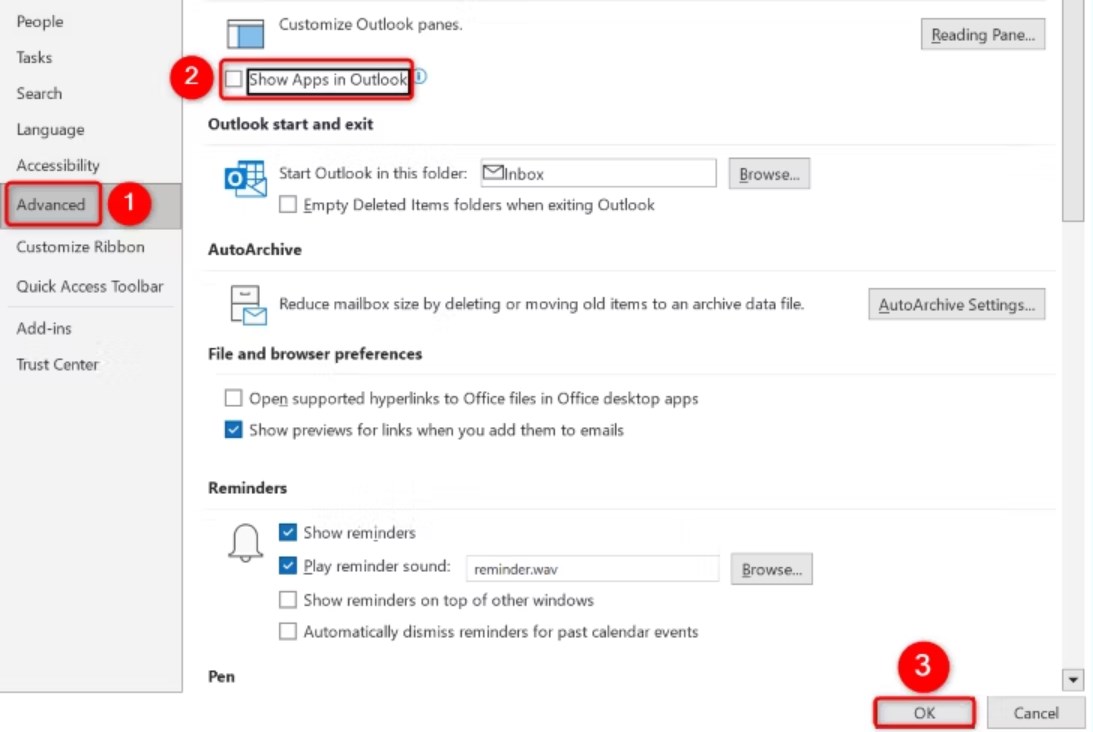
Advanced > Uncheck Show Apps in Outlook > OK
2. Through the Registry Editor
Adjusting the Navigation bar position in Outlook through the Registry Editor can be a bit complex. Here are the steps:
Please proceed with caution when editing the registry, as it contains sensitive system information. If you’re not comfortable with these steps, it’s advisable to seek assistance from someone with experience in registry editing.
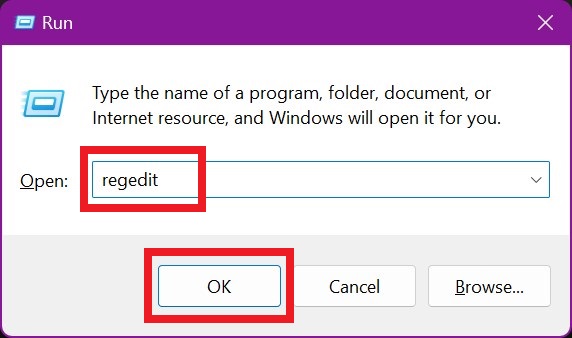
- Press the Windows key and R simultaneously to open the Run dialog box. Type “regedit” and click OK.
Type regedit and click on OK - If a User Account Control dialog box appears, click Yes to proceed.
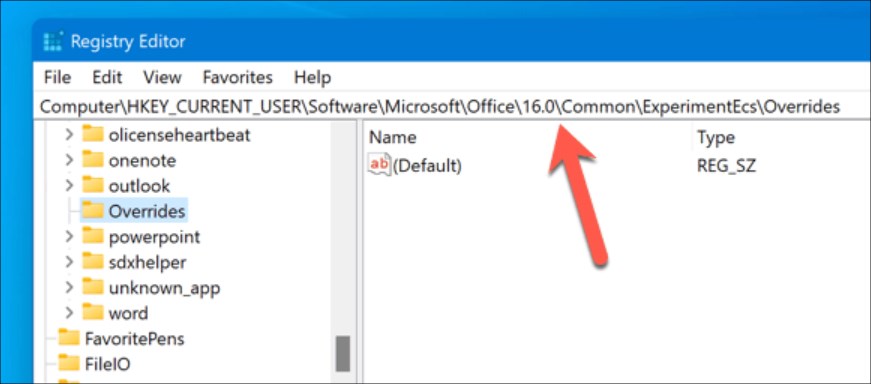
- In the Registry Editor window, navigate to: HKEY_CURRENT_USER\SOFTWARE\Microsoft\Office\16.0\Common\ExperimentEcs\Overrides
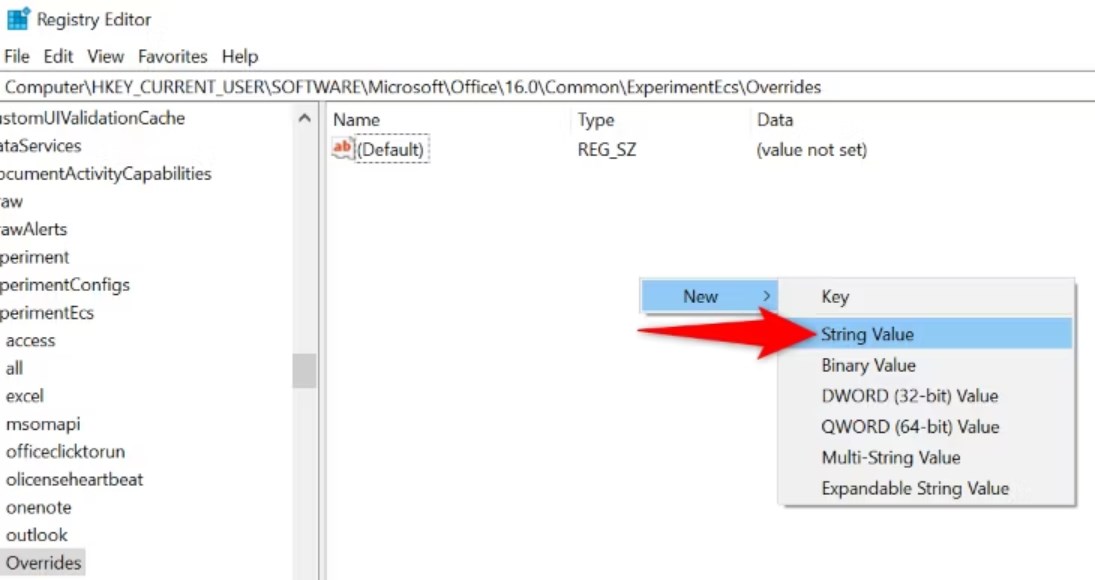
Navigate to the address - If you don’t find the “Microsoft.Office.Outlook.Hub.HubBar” string value, create it. Right-click the Overrides folder, select “New” > “String Value“, and name it “Microsoft.Office.Outlook.Hub.HubBar.”
New > String Value - Double-click the newly created string value. In the Edit String dialog, set the Value data to “False” and click OK.
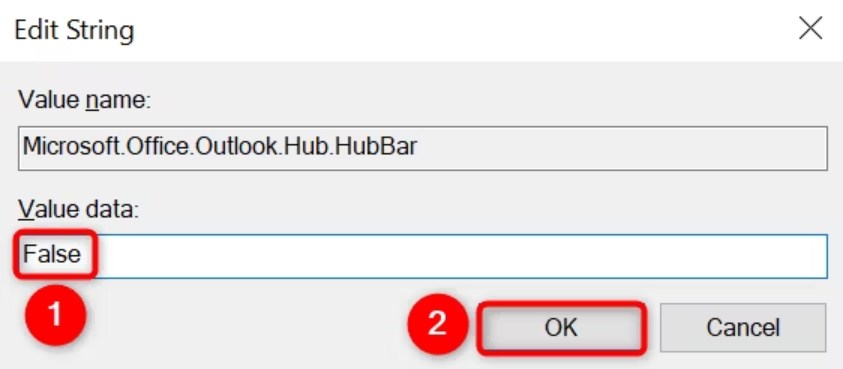
Set the value data to False > OK - Restart Outlook. The Navigation pane should now appear at the bottom of the page.
The post How to Move Outlook Navigation Pane to Bottom? appeared first on Appuals.
]]>The post How to Remove “App Search Bar” in Outlook [All Versions] appeared first on Appuals.
]]>We’ll provide you with step-by-step instructions to regain control of your Outlook interface. Once it’s gone, you’ll have more space and less distraction. Let’s simplify your Outlook experience for smoother navigation and increased productivity.
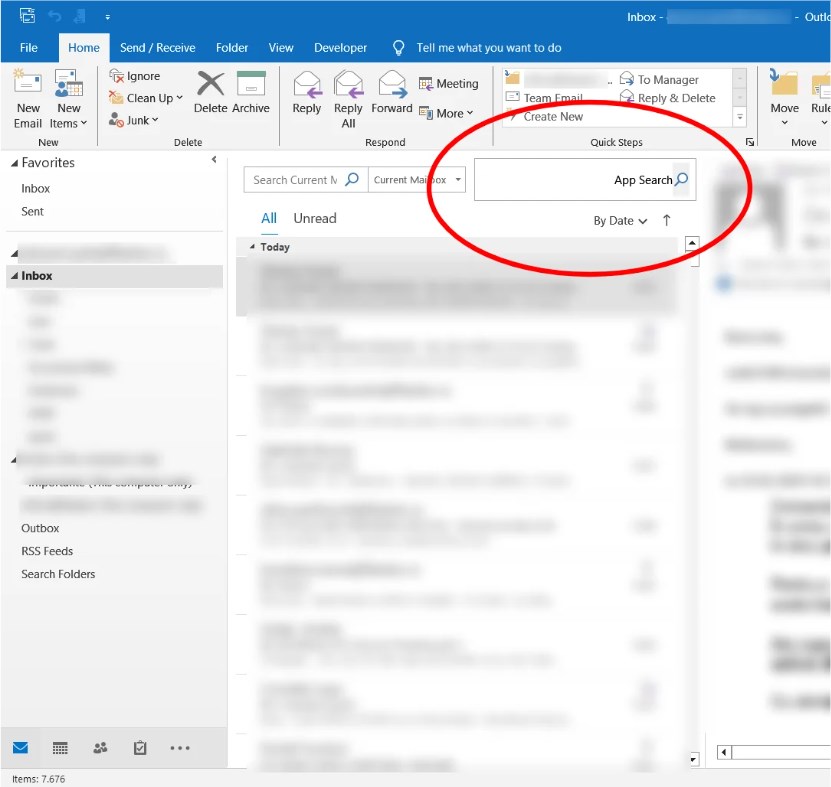
Table of Contents
Why Remove App Search Bar in Outlook?
Removing the App Search Bar in Outlook can enhance your user experience in several ways:
- Declutters the interface, providing more screen space
- Reduces visual distractions for better focus
- Streamlines navigation process, especially if alternative search methods are preferred
- Tailors Outlook environment to individual preferences
- Optimizes productivity by creating a more efficient workspace
READ MORE: Is Your Search Bar Missing in Outlook? Try These Fixes! ➜
How to Remove the “App Search Bar” in Outlook (Recent Version)
Here, we have mentioned different ways to remove the App Search Bar in Outlook in the recent versions. So, let’s get into it.
1. Set the Reading Pane to the Bottom or Off
Follow the below-mentioned process to set the reading pane to the bottom or turn it off:
Different versions of Outlook on different platforms, depending on whether you are enrolled in the Beta program or not, have varying appearances in UI elements. However, the general steps are the same as follows.
- Click on the “View” tab in the Outlook ribbon.
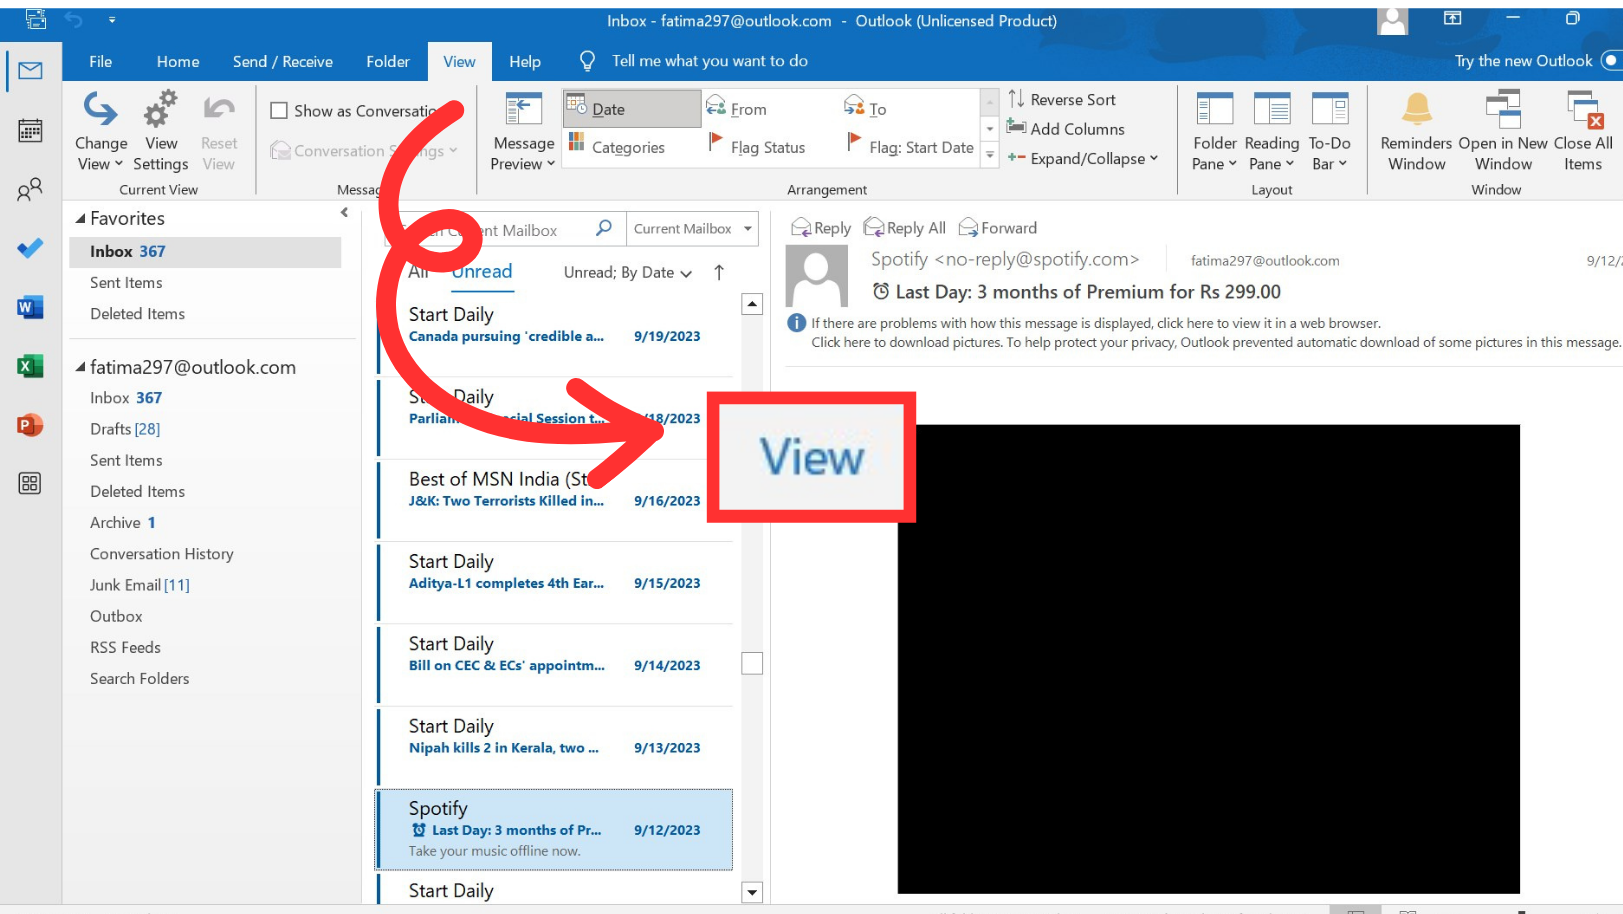
Select View - Navigate to the “Reading Pane” section.
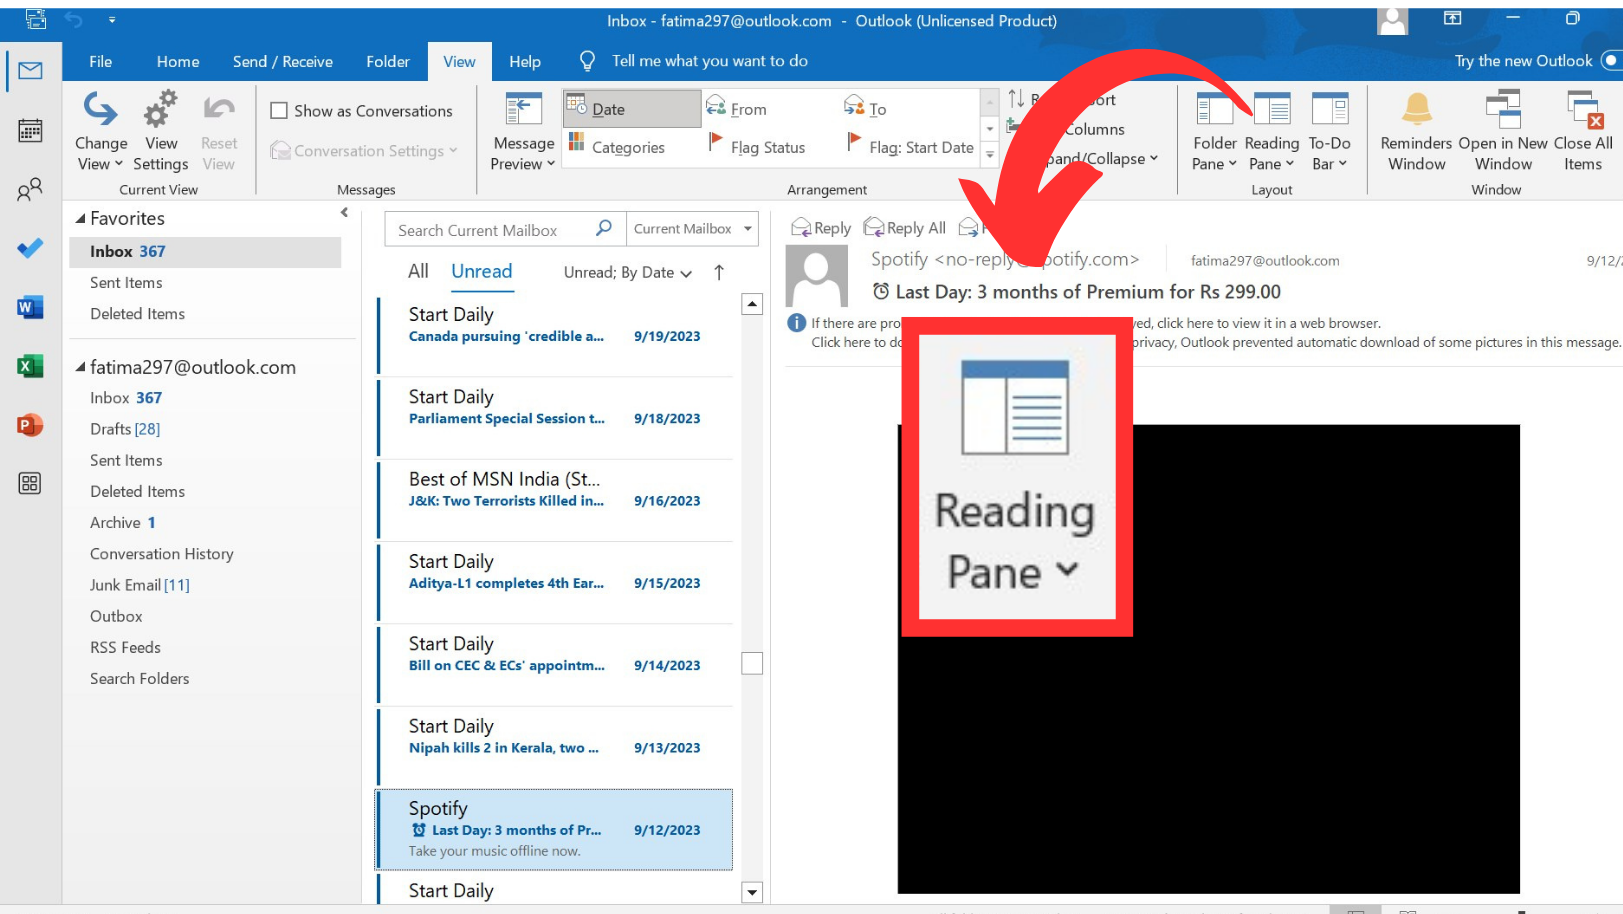
Click on Reading Pane - Select either “Bottom” or “Off” from the options provided. This will quickly remove the app search bar from your Outlook interface.
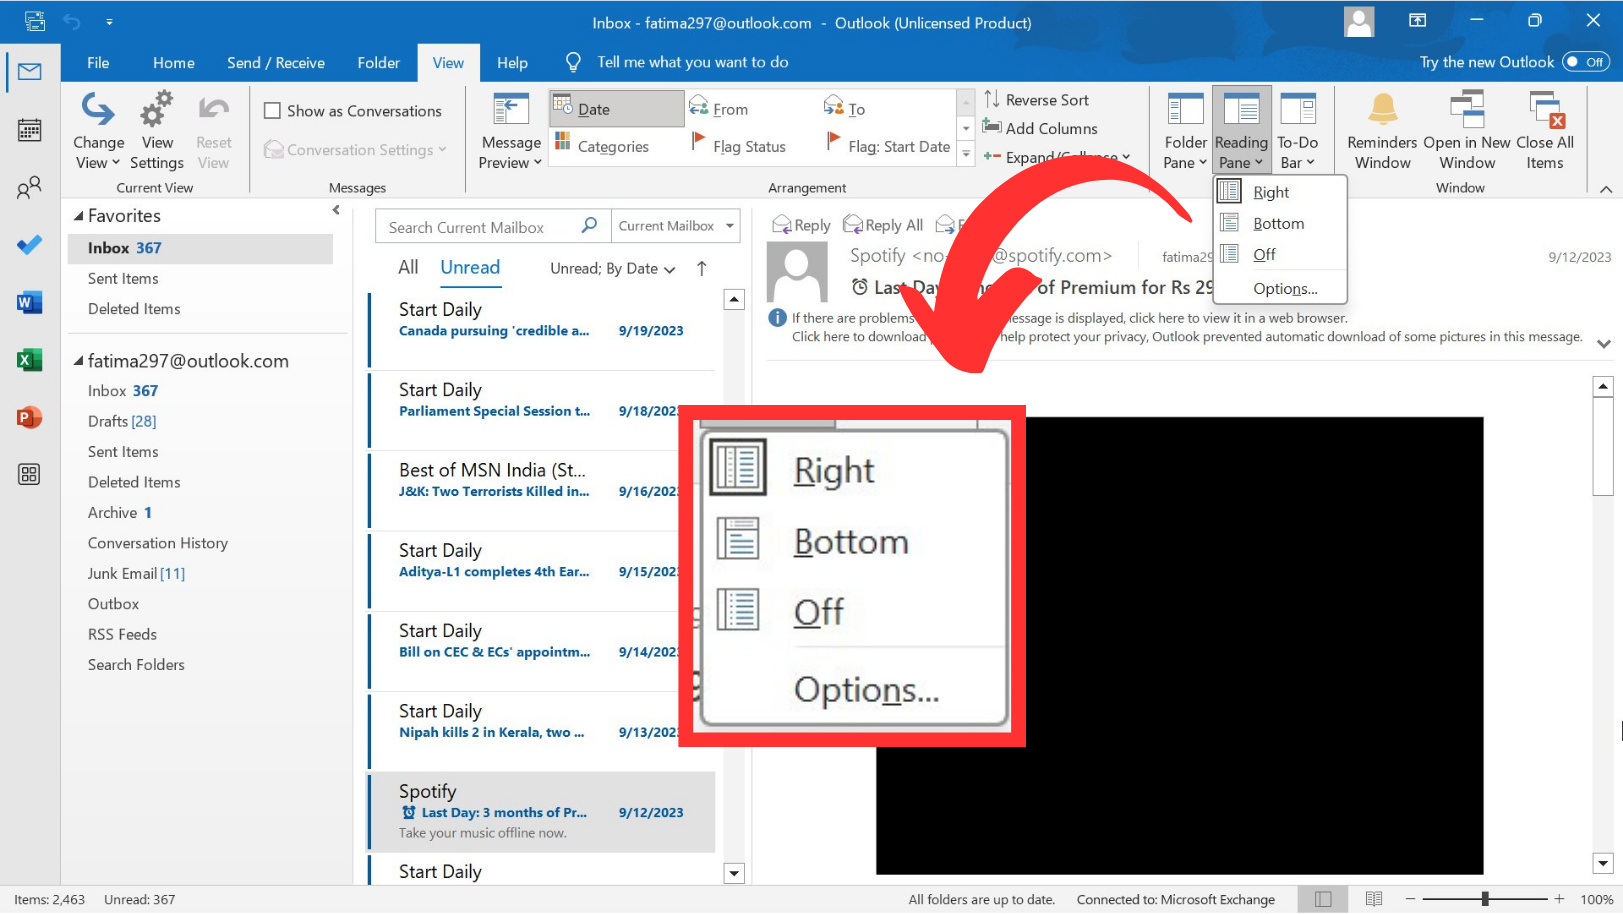
Now, choose Bottom or Off
READ MORE: How to Fix Outlook When It’s Stuck on the Loading Profile Screen? ➜
2. Revert the Office M365 Click-to-Run installation
Implement the following procedure to revert your Outlook to the older build:
- Close all Office applications that are currently running.
- Click on the Start menu.
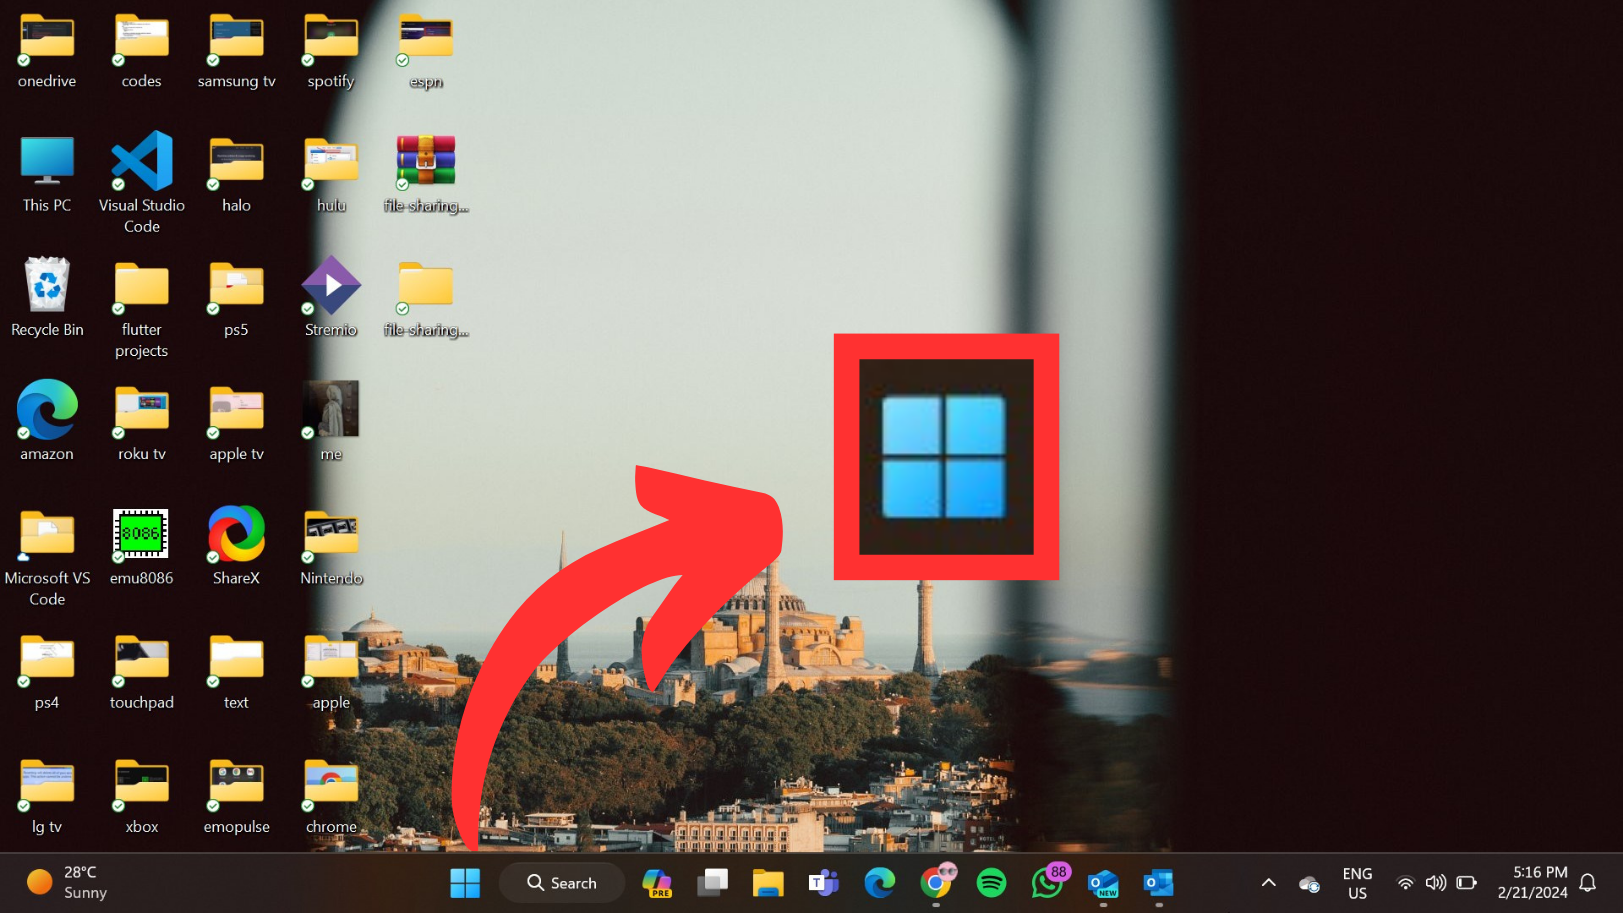
Click on Start - Type “cmd” in the search box and select “Run as administrator” from the context menu.

Choose Run as administrator - In the Command Prompt window, type the following commands one by one, pressing Enter after each:
- cd %programfiles%\Common Files\Microsoft Shared\ClickToRun
officec2rclient.exe /update user updatetoversion=16.0.17126.20132

Type the commands
- cd %programfiles%\Common Files\Microsoft Shared\ClickToRun
- These commands will trigger the repair process for Office. Wait for the repair to complete.
- Now, launch Outlook.
- Click on “File;” and choose “Office Account” from the list of options.
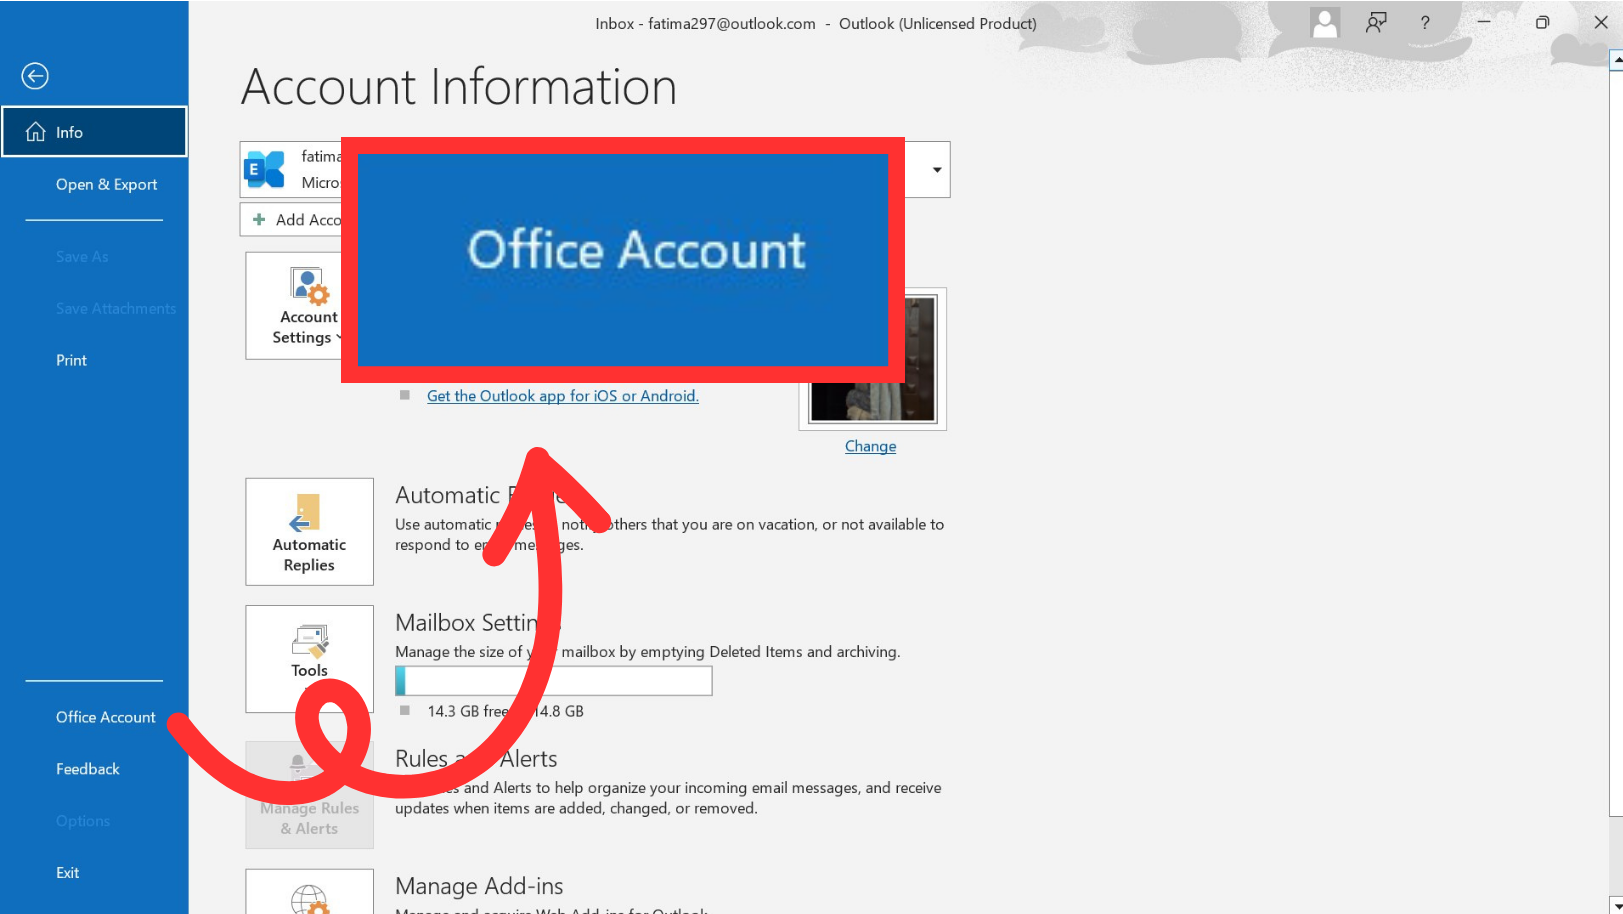
Select Office Account - Here, select “Update Options” and click on “Disable Updates.”
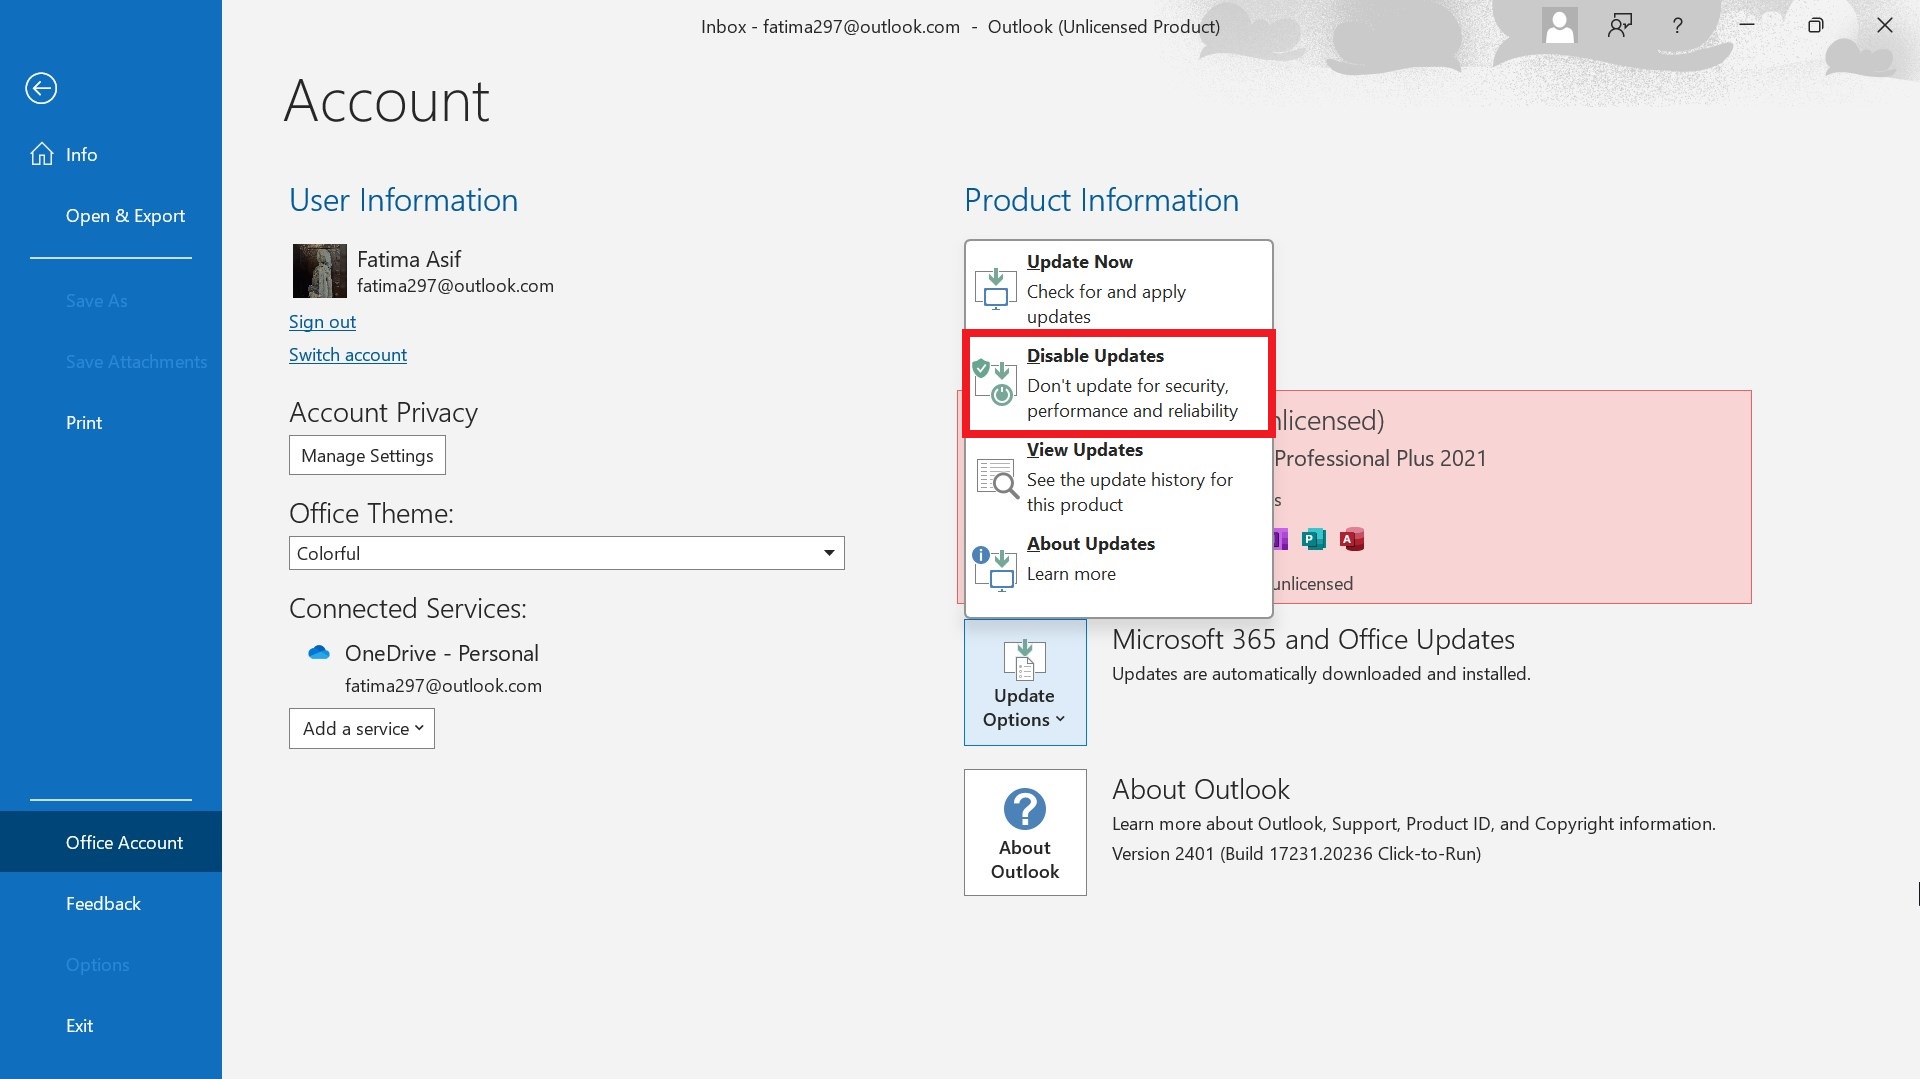
Disable Updates
READ MORE: How to Create a new Outlook Profile (All Versions) ➜
How to Remove the “App Search Bar” in Outlook (2016 or Earlier)
To remove the App Search Bar from Outlook 2016 or earlier versions, follow this process:
- Open Outlook.
- Access the “File” tab positioned at the top left corner.
- Choose “Options” from the left-side menu.
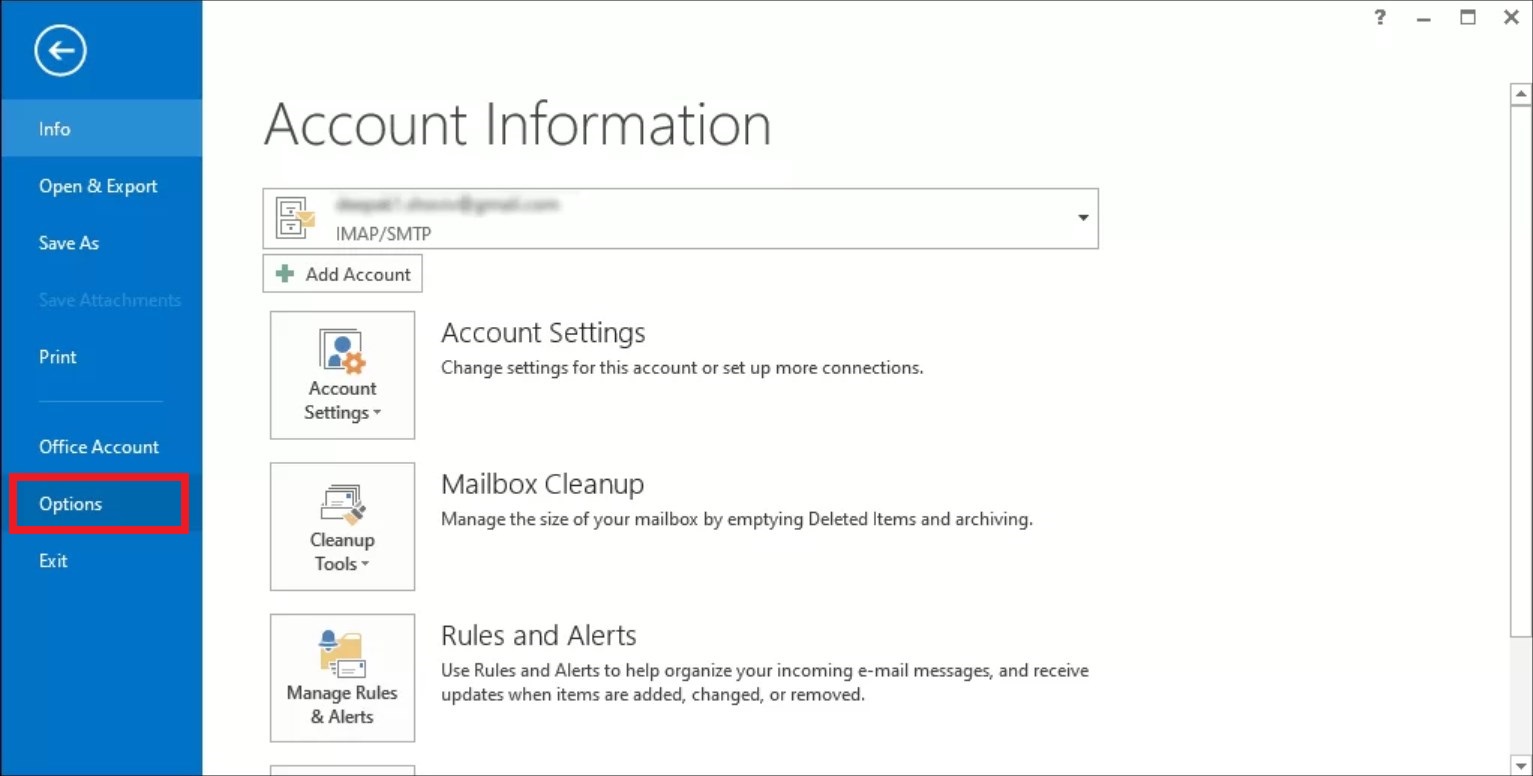
Select Options | Shoviv - Within the “Outlook Options” window, navigate to the “Advanced” section.
- Find the checkbox named “Show Apps in Outlook.”
- Uncheck this option and confirm by clicking on “OK.”
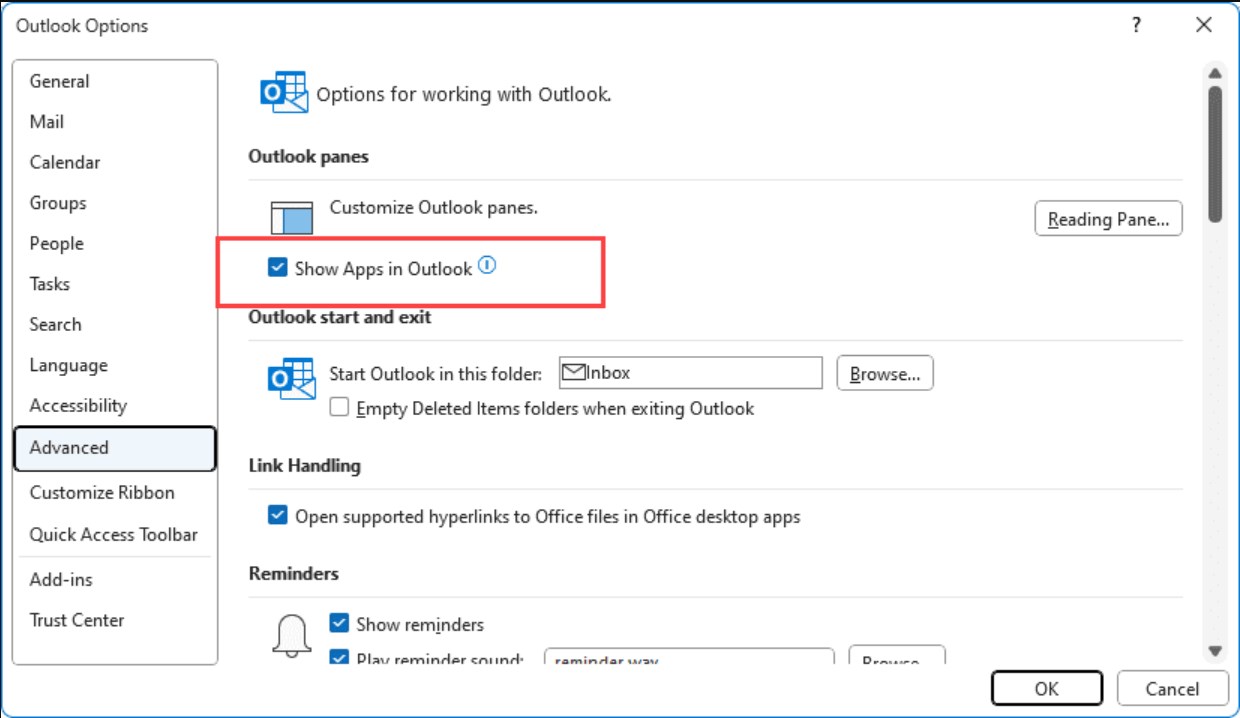
Uncheck the box | Slipstick Systems
READ MORE: How to Select Multiple Emails in Any Outlook Version [2024] ➜
What to Do if None of the Methods Work
If you’re encountering a specific issue with the App Search Bar, and it seems unusual or unintended, you may want to try the following troubleshooting steps:
- Restart Outlook: Simply restarting the Outlook application can sometimes resolve minor display or functionality issues.
- Check for Updates: Ensure that your Outlook application is up to date. Sometimes, issues like this can be resolved by installing the latest updates, which may include bug fixes and improvements.
- Disable Add-ins: Sometimes, third-party add-ins or integrations can cause unexpected behavior in Outlook. Try disabling any recently installed add-ins to see if the issue resolves.
- Contact Support: If you’re still experiencing the issue after trying the above steps, it may be helpful to contact Microsoft Support for further assistance. They can provide more specific guidance and troubleshooting steps based on your version of the app and the nature of the issue you’re encountering.
READ MORE: How to Fix an Email That Won’t Send in Outlook? ➜
Final Words
In conclusion, by following the provided steps, you can effectively remove the App Search Bar from Outlook, thus enhancing your productivity and streamlining your email management experience. Remember to restart Outlook to ensure the changes take effect. Enjoy a clutter-free workspace and smoother navigation as you focus on what matters most in your inbox.
FAQs
What should I do if Outlook keeps crashing or freezing?
How do I clear the search bar in Outlook app?
To clear the search bar of your Outlook account, log into your account on Outlook Web. Click on Settings at the top and select General > Privacy and data > Delete history here.
How do I hide the apps bar in Outlook?
To hide the apps bar in Outlook, right-click on the navigation pane and uncheck the Apps for Office option. However, if this option isn’t visible, click the three dots at the bottom of the pane, choose Navigation Options, and adjust the display settings to hide the apps bar.
How can I change the default font and formatting in Outlook emails?
Go to File > Options > Mail > Stationery and Fonts to customize your email formatting.
The post How to Remove “App Search Bar” in Outlook [All Versions] appeared first on Appuals.
]]>The post How to Fix the Error 500 in Outlook? appeared first on Appuals.
]]>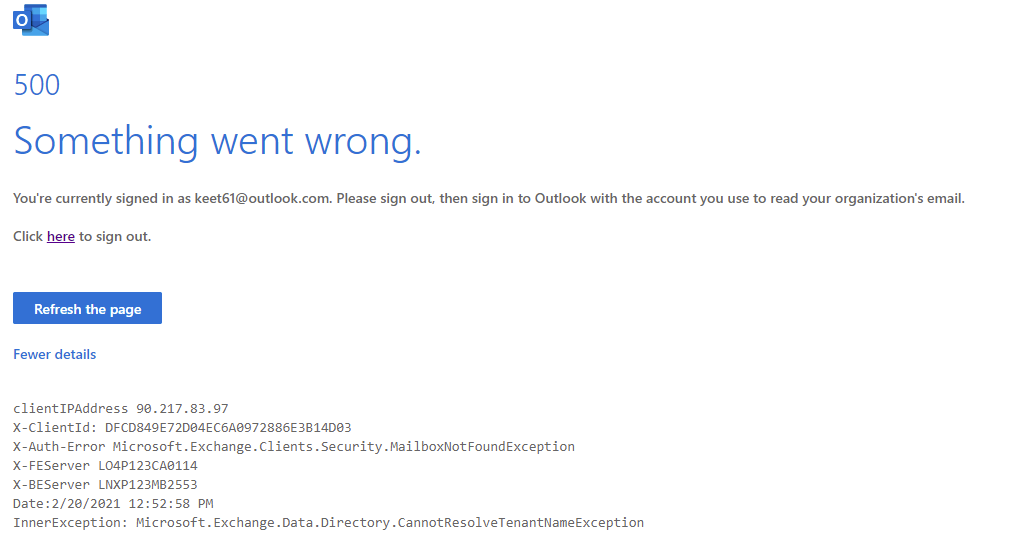
Continue reading the guide to equip yourself with the knowledge needed to resolve this error. Keep in mind that these solutions are temporary, as the error may recur when you try to access Outlook again.
Before you begin, try logging out and logging into your Outlook account again as doing this simple step resolved this error for many users.
1. Check Microsoft’s Service Health
To determine if the error is due to a Microsoft service outage, visit the Service Health panel. If a Microsoft service is down, you must wait until it is fully restored.
- Visit https://admin.microsoft.com and sign in to your account.
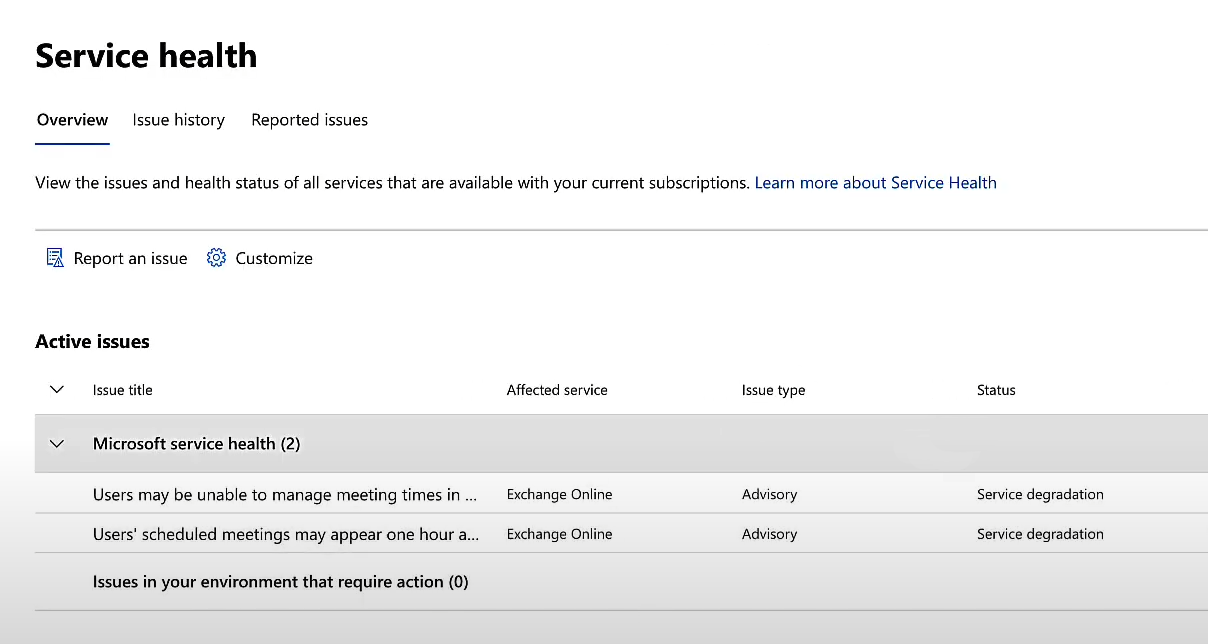
- Select the Health tab.
- From the dropdown menu, choose the Service Health option.
- Here, you can see which services are currently degraded and which are functioning correctly. Any service experiencing issues will be flagged under advisories.
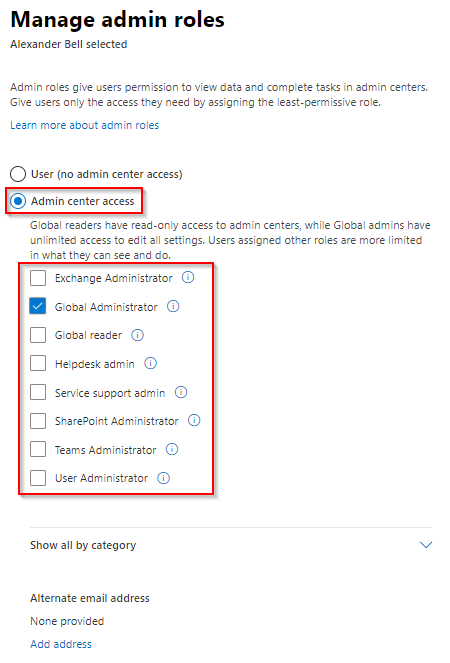
2. Remove Excessive User Permissions
The error can also occur if a user has too many administrator roles assigned, which can cause endless browser redirects. You can correct this by removing some permissions.
If you are not an admin, contact the admin managing your Microsoft 365 subscription and request the removal of all admin roles except for Global Administrator. If you are the Global Administrator, you can make these changes yourself.
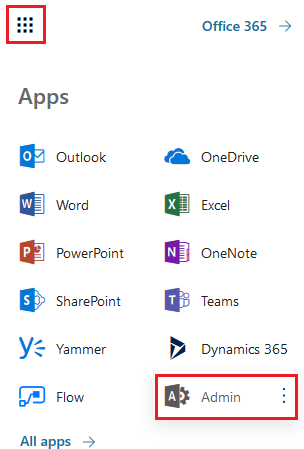
- Log in at www.office.com.
- Click on the app launcher in the top left and select Admin.
 Select the user experiencing the issue.
- Click on Manage roles.
- Uncheck all roles except for Global Administrator and save your changes.
3. Use Microsoft’s Diagnostics Tool
The Microsoft Support and Recovery Assistant is a diagnostic tool that can help troubleshoot problems with a wide range of applications.
- Download the tool from the official website at this link.
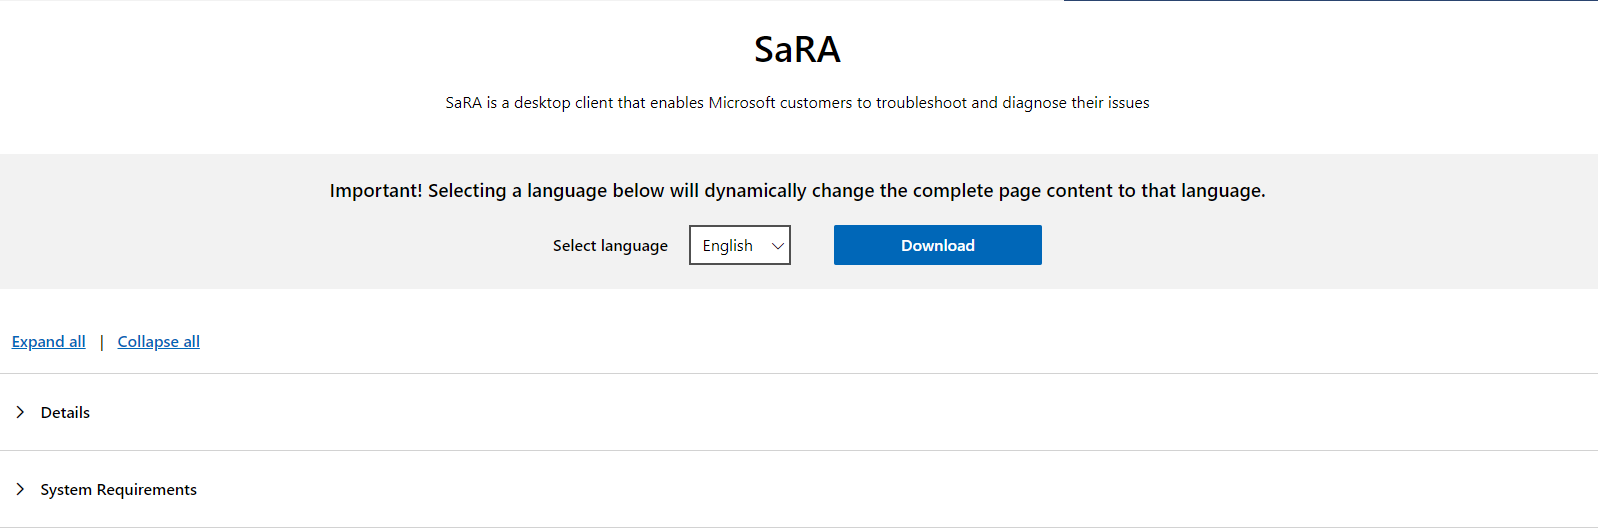
- Uncompress the downloaded file and install the tool. Once installed, open it.
- Select the “Outlook on the web” option and click on the Next button.
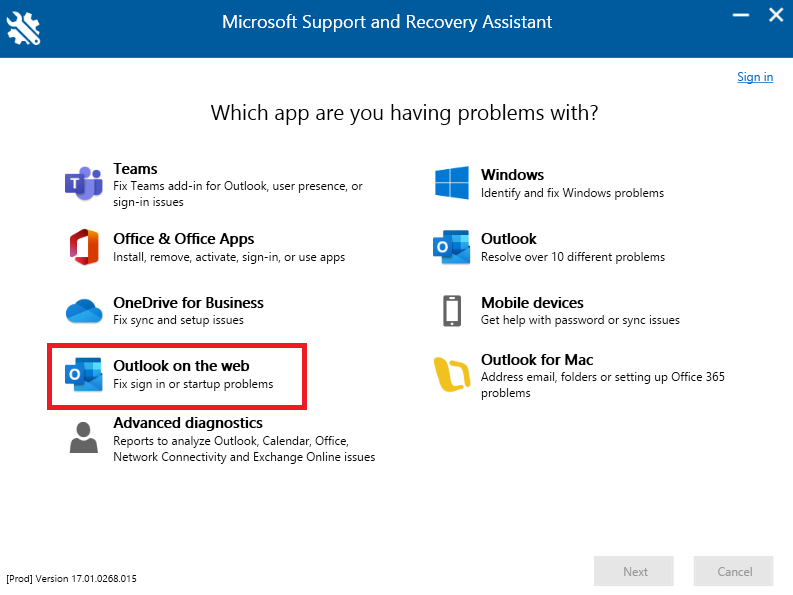
- Choose “I can’t run Outlook on the web” and click the Next button.
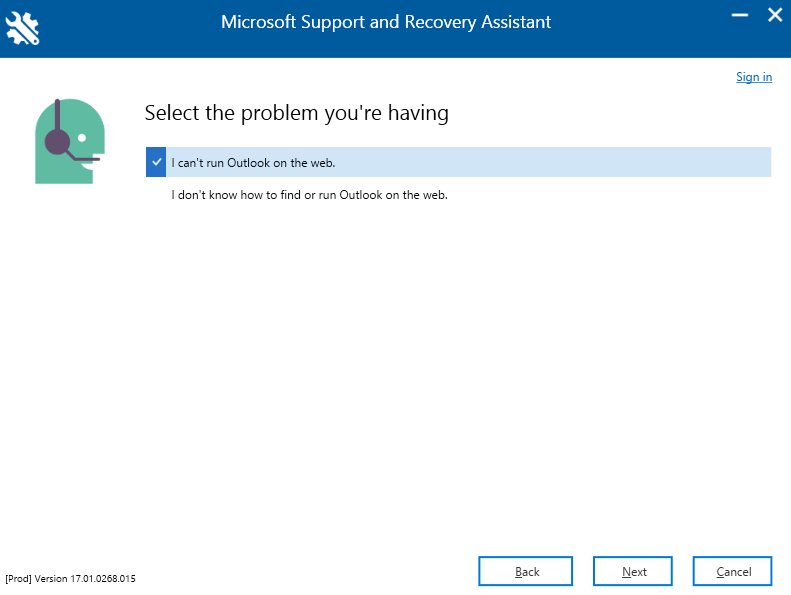
- Confirm if the device you are using is affected by selecting Yes and then click the Next button.
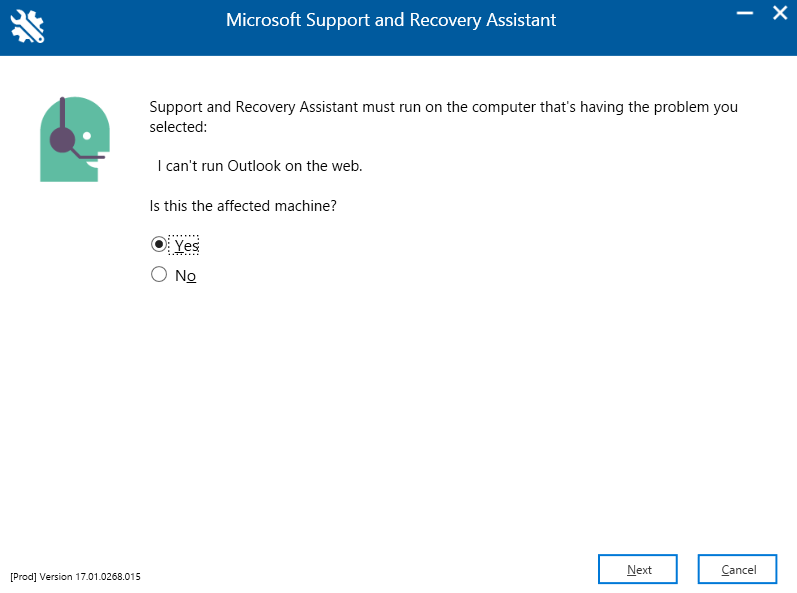
You’ll be prompted to log in to your account to commence the troubleshooting process.
The post How to Fix the Error 500 in Outlook? appeared first on Appuals.
]]>The post What is the Meaning of “Re” in an Email? appeared first on Appuals.
]]>That is why in this article we will take a closer look into the meaning of Re in an email and some common usage for the term. We will also discuss a few misconceptions about Re and how you should avoid using it in the wrong sense. So let’s jump in!
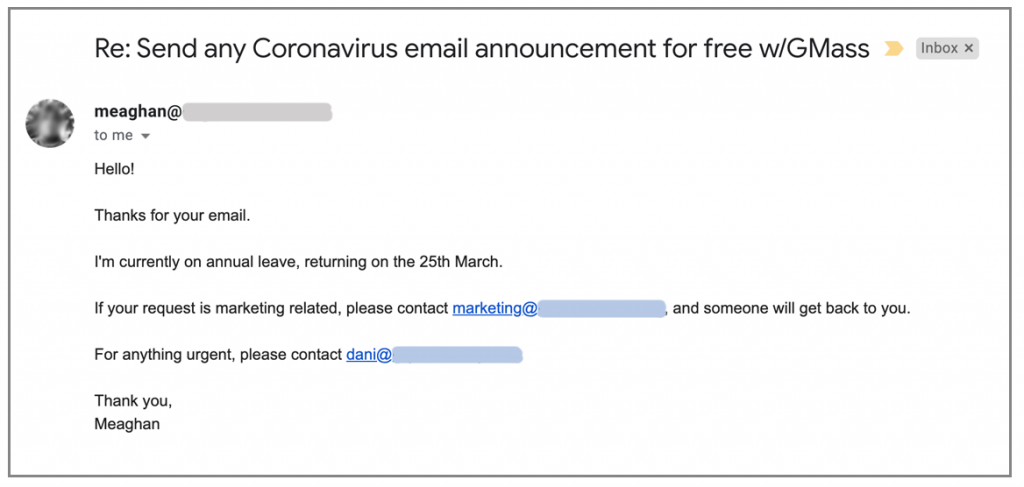
Table of Contents
What is Meant by Re?
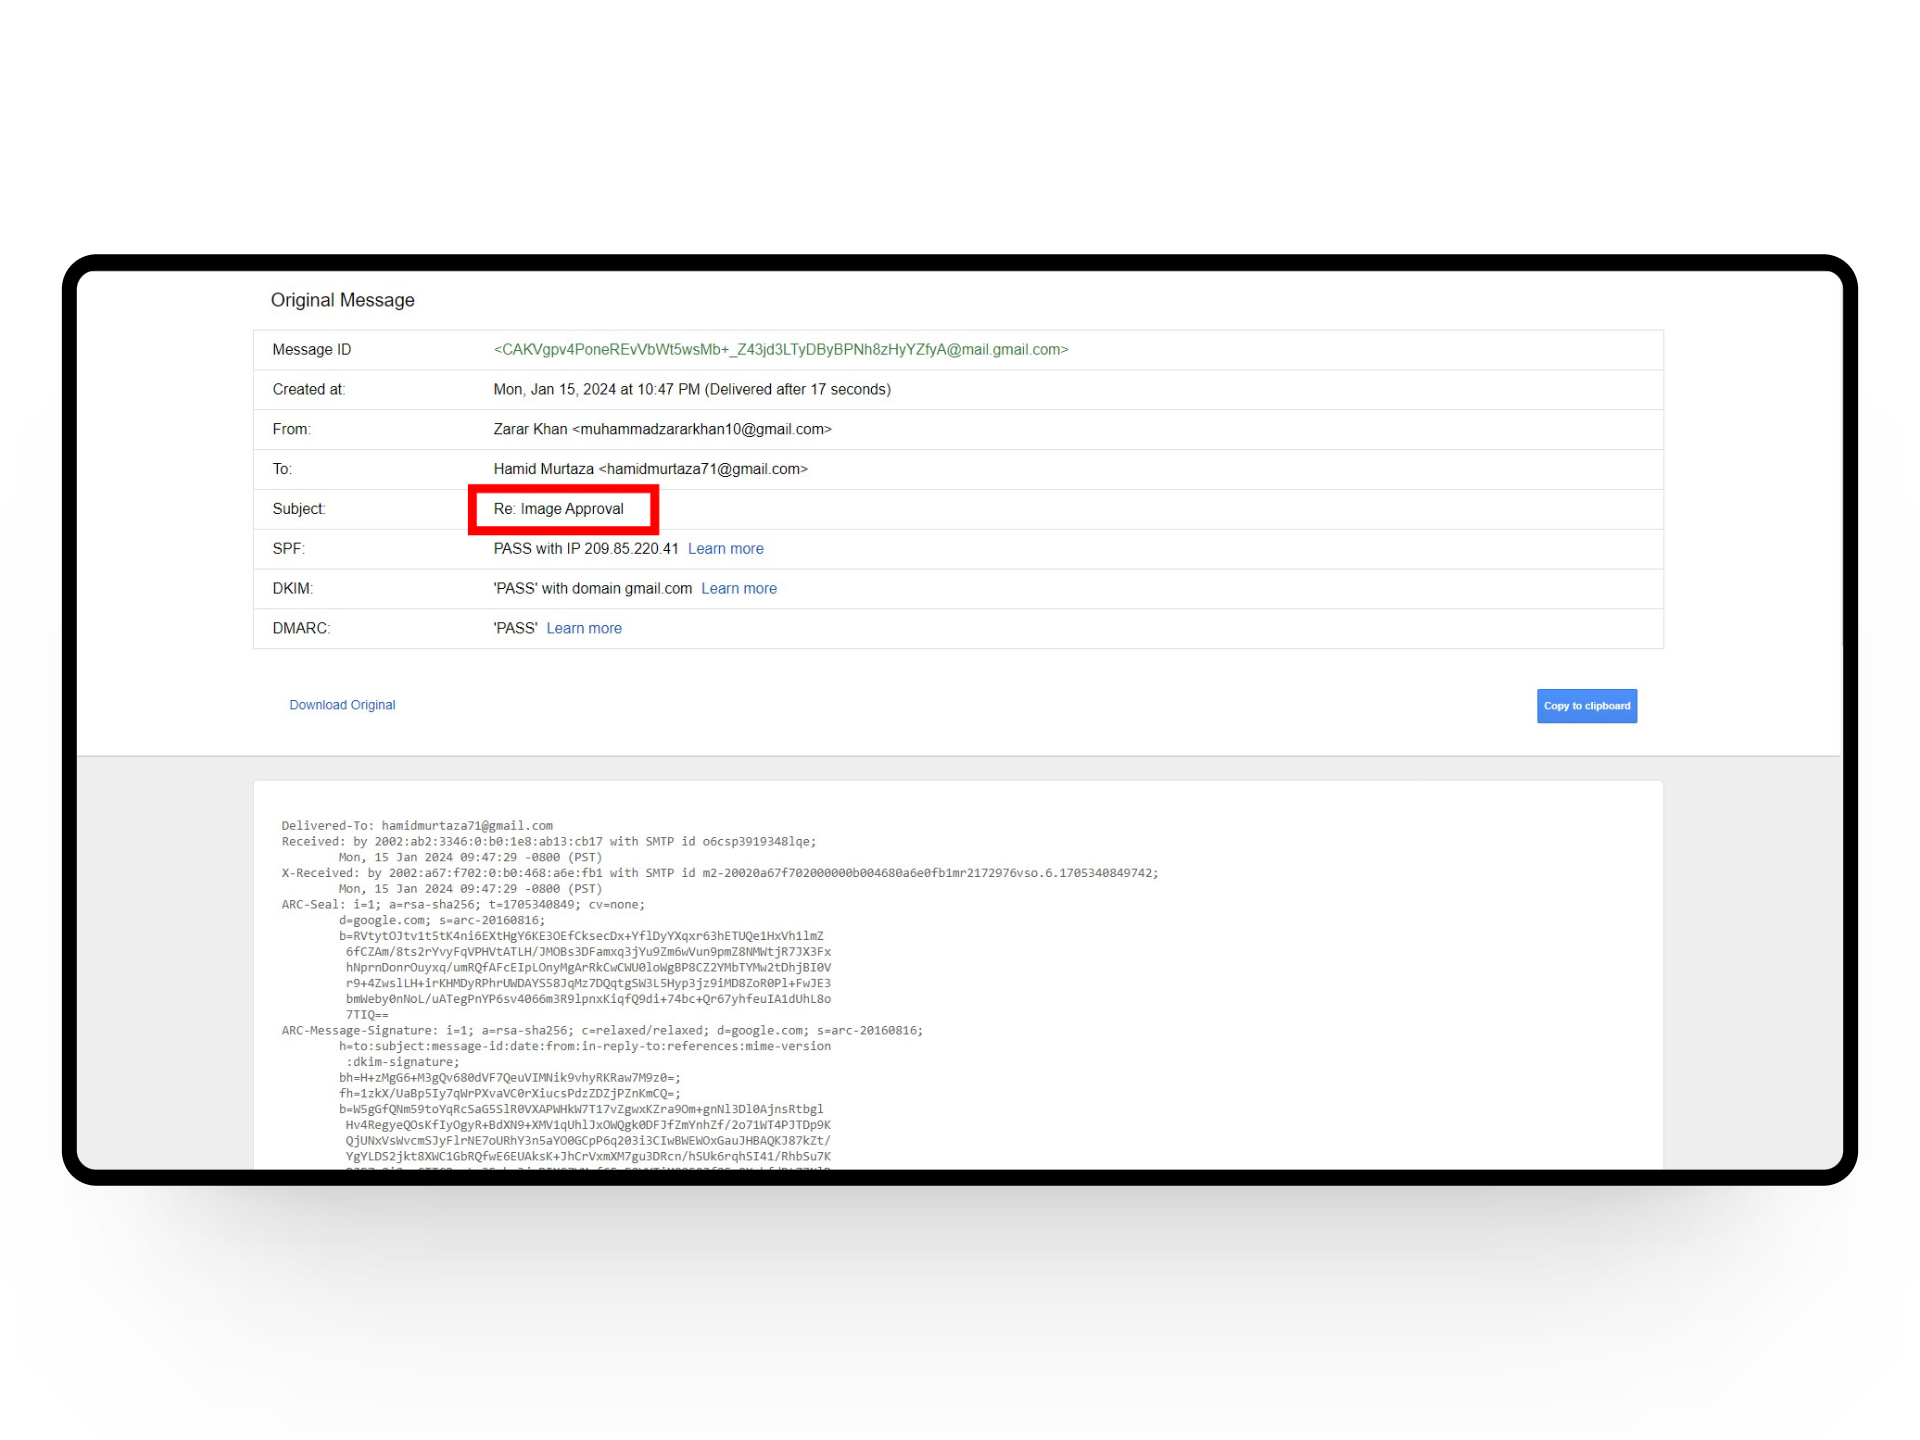
In simple terms, Re is short for “regarding” and is often used in the subject line when replying to an email. The simple term indicates that the email you just received was in response to a previous message.
Apart from addressing previous conversations, Re is also considered to have originated from the Latin phrase “in re“, which means “in the matter of.” Most people argue that Re is an abbreviation for words like “reply” or “regarding“, but others consider using it specifically in legal contexts.
How is Re Used in Emails?
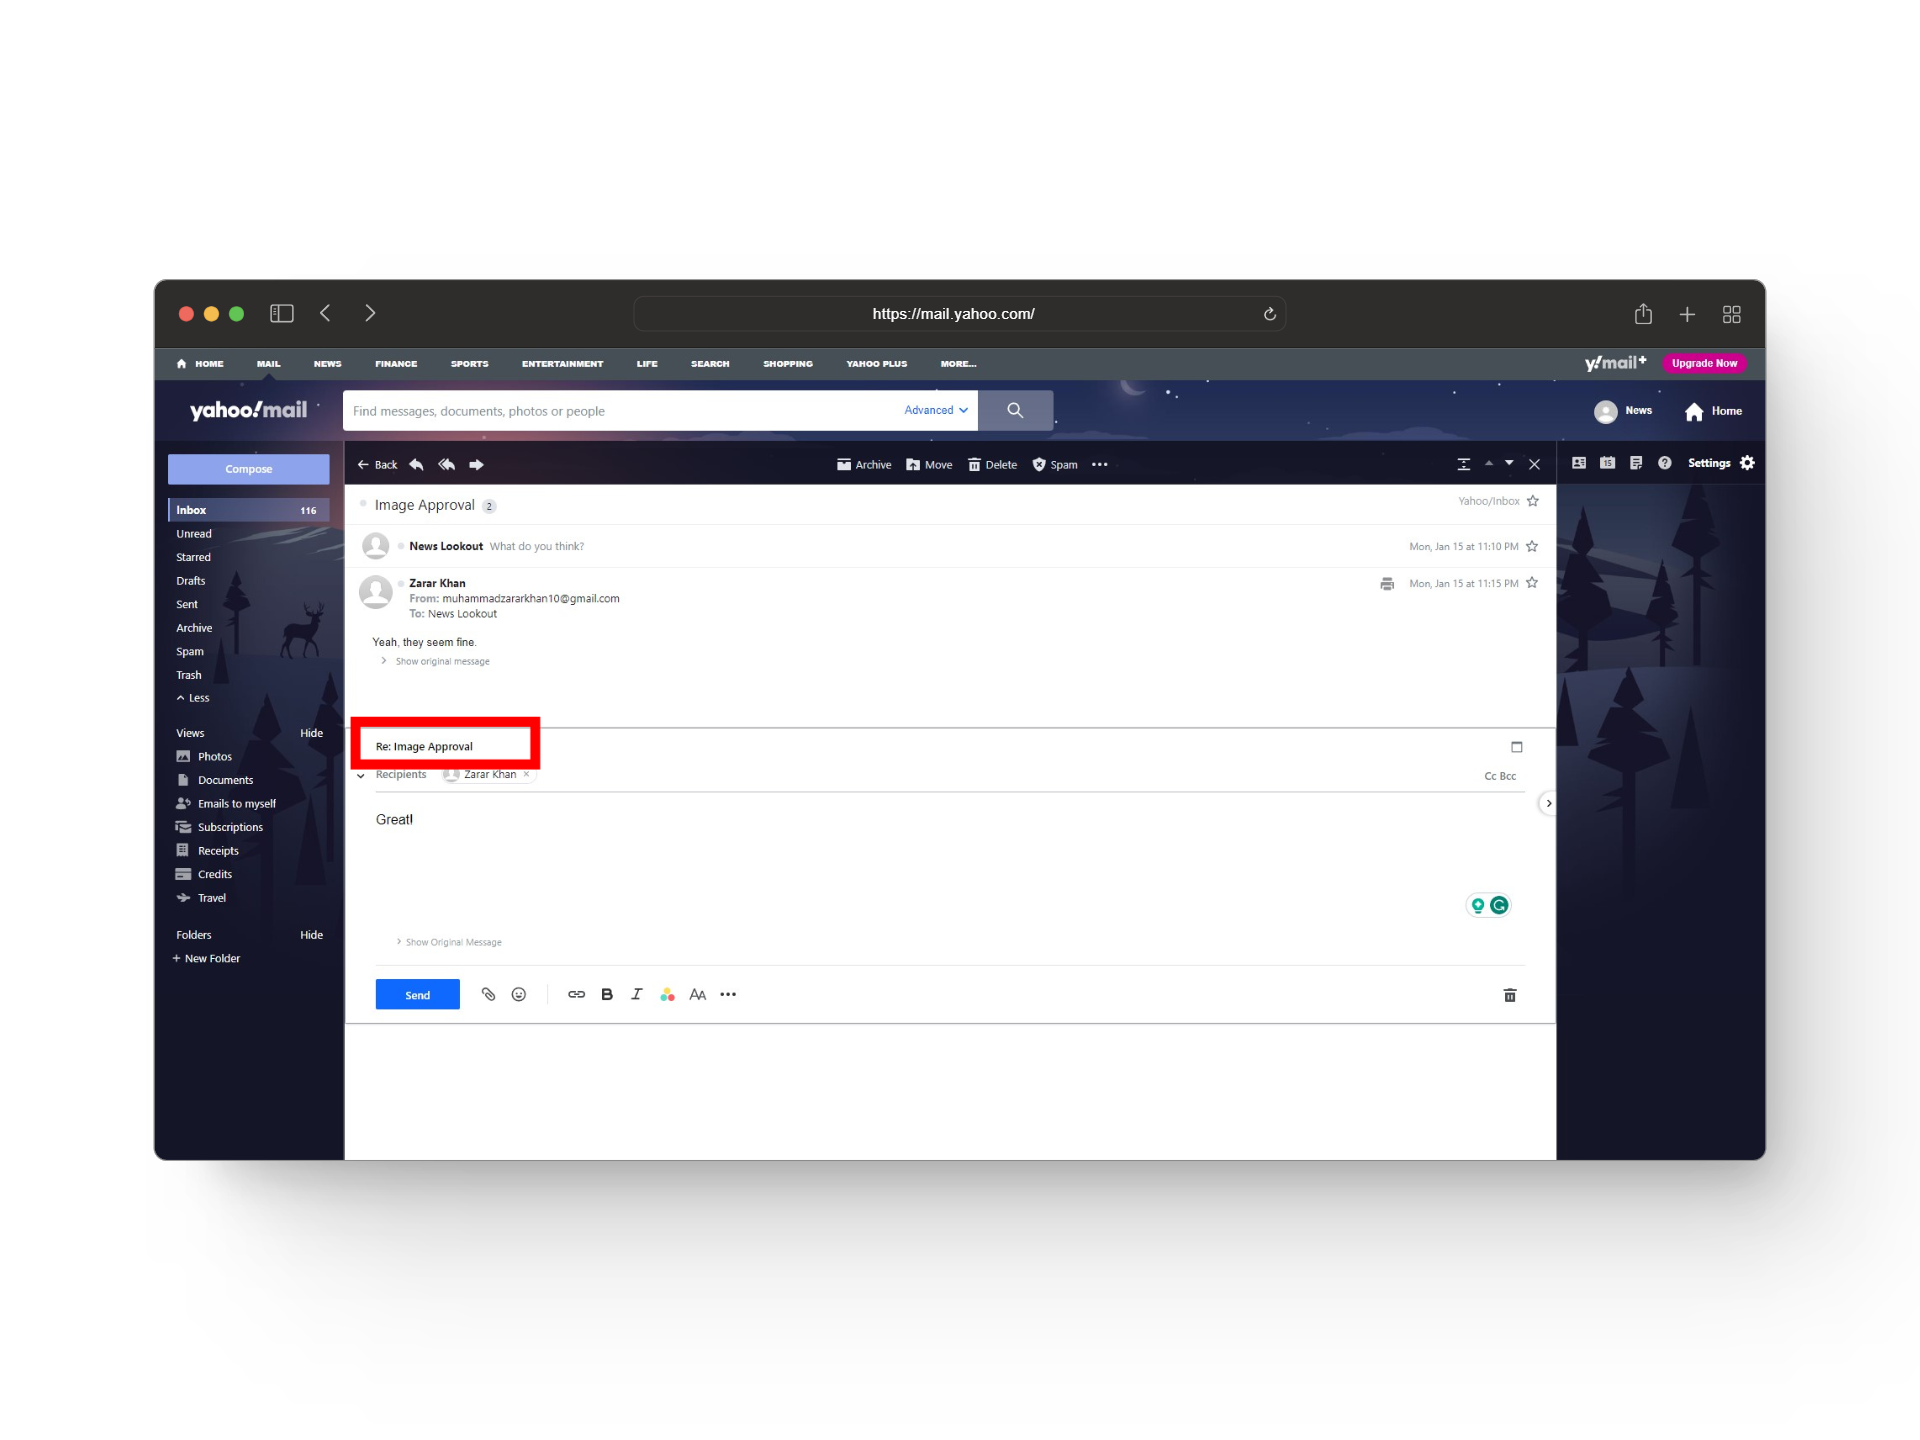
When writing a response to a previous email, Re is automatically added by the email client to the subject line of the message. This means that instead of the normal subject, your email’s subject line will now begin with Re followed by a colon and the original subject title.
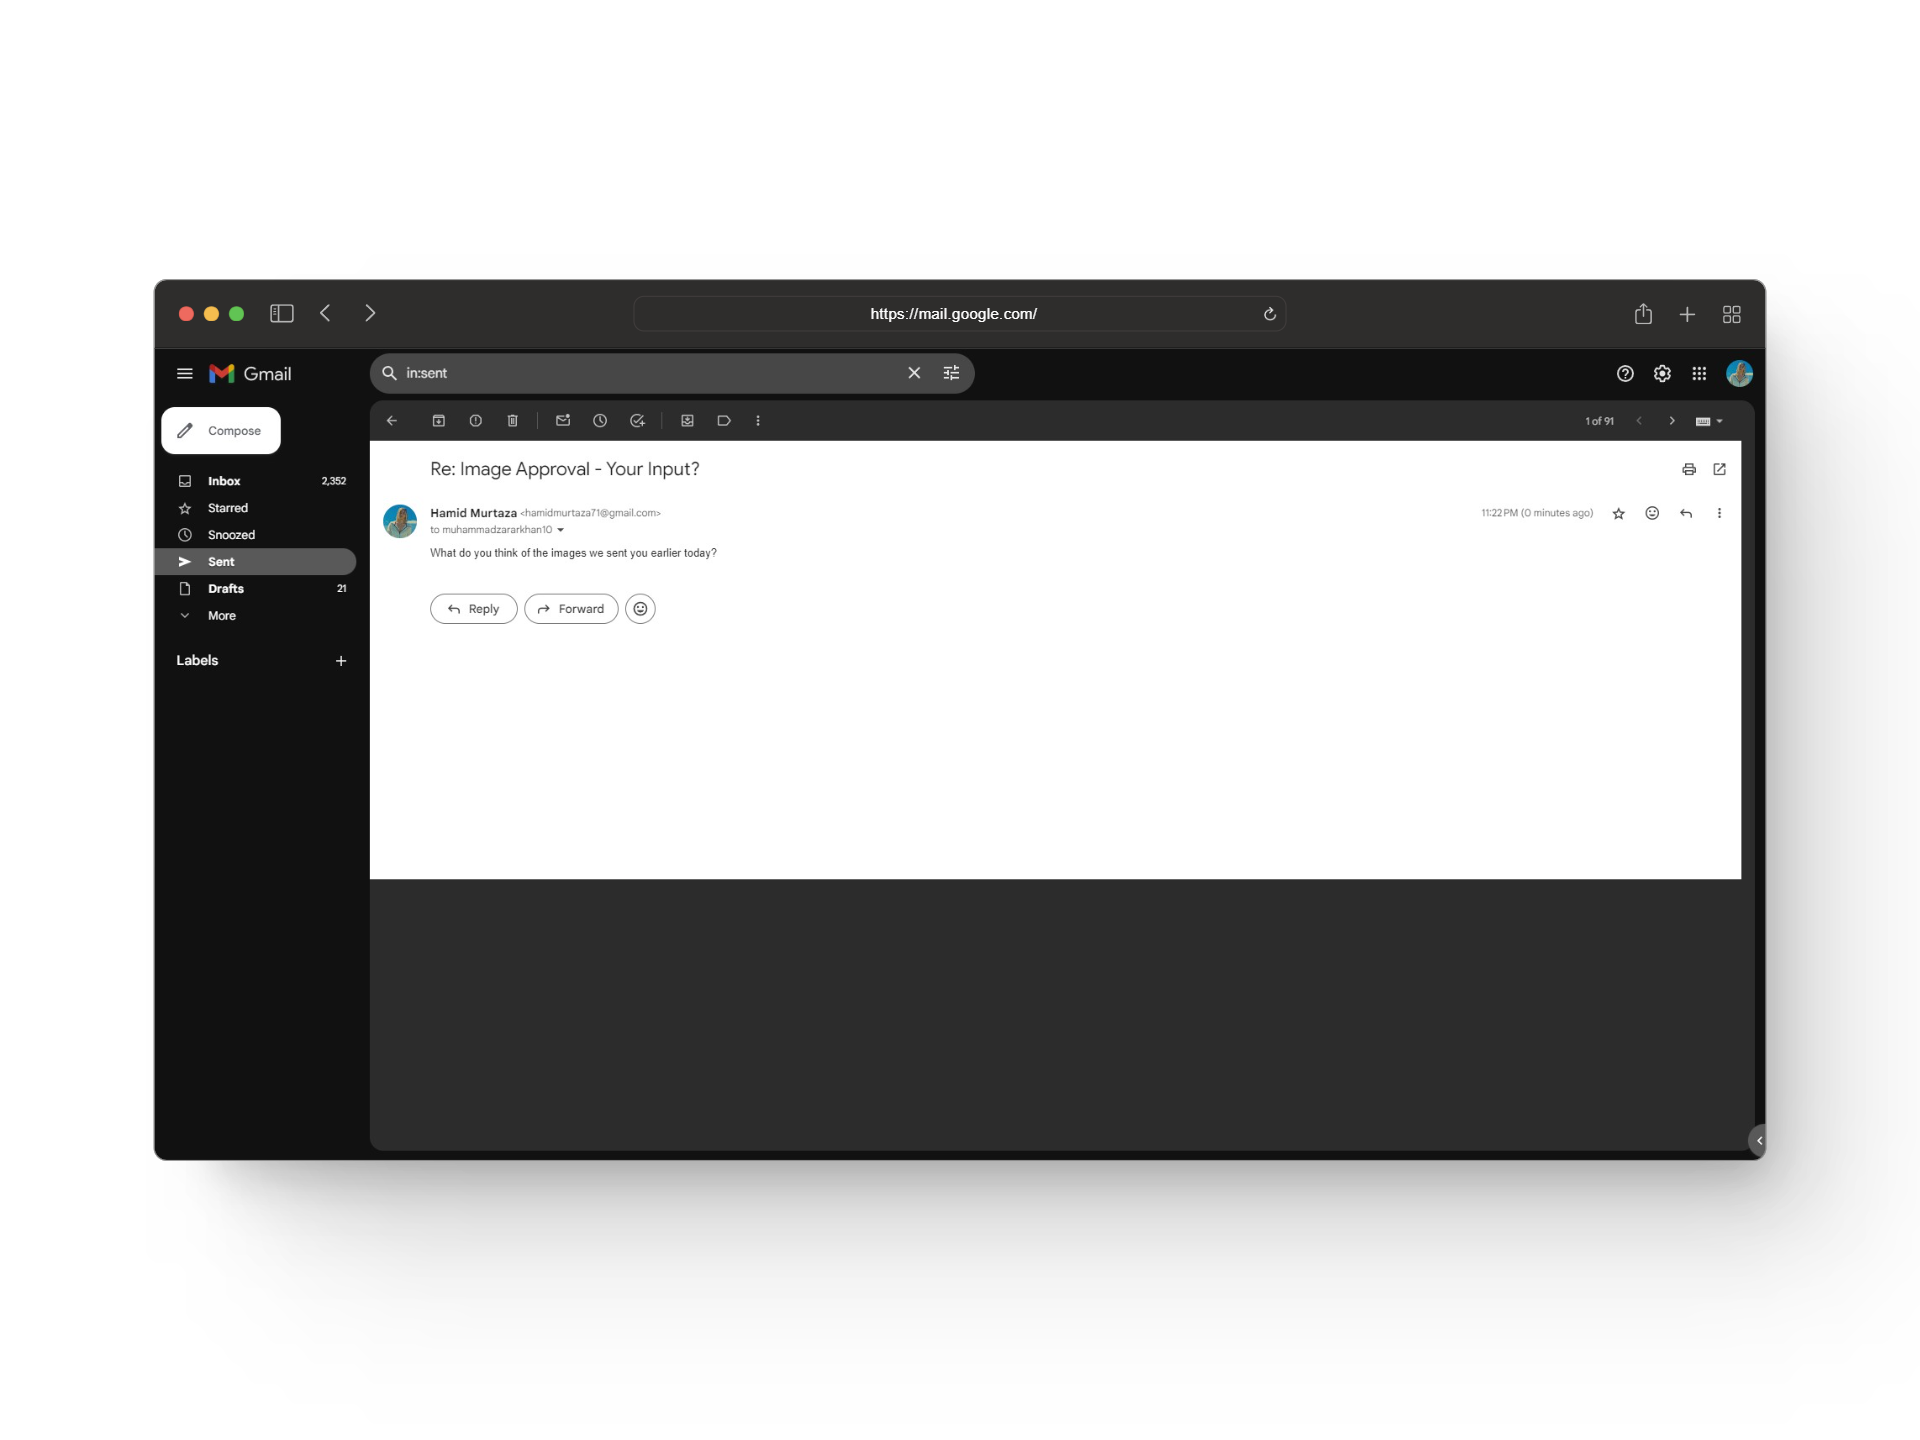
Here’s an example of how Re is used in an email:
Correct:
- Re: April Marketing Strategy
Incorrect:
- Re: Hello, Pam. I wanted to speak with you about the new marketing strategy for April…
The simpler and tidier the subject line is, the more easily Re can help users understand whether the email is regarding a different message or an ongoing conversation. You will mostly come across Re in personal and professional emails when communicating back and forth.
READ MORE: What is Mailinator? How to Use it to Create Disposable Email ➜
The Re in Fwd: Subject
In emails, Re is also used in “Fwd:” or “Forward.” This means that when someone forwards an email, the original subject line remains, but “Fwd:” is added to show it has been forwarded.

Misconceptions About Re in Emails
While the meaning is simple, some people often use Re in scenarios where it either doesn’t fit or simply isn’t needed. Here are a few misconceptions about the usage of Re in email:
1. Re Can Only Be Used When Replying to Emails
Although the most common use of Re is for replying to emails, it should neither be restricted to that specific case nor it should be always used in that specific scenario only. This means that you can always use Re when referring to a previously discussed topic but if you are starting a new email thread, you don’t need to use Re and should simply use a subject line that perfectly sums up your email’s content.
2. Re is Short For Reply
Even though Re is often considered an abbreviation for reply, it can also have several other meanings such as regarding or with reference to. While people argue its meaning, the only thing that remains consistent is that Re indicates an ongoing discussion.
READ MORE: How to Change the Password for Email on iPhone (Mail App) ➜
3. Re is Always Used When Replying to Emails
As discussed above, Re is often seen in reply to emails. However, it’s not always necessary to use it and there’s no need to force the term in your email if you simply don’t need it. This means that if you are discussing something related to a previous topic and the other person is aware of the subject already, there’s no need to force Re during your conversation.
4. Re is Always Followed by a Colon
Another thing that goes with Re is the use of colons. Adding a colon can separate your subject and Re from each other and can save others from confusion. Additionally, there’s no need to manually add colons as most of the time the email client will automatically do it for you.
Using Re Can Trigger Spam Filters
While Re is a simple term used to help others understand the context of your email, it’s also considered spam by some email clients. Most ISPs use spam filters to spot common spam words and characters in email subject lines such as Re. If detected, these emails are sent to the user’s junk mail folder.
If your emails trigger spam filters, your email address might end up on a blacklist. This means none of your future emails will go through, and it could also affect other businesses using the same email service. Once you’re on a blacklist, it’s tough to get off.
READ MORE: How to Make An Email With A Custom Domain in 2024 ➜
Bonus: Common Email Acronyms
Apart from Re, there are many other email acronyms that are often used when writing emails. To help you save a trip to the Google search, here few commonly used email acronyms that you should know.
- NRN – No Reply Necessary.
- Y/N – Yes or No?
- OOO – Out of office.
- WFH – Working from home.
- EOD – End of Day
- EOW – End of Week.
- FYI – For Your Information.
- LET – Leaving Early Today.
- IMO or IMHO – In My (Humble) Opinion.
- AR – Action Requires.
- EOM – End of Message.
- SFW – Safe For Work.
Other Meanings of The Term Re
While Re is most commonly used during email communication, there are a few other meanings and abbreviations of Re. Here’s a quick rundown of 3 other meanings of Re apart from replying to emails:

- Real estate: In the context of relators, investors, and home buyers, “RE” means “real estate.” Oftentimes the terms are used on social media or in forums when talking about the real estate market.
- Replay: In gaming, “re” is a quick way for the loser to ask for a rematch. They might say “gg, rematch” or “gg no re” if they don’t want one. “Re” can also mean asking to redo a part of the game.
- Resident Evil: Resident Evil is a horror video game with several entries, films, and even series to its name. Fans of the video game often refer to it as RE when discussing its boss fights, puzzles, or gameplay.
READ MORE: What’s The Best Email Service in 2023? Best Clients Ranked ➜
Conclusion
In conclusion, RE in email means “regarding,” “in reference to,” and “with regards to.” It is a term that when used properly helps bring clarity to communication, save time, and keep topics organized. Apart from that you can often come across the term Re in other contexts like real estate, replay, and even when talking to fans of the Resident Evil games.
FAQs
How can I keep my emails from going to the spam folder?
To prevent emails from going to spam, use a trusted email service, personalize content, and avoid suspicious links. If you are promoting a service or a product make your emails easy to unsubscribe. Keep your subscriber list updated and focus on creating engaging emails.
Why is the subject line important?
A good subject line gets attention, tells what the email is about, and helps keep things organized and professional.
Can Re be used in formal letters?
In formal letters, it’s better to use “Regarding” or “In reference to” instead of the informal Re.
The post What is the Meaning of “Re” in an Email? appeared first on Appuals.
]]>The post How to Fix Outlook When It’s Stuck on the Loading Profile Screen? appeared first on Appuals.
]]>
When this issue occurs, Outlook continually displays the loading profile screen and must be forcibly closed. This can happen after adding a new profile for the first time or with an existing one. Occasionally, the addition of a new profile causes the problem. Sometimes, even an update to Outlook or the system’s operating system (OS) can trigger this issue.
Basic Troubleshooting
- Check the Status of Microsoft Services, especially those related to Outlook and Exchange, if you are an Office 365 user.
- Ensure that the system’s OS and Office versions are up to date.
- Verify that the OWA (Outlook Web App) is functioning properly.
- Restart your system and router. If you are using an on-premises Exchange server, reboot that as well.
Method 1: Launch Outlook in Offline Mode or Try Another Network
Outlook may get stuck on the profile screen if your Internet Service Provider (ISP) is restricting communications between Outlook and its servers, particularly during startup when the application needs to communicate with its servers.
Here, launching Outlook in offline mode or connecting to a different network could solve the problem.
Use Outlook in Offline Mode
- Restart the system and disconnect from the Internet by disabling Wi-Fi, unplugging the Ethernet cable, or enabling Airplane Mode.
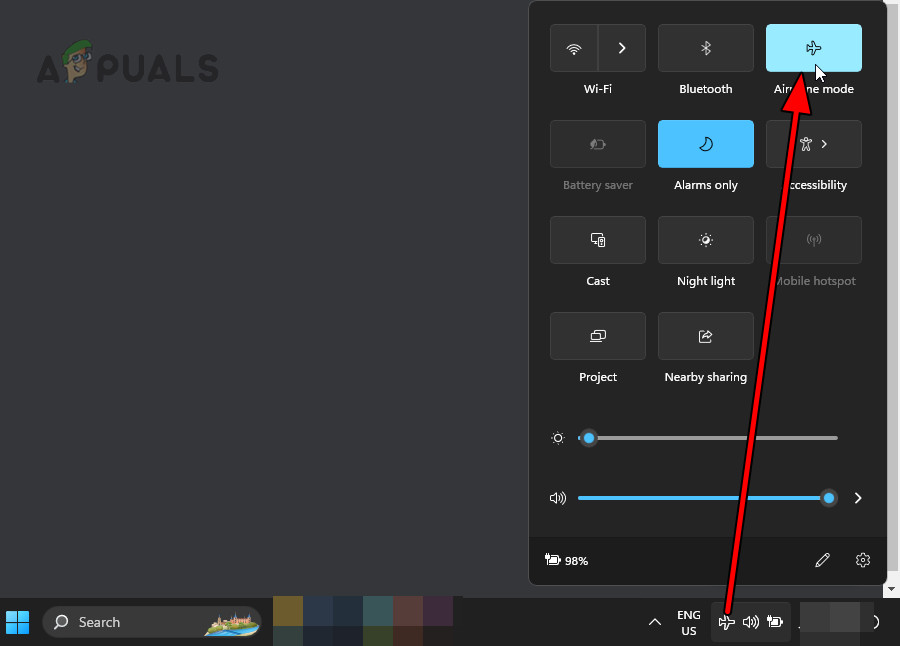
Enable Airplane Mode on the System - Launch Outlook and check if the problem is resolved.
- If the issue is fixed, reconnect to the Internet and confirm that the problem has been resolved.
Try Another Network
- Disconnect the system from the current network or VPN (if in use) and restart the system.
- Connect the system to a different network, such as a phone’s hotspot, and launch Outlook. Confirm that it loads correctly.
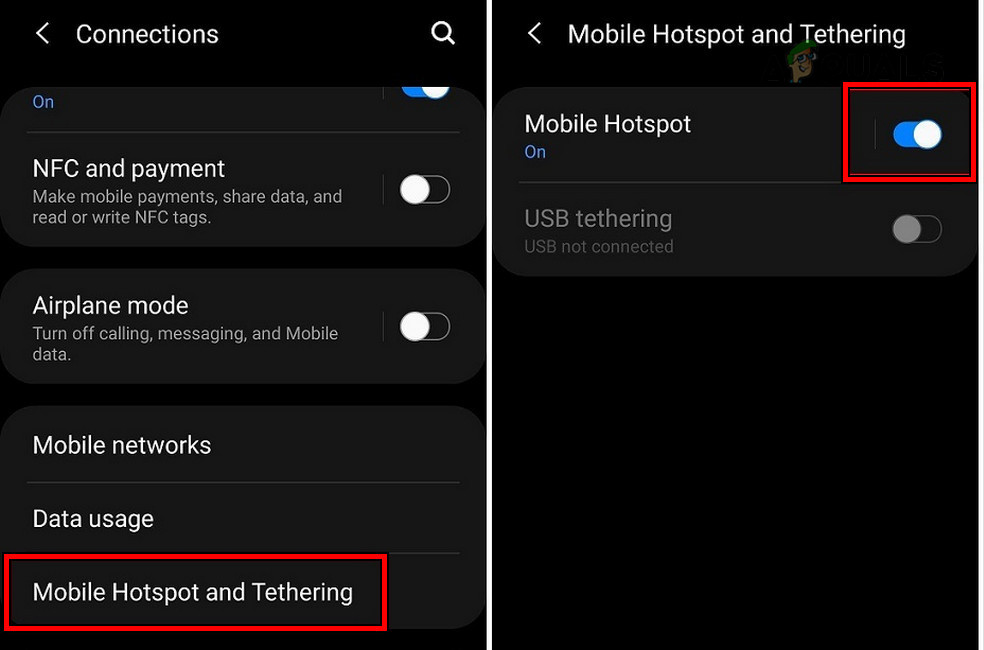
Enable the Phone’s Hotspot - If the issue persists, download, install, and launch a VPN application.
- Connect the VPN to a server with strong connectivity and try launching Outlook again.
Method 2: Connect the Second Monitor
If you are operating Outlook within a multi-monitor setup and the application was last closed on a secondary monitor, it may get stuck on the loading screen if it attempts to load on a disconnected secondary screen.
Resolve this by reconnecting the second monitor to the system.
- Connect the second monitor to the system and restart the computer.
- Open Outlook and check if it progresses beyond the profile loading screen.
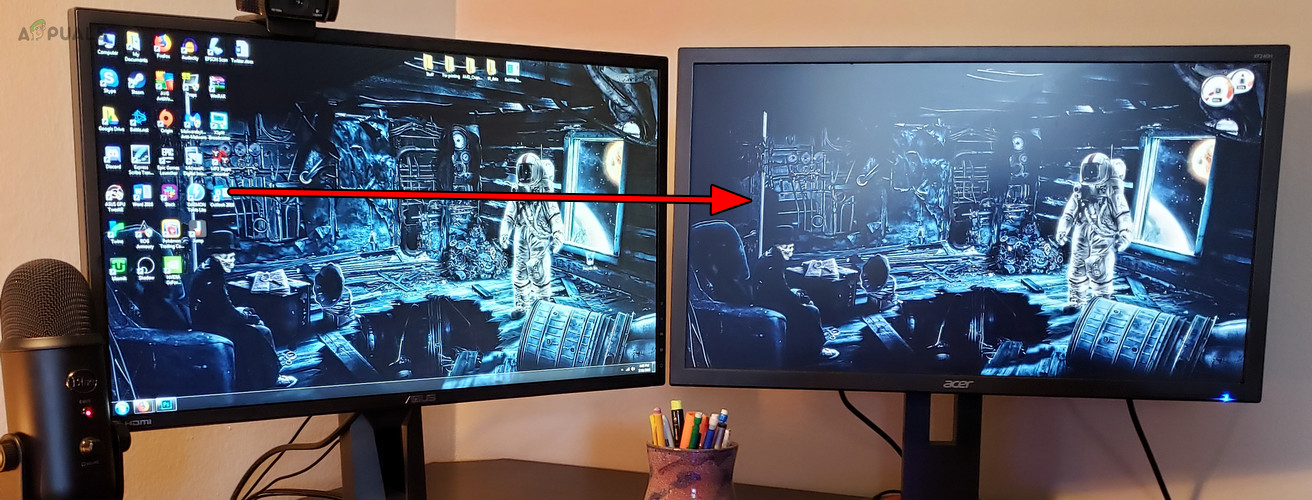
Connect a Second Monitor to the System and Open Outlook on it - If Outlook opens successfully, transfer the application window to the main monitor and close Outlook.
- Then, disconnect the second monitor and try launching Outlook again to see if the issue has been resolved.
Method 3: Reset the Internet Options of the System
Outlook uses the system’s Internet Options to communicate with its servers. Altered settings in these options can cause the email client to become stuck on the Profile Loading screen. Resetting the Internet Options on your system could resolve the issue.
- Press the Windows key and type ‘Internet Options.’
- Open the Internet Options and navigate to the Advanced tab.
- Click on Restore Advanced Settings and confirm the action.
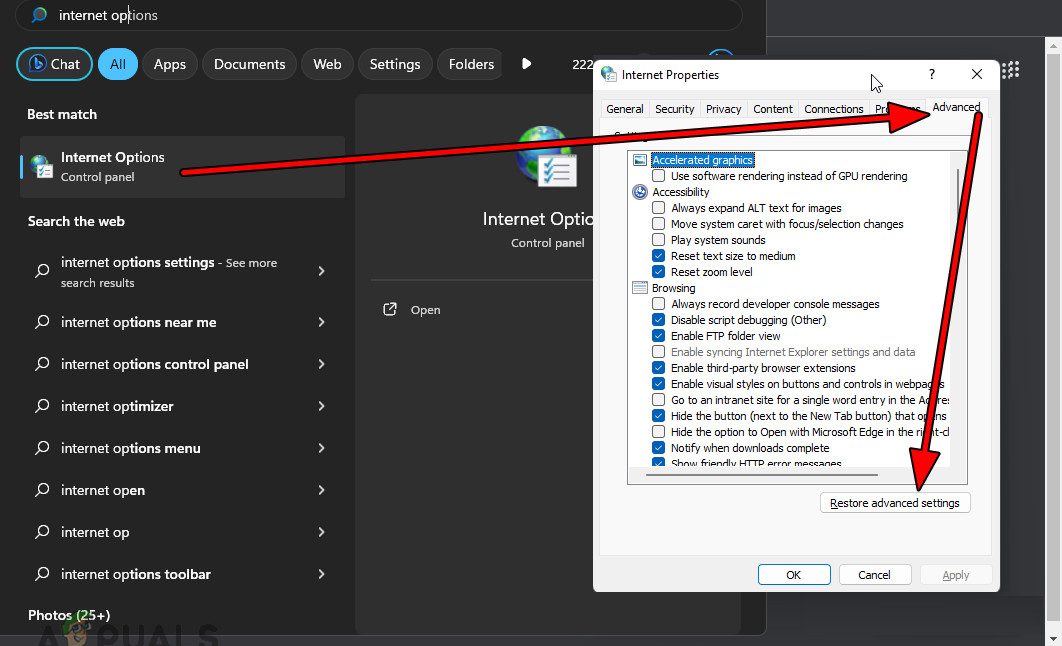
Reset the Internet Options on the PC - Restart the PC, launch Outlook, and verify whether the issue has been resolved.
Method 4: Reset the Navigation Panel of Outlook
Outlook’s navigation panel, on the left side of the screen, offers quick access to emails, calendars, tasks, and contacts. Sometimes, a glitch in this panel can prevent Outlook from launching correctly. To fix this, you can reset the navigation panel to its default state.
- Close Outlook completely.
- Press Windows key + R and type ‘Outlook.exe /resetnavpane.’
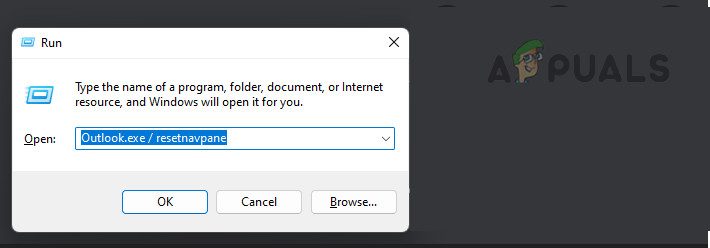
Reset the Navigation Pane of Outlook - Press Enter and check if Outlook opens without getting stuck at the profile loading screen.
Method 5: Open Outlook as Administrator
Outlook requires administrative rights to perform certain actions. Without these rights, various issues can occur. Running Outlook as an administrator might solve the problem.
- Press the Windows key, type ‘Outlook,’ and right-click on the program.
- Select Run as Administrator.
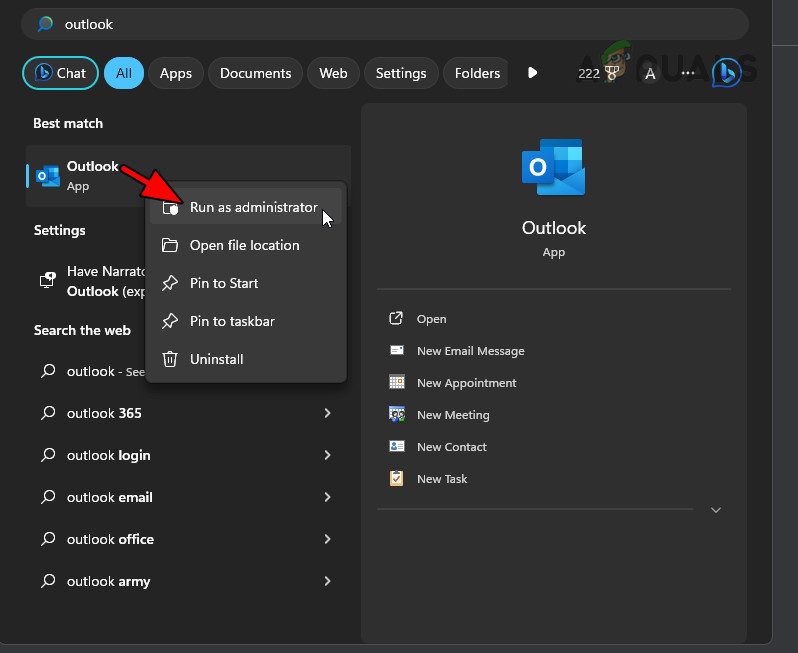
Open Outlook as an Administrator - Confirm the action and check if Outlook loads correctly now.
Method 6: Launch Outlook in Safe Mode
Outlook add-ins can sometimes conflict with the client, causing the application to get stuck at the loading profile screen. Launching Outlook in Safe Mode can help troubleshoot this problem.
- Press the Windows + R keys to open the Run command box.
- Type the following command:
outlook.exe /safe
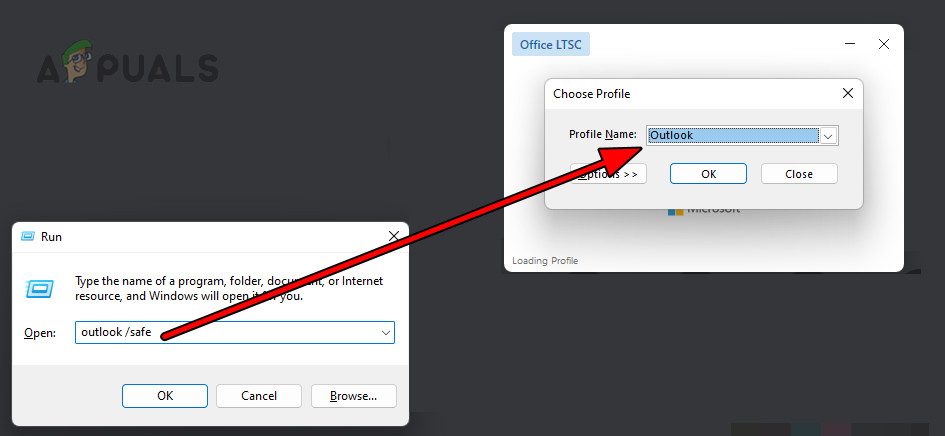
Open Outlook in the Safe Mode - Select your profile and check if Outlook loads correctly.
- If it does, navigate to File, then Options, and access the Add-ins tab. Click Go next to COM Add-ins, disable all add-ins and restart Outlook in regular mode to see if the problem has been resolved. Re-enable the add-ins one by one to identify which one is problematic.
Method 7: Delete the Outlook Credentials in the Credential Manager
Damaged or invalid Outlook credentials stored in Windows Credential Manager can prevent the application from progressing past the profile loading screen. Deleting these credentials can fix the issue.
- Press the Windows key and type ‘Credential Manager.’
- Open the Credential Manager and navigate to the Windows Credentials tab.
- Find and expand the credentials for the problematic account.
- Select Remove and confirm your action.
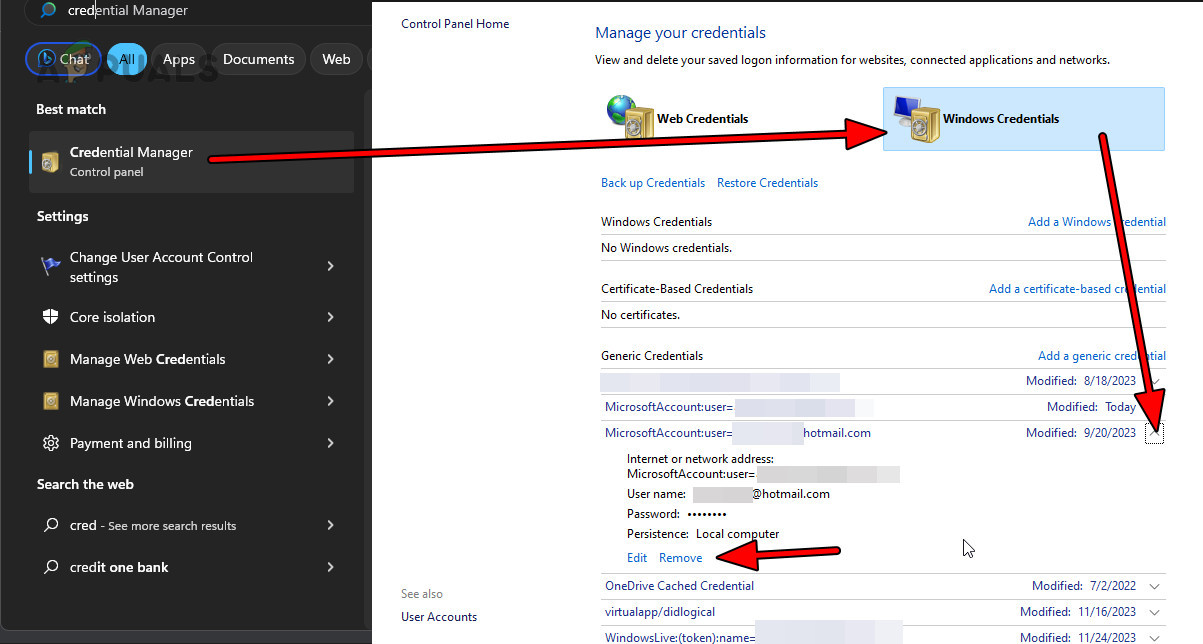
Remove the Outlook Credentials in the Credential Manager - Open Outlook and see if it gets past the profile loading screen. If successful, you will be prompted to enter your credentials again.
Method 8: Check for Conflicting Applications
Outlook can get stuck on the loading profile screen if another application or process interferes with it, blocking access to essential resources. Identifying and resolving such conflicts can address the issue.
Use the Task Manager
- Press Ctrl + Shift + Esc to open Task Manager and end any unnecessary applications or processes that may be conflicting with Outlook, such as:
Skype Skype for Business MS Word MS Excel MS Access Microsoft Office Click-to-Run
- After closing these applications and processes, attempt to launch Outlook and check if it loads properly.
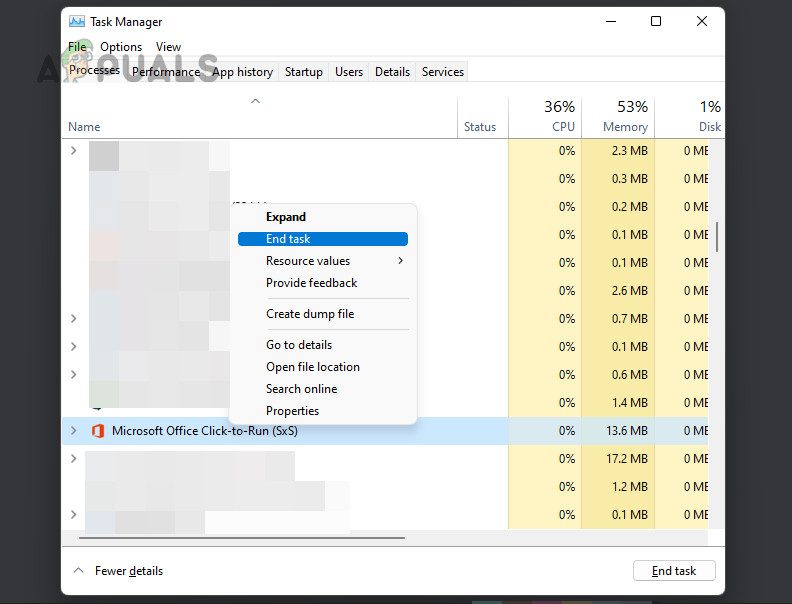
End Microsoft Office Click to Run in the Task Manager
Perform a Clean Boot
- Conduct a Clean Boot on your PC and check if Outlook runs correctly afterward.
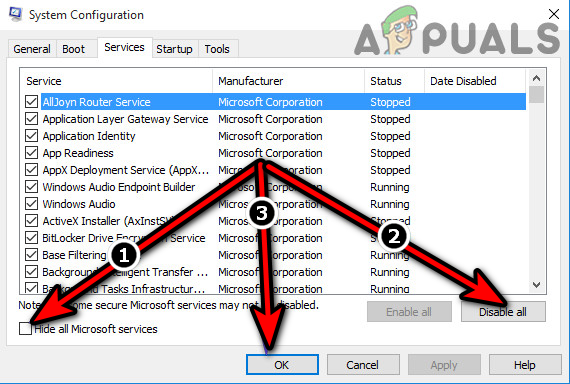
Clean Boot the Windows PC - Re-enable the processes or services that were disabled during the clean boot, one by one, to identify the one causing the issue. Once found, keep it disabled during startup or consider uninstalling it.
Uninstall the Conflicting Application
Certain applications are known to cause issues with Outlook’s profile loading, including:
- Dell Optimizer
- Intel Killer Performance Suite
- HP Wolf Security
If you have any of these applications (or others that might be similar) installed, consider uninstalling them or altering their settings. Here’s how to uninstall HP Wolf:
- Press the Windows key, type ‘HP Wolf,’ and right-click on the app to select Uninstall.
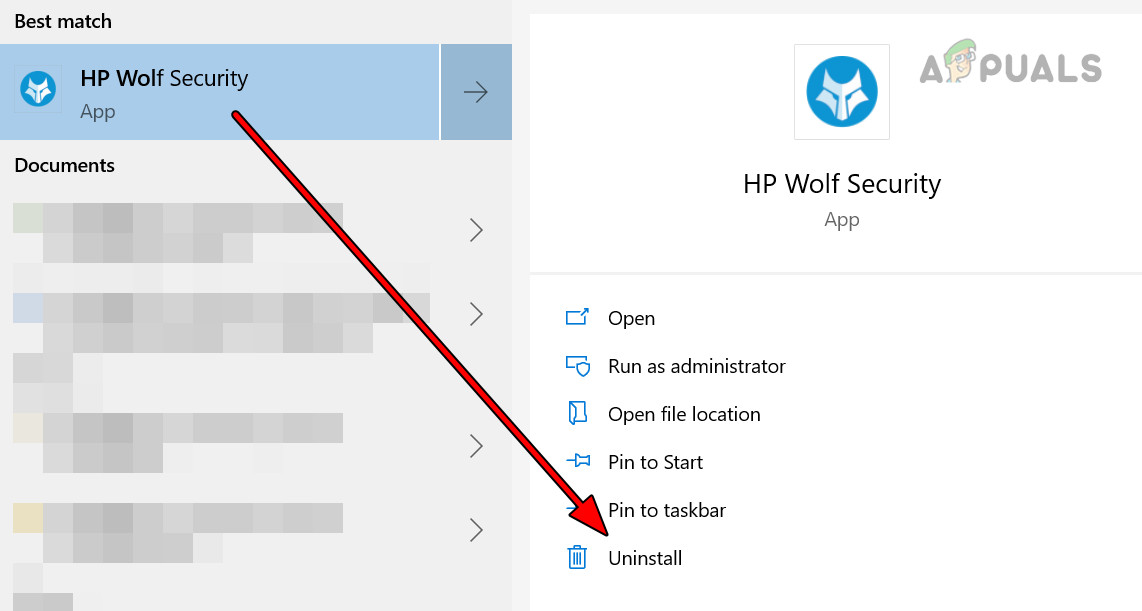
Uninstall HP Wolf Security - Follow the on-screen instructions to complete the uninstallation, restart your system, and then open Outlook to check if the profile loading issue has been resolved.
Method 9: Repair Outlook and its Data File
When Outlook’s installation or its Data Files are damaged, the application may be unable to load the profile screen. Repairing Outlook and its Data Files using SCANPST.exe, Microsoft Support and Recovery Assistant (SARA), and the Quick/Online Repair option can help resolve this issue.
Use ScanPST
- Close Outlook entirely.
- Press the Windows + R keys and navigate to the installation path for Office, depending on whether it is the 64-bit or 32-bit version, as follows:
For Office 64-bit \Program Files\Microsoft Office\root\Office16 For Office 32-bit \Program Files (x86)\Microsoft Office\root\Office16
- Double-click on ScanPST.exe, click Browse and set the path of the Outlook Data file, which by default is located at:
%LOCALAPPDATA%\Microsoft\Outlook
- Initiate the scan and, once complete, check the option ‘Make a backup of scanned file before repairing.’
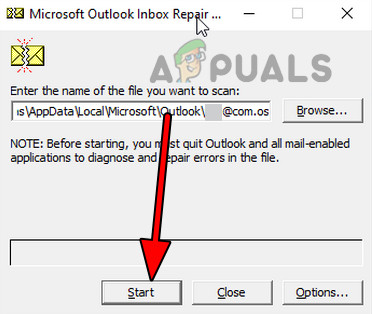
Use the ScanPST to Scan the Outlook Data File - Click Repair, and after the process is complete, try opening Outlook again to see if the issue is resolved.
Use Microsoft Support and Recovery Assistant (SARA)
- Download SARA by visiting the designated page in your web browser here.
- Run SARA and choose Outlook from the options provided.
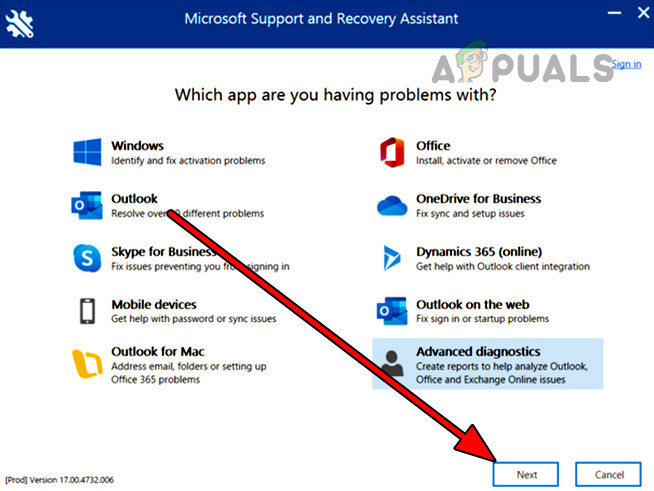
Use the Microsoft Support and Recovery Assistant to Check Outlook - Follow the on-screen instructions to finish the process. Check if this resolves the problem.
- If the issue persists, run SARA again and select Advanced Diagnostics followed by Outlook.
- After the report is generated, review it and address any identified issues accordingly.
Use Quick and Online Repair
- Right-click on the Windows start button and choose Apps & Features.
- Find your Office installation, click on its Options, and then select Modify.
- Choose the Quick Repair option and initiate the repair process.
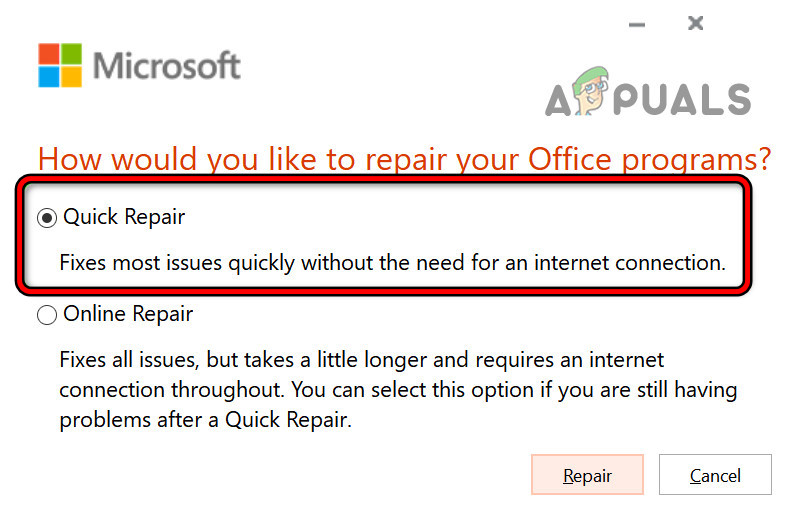
Quick Repair Office - Launch Outlook once the repair is completed and verify if the profile loading issue has been resolved.
- If not, repeat the first three steps but this time, select the Online Repair option.
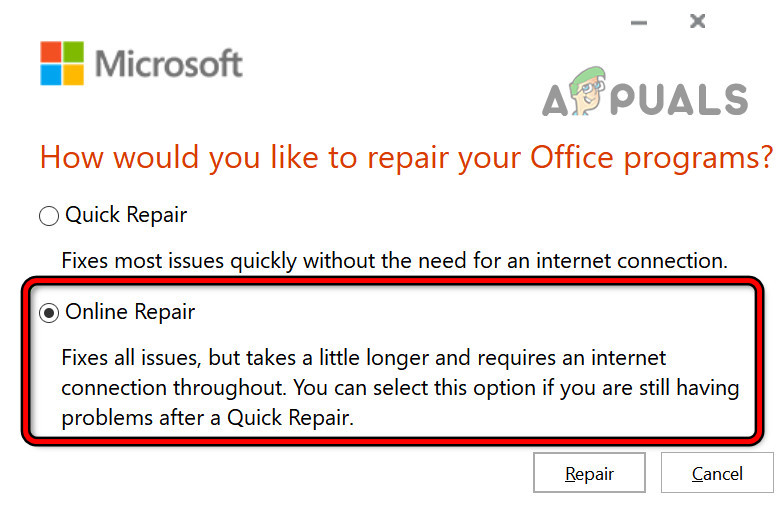
Online Repair Office - Click Repair and patiently wait for the online repair process to complete.
- Afterwards, launch Outlook to see if it is now able to move past the profile loading screen.
Method 10: Delete the Outlook Profile and OST File
A damaged Outlook profile or OST file can cause the application to be stuck on the profile loading screen. Deleting the profile or OST file and creating a new profile may resolve the problem.
- Open the Control Panel and change the view to Large Icons.
- Select Mail and then click on Show Profiles. Alternatively, you can access this by executing the following command in the Run dialog box:
outlook.exe /manageprofiles
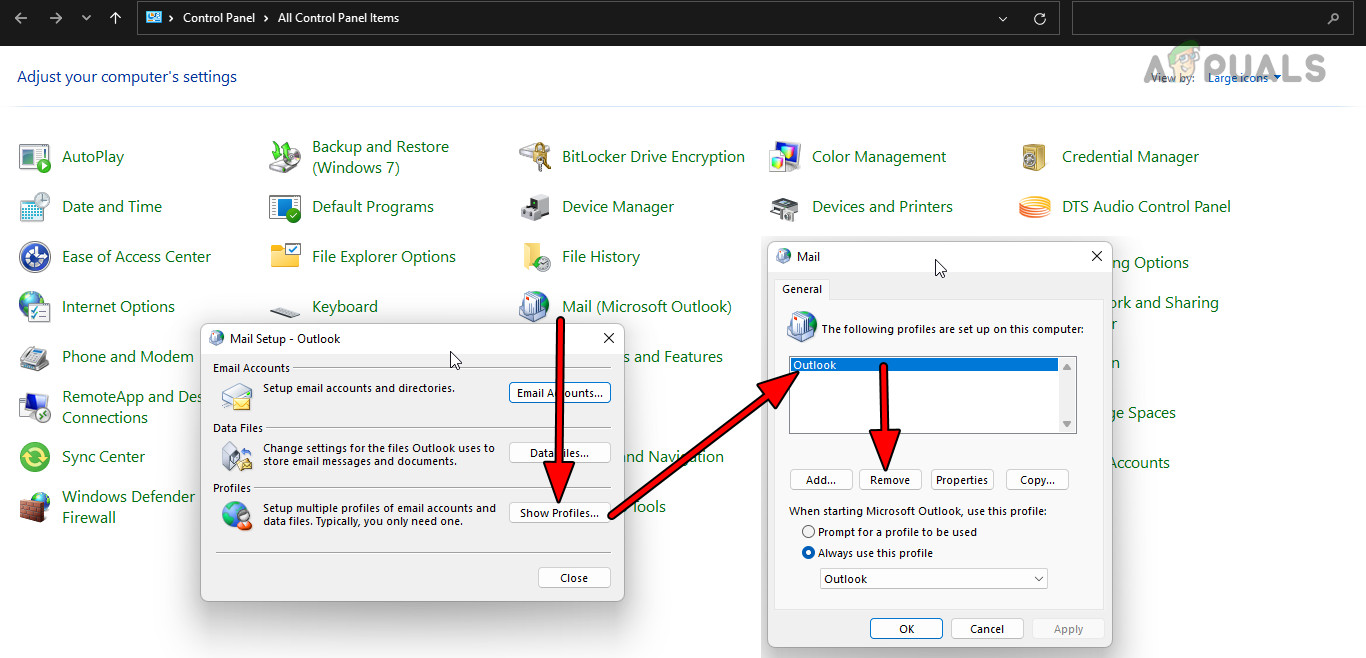
Remove the Problematic Outlook Profile Through the Control Panel’s Mail - Choose the problematic profile and click on Remove. If a new account was added when the issue started, consider removing that account first. For non-Microsoft accounts, ensure that you back up their PST files beforehand.
- Press Windows + R to open the Run command and navigate to the Outlook folder via the following path:
%localappdata%/microsoft/outlook
- Locate and delete the OST file associated with the problematic profile.
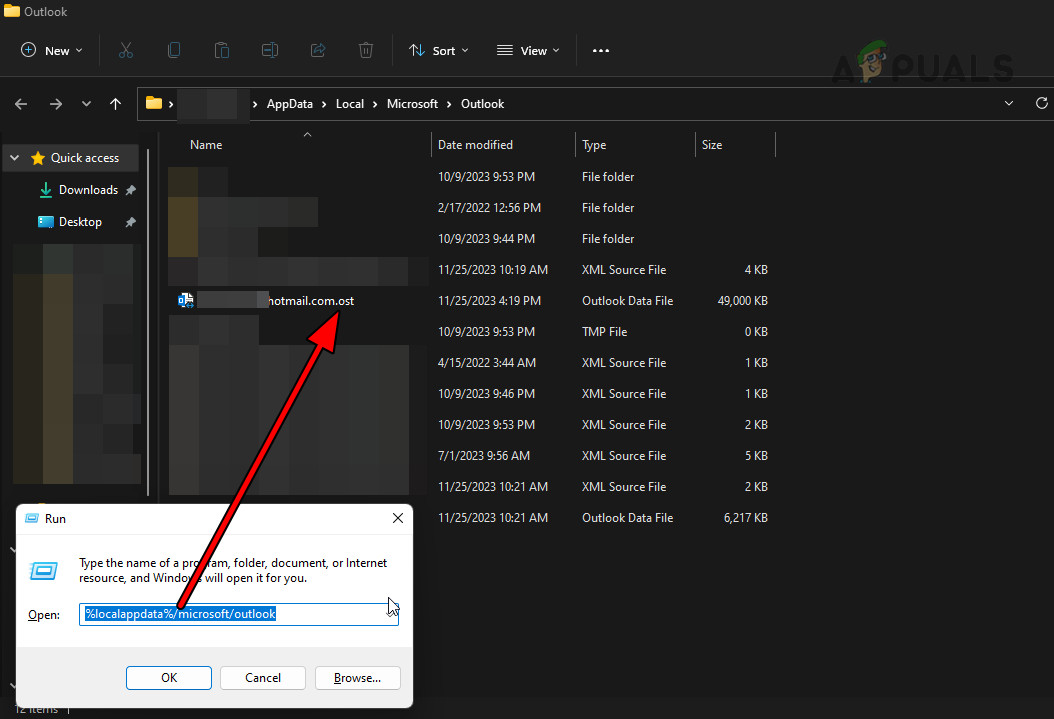
Delete the OST File of the Outlook Profile - Finally, restart Outlook and set up a new profile. This action should allow Outlook to bypass the loading profile screen successfully.
By following these methods, you should be able to overcome the issue of Outlook being stuck at the loading profile screen. If problems persist after trying these solutions, consider seeking further assistance from Microsoft support or a professional IT service.
The post How to Fix Outlook When It’s Stuck on the Loading Profile Screen? appeared first on Appuals.
]]>